Cross-check rules scenarios
Explore example scenarios for using cross-check rules in common verification cases.
Use the following examples to configure cross-check rules for common verification cases, such as comparing address data across different sources or rejecting a specific document.
Before you create a cross-check rules, make sure that:
- Your verification level collects the data you want to compare.
- The required document or applicant data fields are available in the applicant profile.
- You know which verification step Sumsub must reject if the applicant does not match the rule conditions.
- You know which rejection button Sumsub must display to the applicant.
Scenario 1: Compare address fields
Use this scenario to compare the address extracted from the applicant’s proof of address document with the address provided in applicant data.
In this example, the rule compares the applicant’s address extracted from the PoA document with the address stored in the applicant profile. For applicants from the United States, the rule compares the state. For applicants from other countries, the rule compares the country.
The system should reject the applicant if the address data from the PoA document does not match the address data provided by the applicant.
You need to configure the rule with two condition groups:
- For US applicants, compare the state from the PoA document with the state from applicant data.
- For non-US applicants, compare the country from the PoA document with the country from applicant data.
Step 1: Create rule
- In the Dashboard, go to Global settings.
- In the Integrations section, open Data Comparison.
- Click Create preset or open an existing preset.
- In the preset, create a rule.
- Enter a rule name, for example: Custom address comparison.
Step 2: Configure condition groups
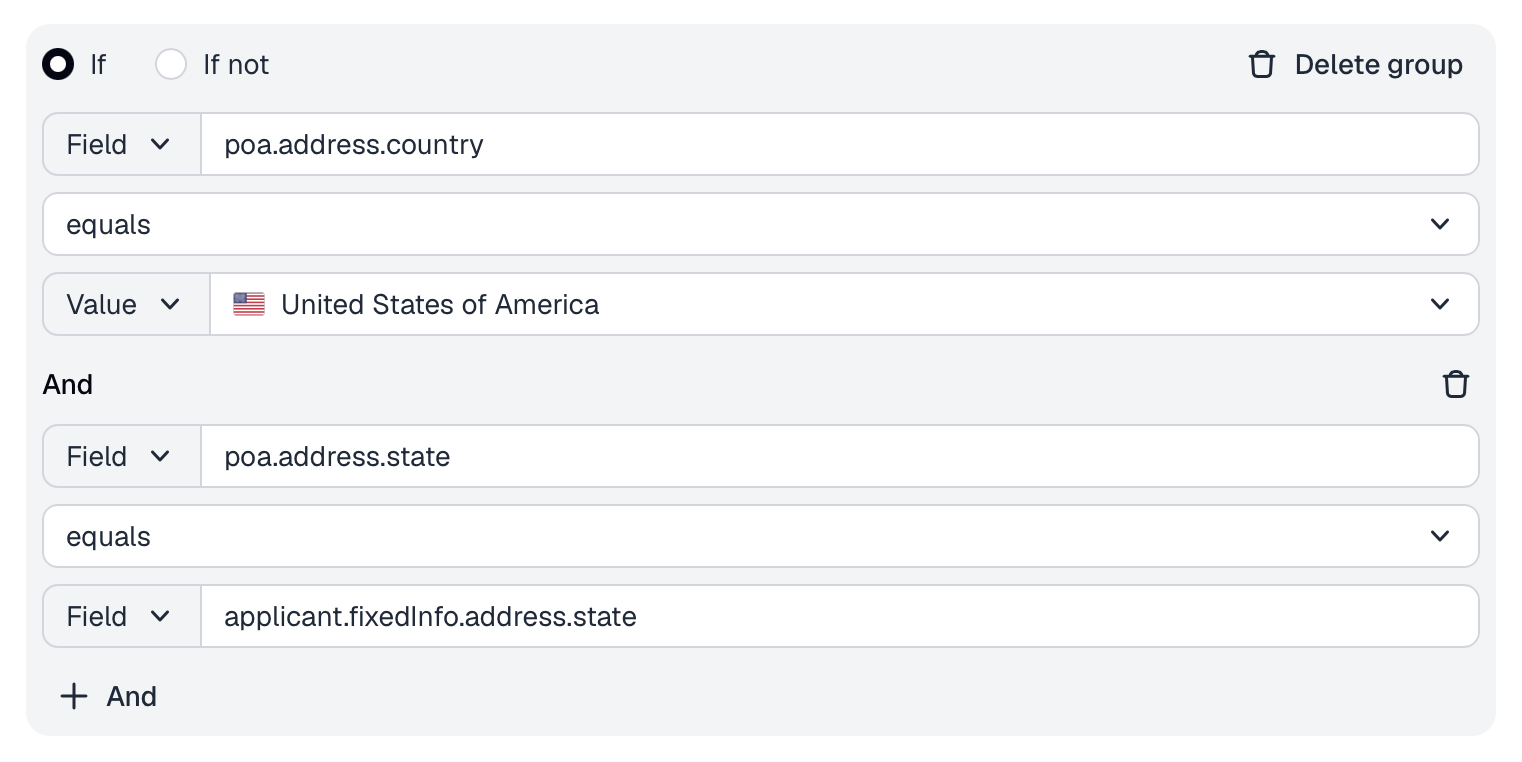
In the first condition group, select If and add the following conditions:
| Field | Operator | Value |
|---|---|---|
poa.address.country | equals | United States |
poa.address.state | equals | applicant.fixedInfo.state |
This group checks that if the country in the PoA document is the United States, the state extracted from the PoA document matches the state provided in applicant data.
Add an Or group. In the second condition group, select Or and add the following conditions:
| Field | Operator | Value |
|---|---|---|
poa.address.country | isn’t equal | United States |
poa.address.country | equals | applicant.fixedInfo.country |
This group checks that if the country in the PoA document is not the United States, the country extracted from the PoA document matches the country provided in applicant data.

Step 3: Configure rejection settings
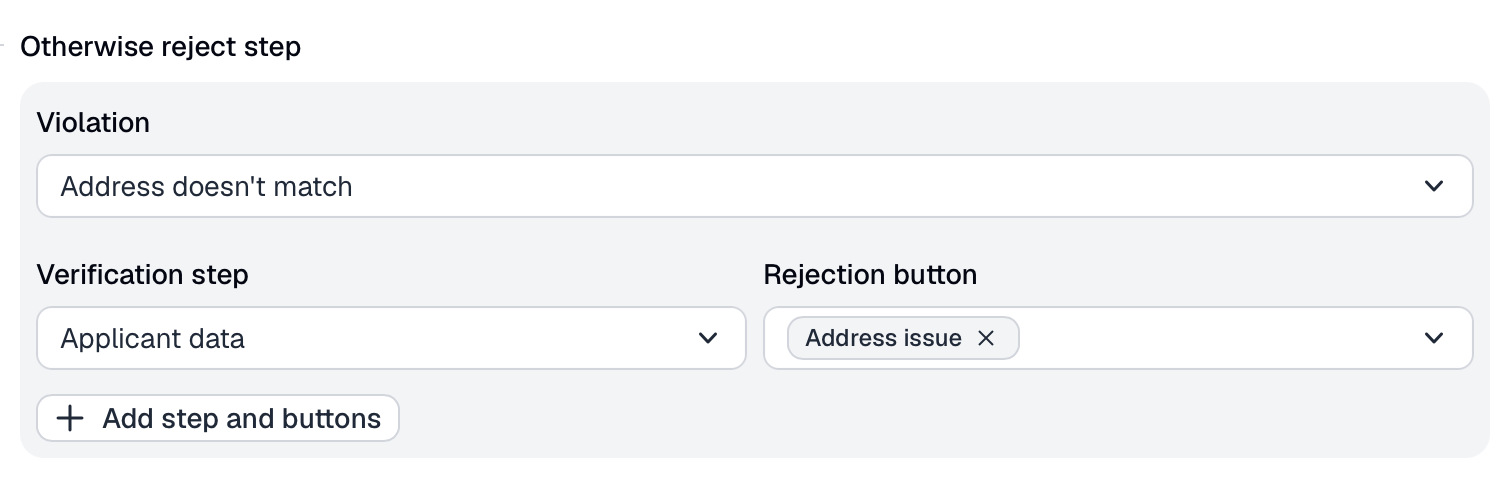
In the Otherwise reject step section, specify how Sumsub must reject applicants who do not match any of the configured condition groups.
Use the following settings:
| Setting | Value |
|---|---|
| Violation | Address doesn't match |
| Verification step | Select the verification step that will be rejected. For instance, Applicant data. |
| Rejection button | Select the rejection button that explains the rejection reason. |
After you save and apply the preset, Sumsub rejects the selected verification step if the applicant’s PoA address does not match the applicant data according to the configured logic.
Scenario 2: Reject specific document
Use this scenario to reject applicants who submit a specific document.
In this example, the rule rejects every Mali 'Military' ID. The document can be identified by a combination of the document number format, country, and document type.
Reject the applicant if the submitted document matches all of the following conditions:
| Field | Operator | Value |
|---|---|---|
poi.number | matches | ^\d{5}$ |
poi.country | equals | Mali |
poi.idDocType | equals | ID_CARD |
Since Cross Check Rules reject applicants in the Otherwise reject step when the configured conditions are not met, configure this scenario as an inverted rule.
The rule should allow all applicants except those who match the prohibited document combination.
Step 1. Create rule
- In the Dashboard, go to Global settings.
- In the Integrations section, open Data Comparison.
- Click Create preset or open an existing preset.
- In the preset, create a rule.
- Enter a rule name, for example: Reject specific document.
Step 2. Configure condition groups
In the condition group, select If not and add the following conditions:
| Field | Operator | Value |
|---|---|---|
poi.number | matches | ^\d{5}$ |
poi.country | equals | Mali |
poi.idDocType | equals | ID_CARD |
With this configuration, the applicant passes the rule if the submitted document does not match the prohibited combination.
If the submitted document matches all conditions, the applicant does not pass the rule and Sumsub applies the Otherwise reject step settings.

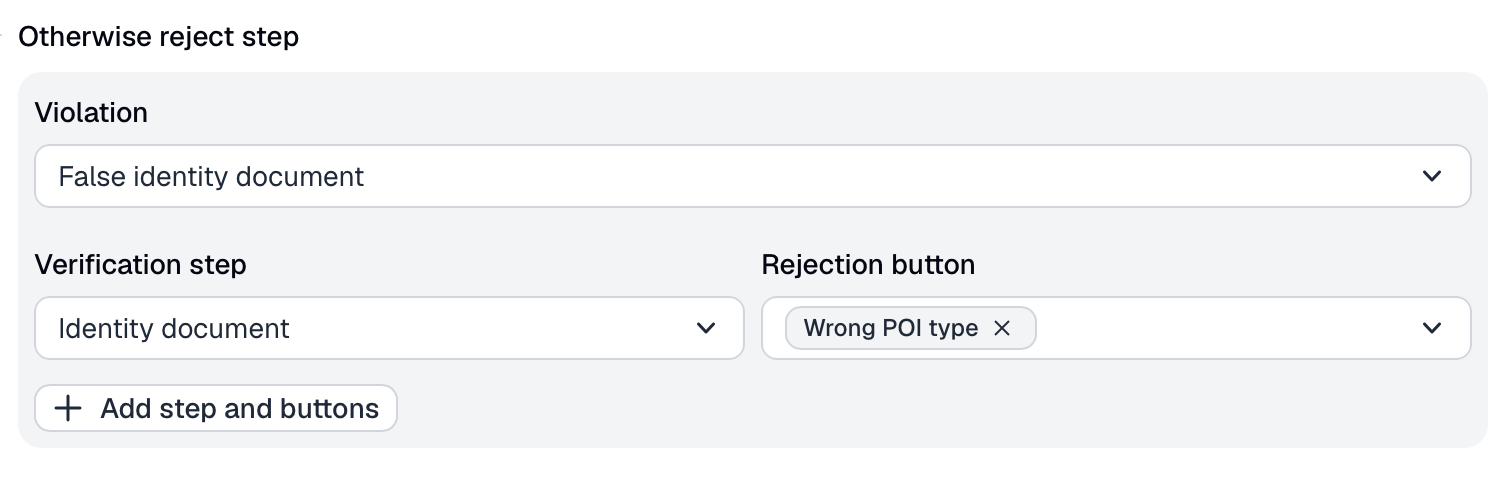
Step 3. Configure rejection settings
In the Otherwise reject step section, specify how Sumsub must reject applicants who submit the prohibited document.
Use the following settings:
| Setting | Value |
|---|---|
| Violation | Unsupported document |
| Verification step | Identity document |
| Rejection button | Select the rejection button that explains the rejection reason. |
After you save and apply the preset, Sumsub rejects applicants who submit a Mali ID card with a five-digit document number.
Updated 10 days ago