Consent screen
Customize consent screen for your applicants' data processing.
Since Sumsub is a data processing company, in specific cases when it is prescribed by the regulation of a certain country (for instance, in the US), we must ensure that applicants undergoing verification give their consent to process their data. This way, we stay compliant with regulations, including the presence of the consent screen in the process of verification, which is mandatory for Sumsub as a data processor and our clients as data controllers.
How consent screen works
By default, the consent screen is shown at the beginning of verification and allows your applicants to give their consent to the terms and conditions of data processing.
Depending on the steps chosen in your verification level settings, there will be different options and scenarios of showing the consent:
- A verification level including only the Questionnaire and/or Applicant data steps allows you to skip the consent screen in the level settings as no biometry is involved when passing the mentioned steps.
- The Applicant actions level type that is used for additional verification after onboarding does not imply showing the consent.
- The Workflow Builder levels take into account all the conditions, as described above. But if your applicant undergoes Questionnaire or Applicant data level verification, and then they are transferred to any other level, such as one with providing documents, they will see the consent screen.
Mind the additional conditions that may affect showing the consent screen:
- If applicants give their consent during onboarding, they will not see the consent screen when passing actions.
- If applicants pass onboarding checks that include only the Applicant data / Questionnaire steps, they will need to give their consent during further additional verification that implies other steps.
- Applicants may be asked to give their consent during both onboarding and additional verification if the consents are not the same in each case.
Set up consent screen
When verifying applicants, you have a few options for skipping the consent screen or adjusting it in your WebSDK or MobileSDK verification flow.
Skip consent for some verification steps
You can avoid displaying the consent by selecting the Skip consent screen checkbox in the level configuration if there are only the Questionnaire or Applicant data steps included in the verification level. Otherwise, the checkbox will not be shown.
Use WebSDK custom consent
By default, the WebSDK consent screen contains two paragraphs describing the major terms of giving consent to data processing. When you set up your own consent text, a third customizable paragraph appears on the consent screen. The paragraph also includes a link (named Notification to Processing of Personal Data by default, but you can rename it) that opens your custom text or page.
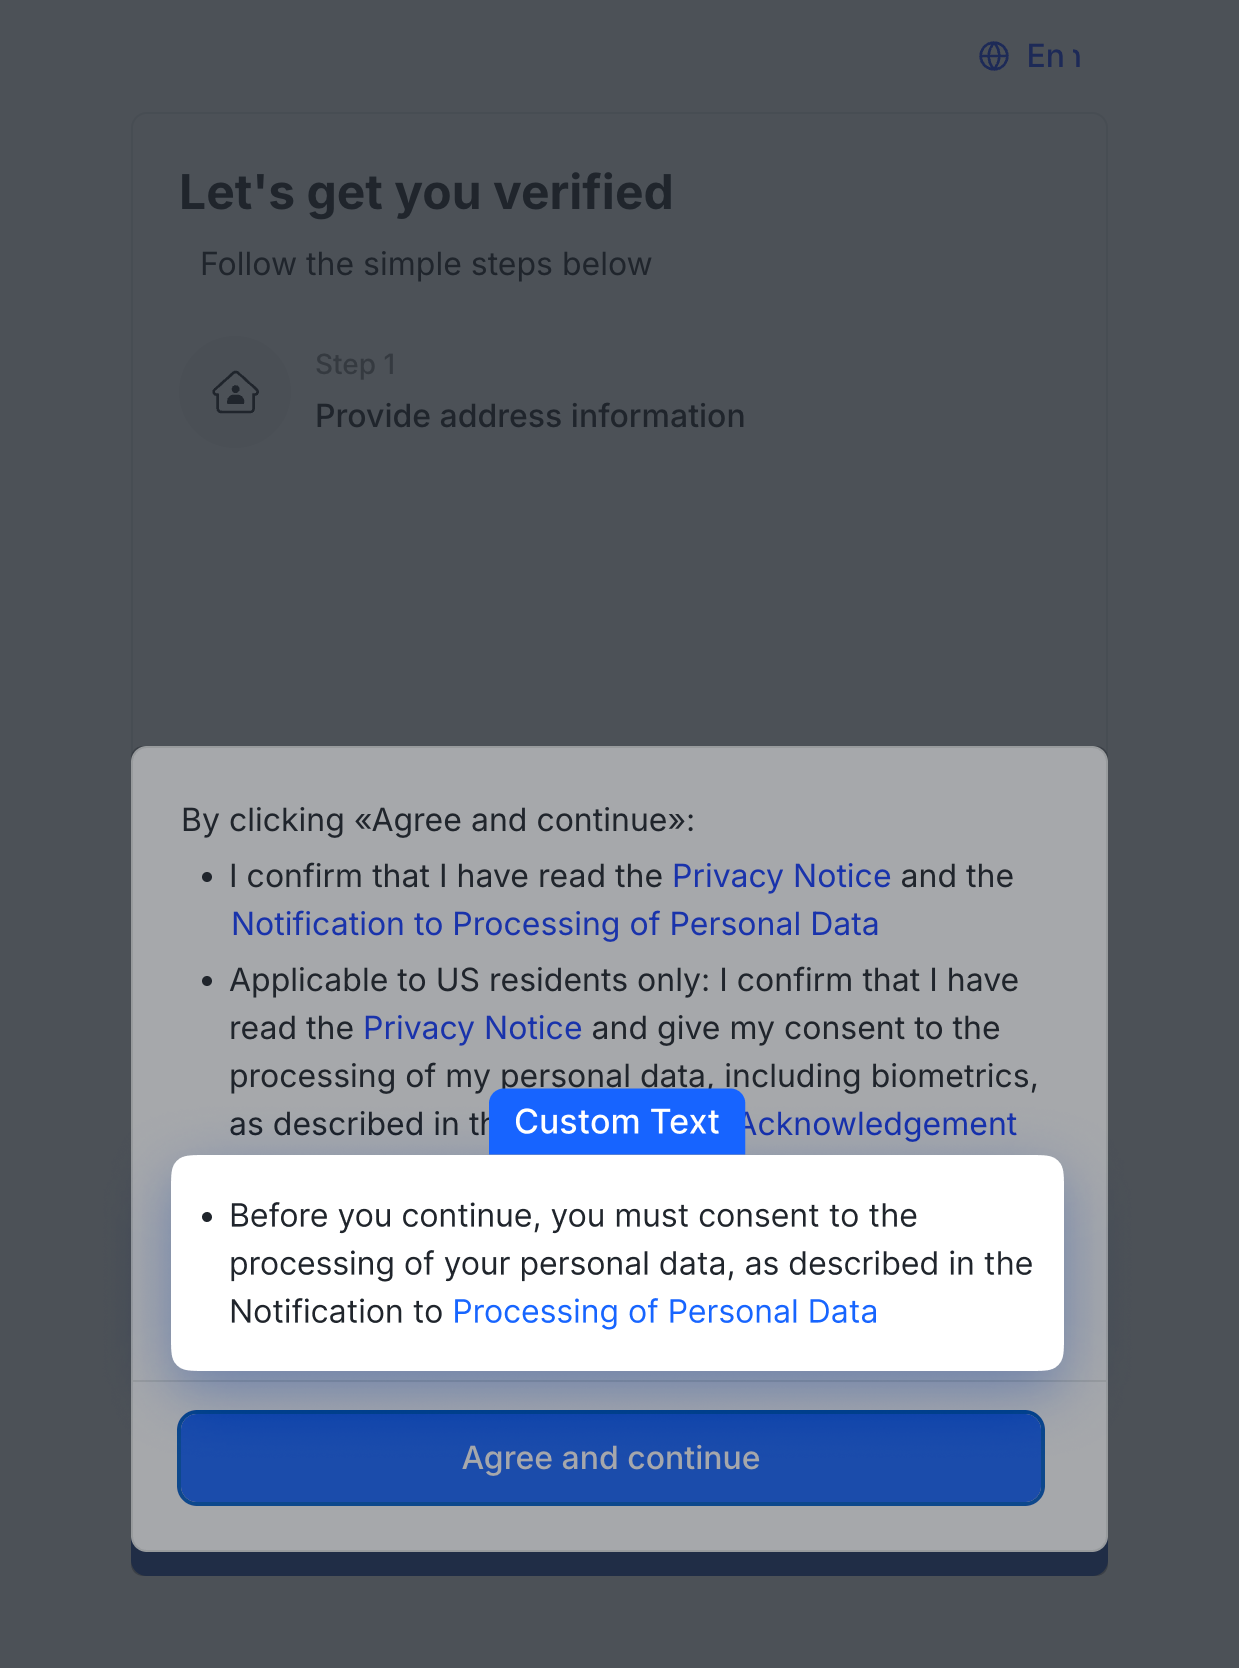
The rest of the consent screen text cannot be changed or translated.
Adjust customizable paragraph
To change the text of the third, customizable paragraph:
- In the Dashboard, open the SDK translations page.
- Select the Common section.
- Find the
"agreements.custom"object. - Change the text for the
"defaultDescription"string. - You can also rename the link (by default named Notification to Processing of Personal Data) to any title you prefer. When the applicant clicks this link, your custom text or page opens.
Provide your custom consent for WebSDK
To add your consent to data processing within the WebSDK integration, navigate to the level configuration, open the Advanced settings section, and scroll down to Custom consent for data processing. There are two ways to do this, from which you should choose one option that is more convenient for your case:
- Provide the Link that leads to an external source (a website). The link is embedded into the customizable paragraph shown in the WebSDK and opens in a new tab when the applicant clicks the consent link.
- Paste the Text that will be shown in the WebSDK when the applicant clicks the consent link in the third paragraph.
By default, no extra consent link or text is added to the consent screen.
Use MobileSDK custom consent
The MobileSDK consent screen contains two paragraphs describing the major terms of giving consent to data processing that cannot be customized. You can add your own consent text below these paragraphs, which can include plain text or links formatted as you wish.
Provide your custom consent for MobileSDK
- To add your consent text to data processing within the MobileSDK integration:
In the Dashboard, open the SDK translations page, choose the translation you want to adjust, and navigate to the Common tab. - Find the
"agreements.custom"object. - Add a new string
"customDescription": "Your consent link or text for data processing in MobileSDK". - Customize your consent text in the string as you wish; markdown formatting is supported.
NoteLevel settings for adding a consent link or text apply only to the WebSDK. For the MobileSDK, the string must be added manually on the SDK translations page.
Supported consent languages
Both the Privacy Notice and the Notification to Processing of Personal Data are available in multiple languages, just like our WebSDK and MobileSDK.
If a consent translation is provided for the language selected in the SDK, the consent text will be displayed automatically in that language.
The following languages are supported for the consents:
| Code (ISO 639-1) | Language | Privacy Notice | Notification to Processing of Personal Data |
|---|---|---|---|
| hr | Croatian | ✓ | ✓ |
| en | English | ✓ | ✓ |
| fr | French | ✓ | ✓ |
| de | German | ✓ | ✓ |
| el | Greek | ✓ | ✓ |
| hu | Hungarian | ✓ | ✓ |
| id | Indonesian | ✓ | ✓ |
| it | Italian | ✓ | ✓ |
| lv | Latvian | ✓ | ✓ |
| pl | Polish | ✓ | ✓ |
| pt-br | Portuguese (Brazil) | ✓ | ✓ |
| pt | Portuguese (Portugal) | ✓ | ✓ |
| sr | Serbian | ✓ | ✓ |
| sl | Slovenian | ✓ | ✓ |
| es | Spanish | ✓ | ✓ |
NoteIf a consent translation is unavailable for the language selected in the SDK, the consent text will be displayed in English.