
Configure authentication through Okta
Login to Sumsub using a multifunctional service.
Okta is a cloud-based identity and access management platform that acts as a secure, centralized control center that verifies who a user is and manages which applications they are allowed to use.
Connecting Okta enables Single Sign-On (SSO) for Sumsub. This adds Sumsub to your Okta dashboard, so your employees can then access Sumsub directly from their Okta dashboard, eliminating password fatigue and allowing you to centralize access control and security policies.
In Okta
To connect to Okta, follow the setup steps below.
Step 1. Create an integration
- In the Okta Dashboard, navigate to Applications and click Create App Integration.
- When a pop-up window appears, select SAML 2.0 and proceed to the next step.
- In the General Setting tab, enter the name of the integration.
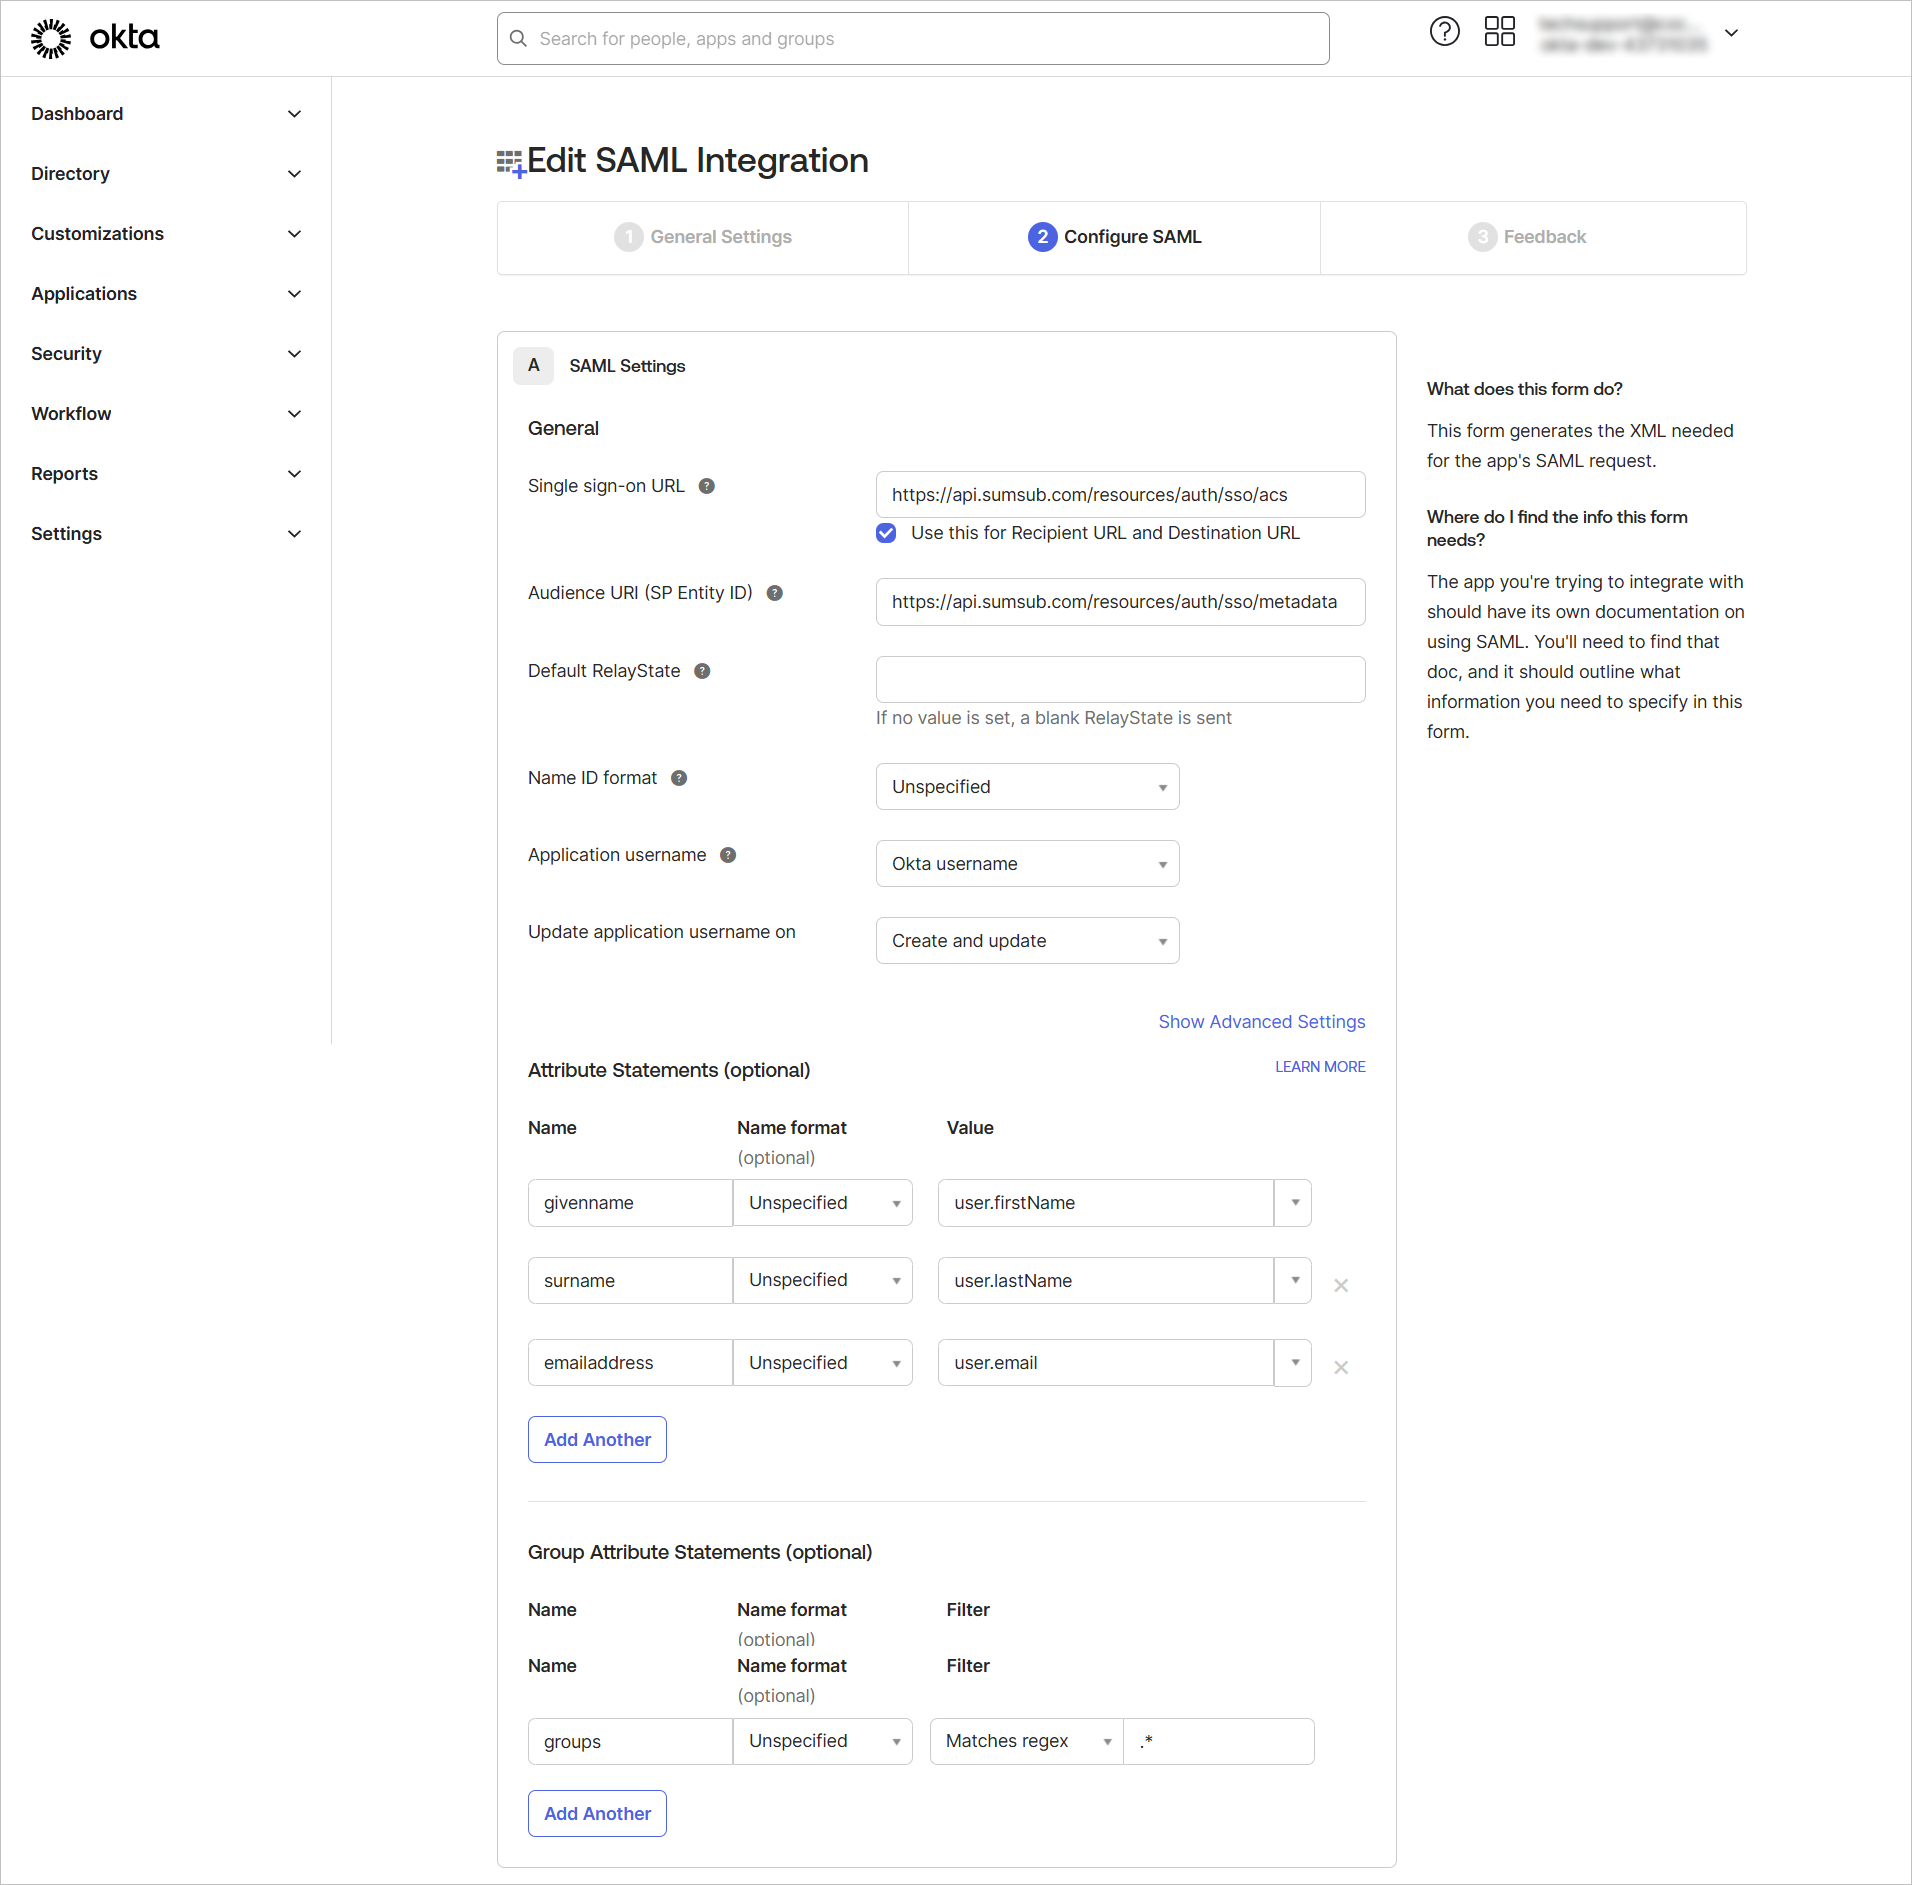
- Configure SAML:
-
Within the General section, fill in Single sign-on with https://api.sumsub.com/resources/auth/sso/acs.
-
In Audience URI (SP Entity ID), enter the following: https://api.sumsub.com/resources/auth/sso/metadata.
-
Fill in the Attribute Statements fields with your given name, last name, and email address. These fields are necessary to complete since our system will use this data to pull up information about a particular user.
-
In the Group Attribute Statements fields, specify the name of the group attribute.
-
Step 2. Review your integration
- Go back to Applications and select the integration from the list.
- Navigate to the Sign On tab to view the Metadata details and Certificate fingerprint data.
- Use this data to fill the fields in the Sumsub Dashboard.
In Sumsub
Once your integration is created and configured, transfer the data to the Sumsub Dashboard to complete integration with Okta.
Step 1. Enter the required data
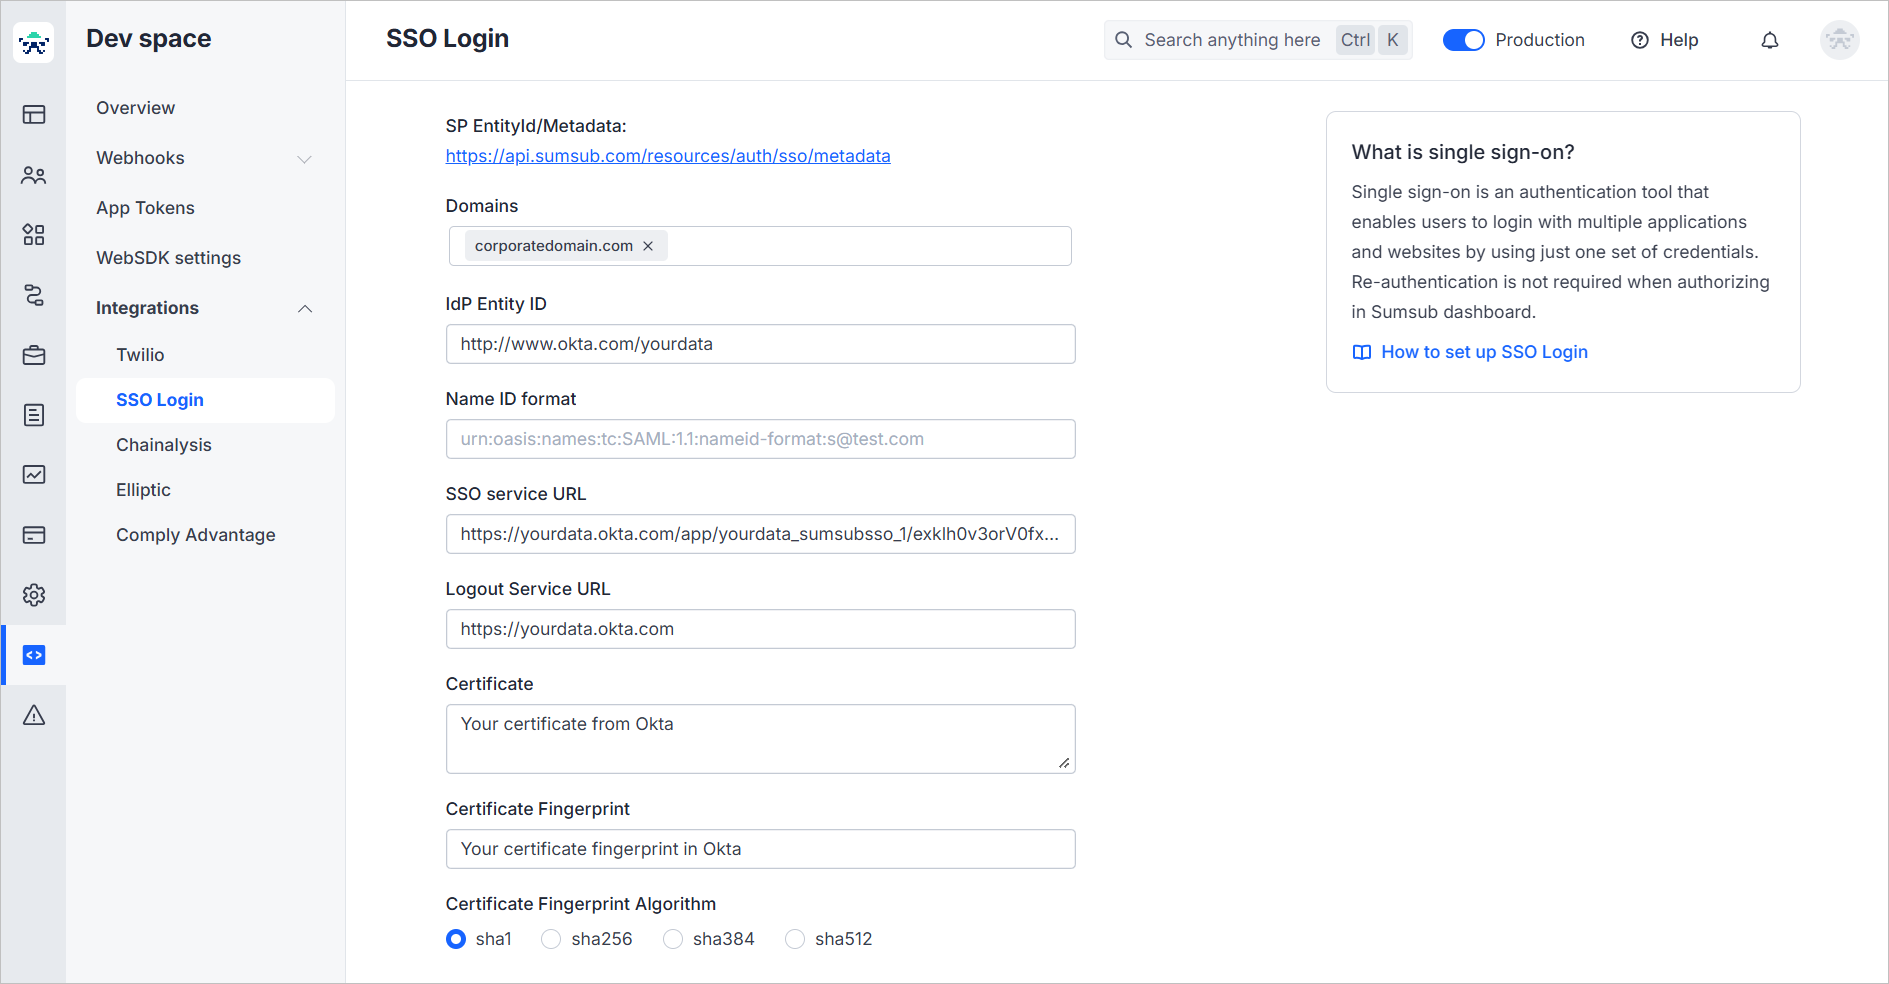
- In the Dashboard, open the SSO Login page.
- Use the corporate email domain in the Domain field.
- For IdP Entity ID, go to the Metadata details in Okta and paste the data from the Issuer field.
- You can leave the Name Id Format field empty. For more information about this field, refer to this section.
- For SSO service URL, use data from the Sign on URL field in Okta.
- For Logout service URL, use data from the Sign on URL field in Okta.
- From Metadata details in your Okta account, copy the Signing Certificate number and paste it in the Certificate field.
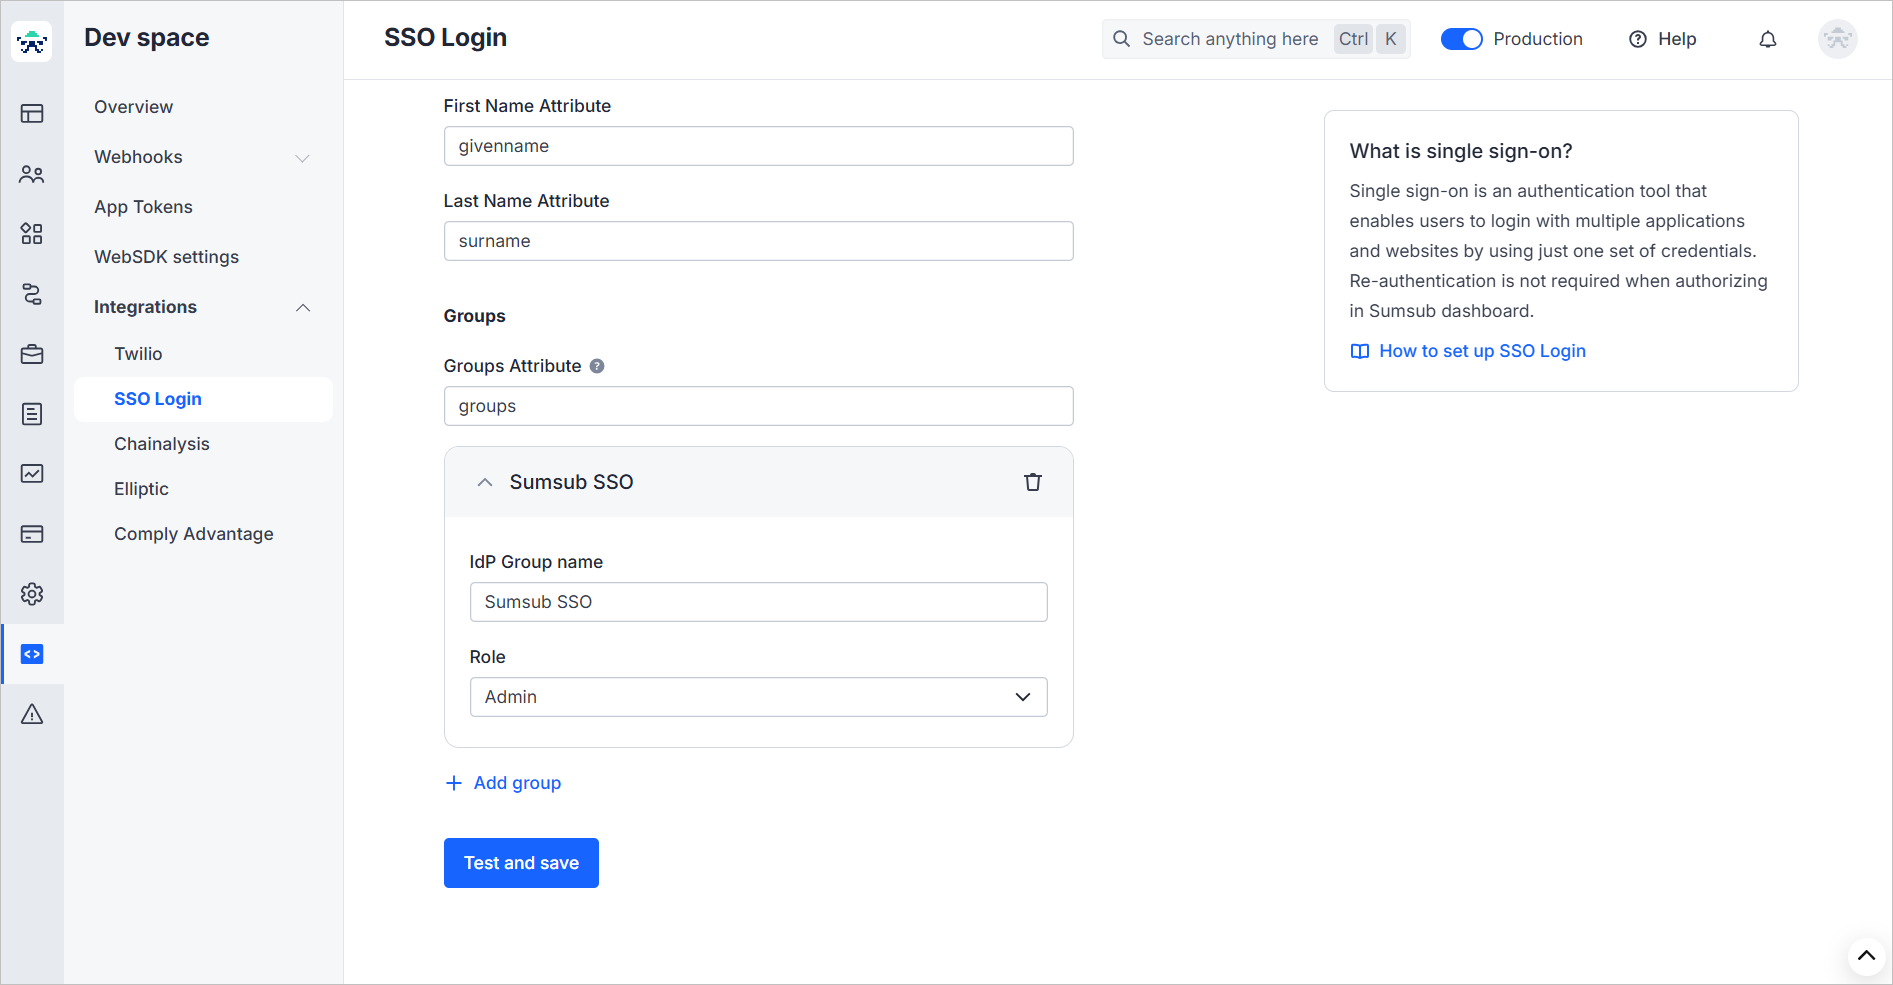
- Fill in the Attributes fields with the data from Attribute Statements in the same format as you specified them in Okta.
Step 2. Set up Groups
- Fill in the Groups Attribute field with the group attribute name from Okta.
- Click Add group to create a group within Sumsub.
- Use the IdP Group name as a name for your group.
- Select the role that will be associated with the group.
- Click Test and save.
Updated about 20 hours ago