Get started with Workflow Builder
Use Workflow Builder to set up verification steps no-code.
Build custom verification logic with no-code and integrate with Sumsub easily:
- Navigate to Workflow Builder and set the canvas type.
- Add level steps, build conditions, set up review steps, and configure actions according to your needs.
- Create multiple versions of your flow and test them.
- Publish your flow to make it available in production.
- Set up WebSDK or MobileSDK integration that will handle the whole verification process.
- Review verification results.
Define flow type
With Workflow Builder, you can create flows based on two types of verification levels: Standard and Applicant actions. Depending on your choice, you'll need to set up your verification flows in the corresponding tabs.
To start building a verification flow:
- Go to Workflow Builder and select Active workflow.
- Navigate to either the Standard Workflow or Action Workflow tab, depending on the type of your initial step.
- Go to the Draft view.
- Proceed to add the level step.
Add level step
A level node always goes first and is always required to start your workflow, as it will be responsible for initiating a process of collecting information about your applicants. Without this node, the verification flow will not run.
You can map a level node to any Standard verification level that obtains necessary information about your applicants, such as, for example:
- Country/State
- Age
- Gender
- IP address
- Data from applicant documents
- Data from Questionnaire
- Metadata
- Other details: high-risk applicants, large transactions
- Internal fraud score results
- External databases results
- Company type
You can also start your verification flow with an Applicant action verification level that requires additional verification:
To add a level node:
- Set up a verification level.
- In Workflow Builder, navigate to either the Standard Workflow or Action Workflow tab, depending on the type of your initial step. The first type fits for general applicant verification; the second type is usually used to initiate additional checks based on suspicious applicant actions.
- Right-click anywhere on the canvas and select Level step.
- Specify the name of the node and select a level that you have configured at step 1.
- Click Choose next level to continue building your flow by adding such nodes as Level step, Condition, Action, and Terminal step.
Important
- While setting up an applicant workflow, you cannot use the same verification level more than once within a single workflow. If a level is already used, it becomes unavailable for selection. To avoid conflicts in your verification logic, structure your workflow using conditional nodes and separate branches.
- If two levels are configured in the workflow one after another, the system will transfer both approved and rejected applicants to the next level, resetting the verification state. At the second level, rejected applicants may become approved if they meet this level’s requirements. To prevent this, you can add a conditional node between the levels that checks the applicant’s status and allows only approved applicants to pass through.
- All verification levels must use the same WebSDK version.
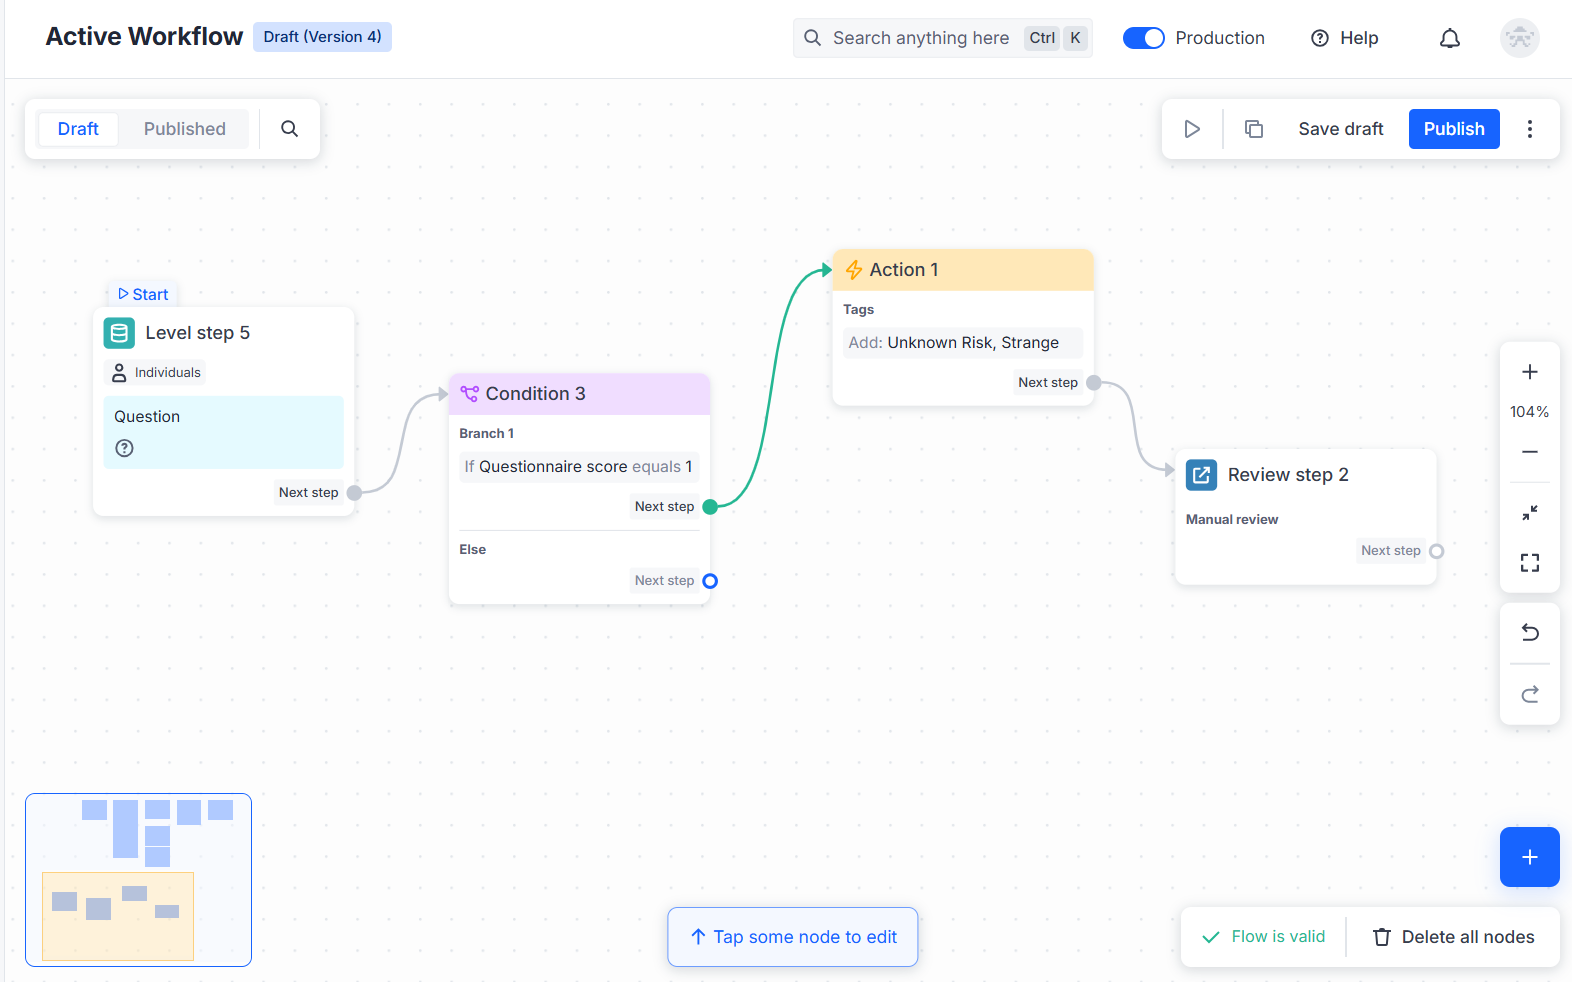
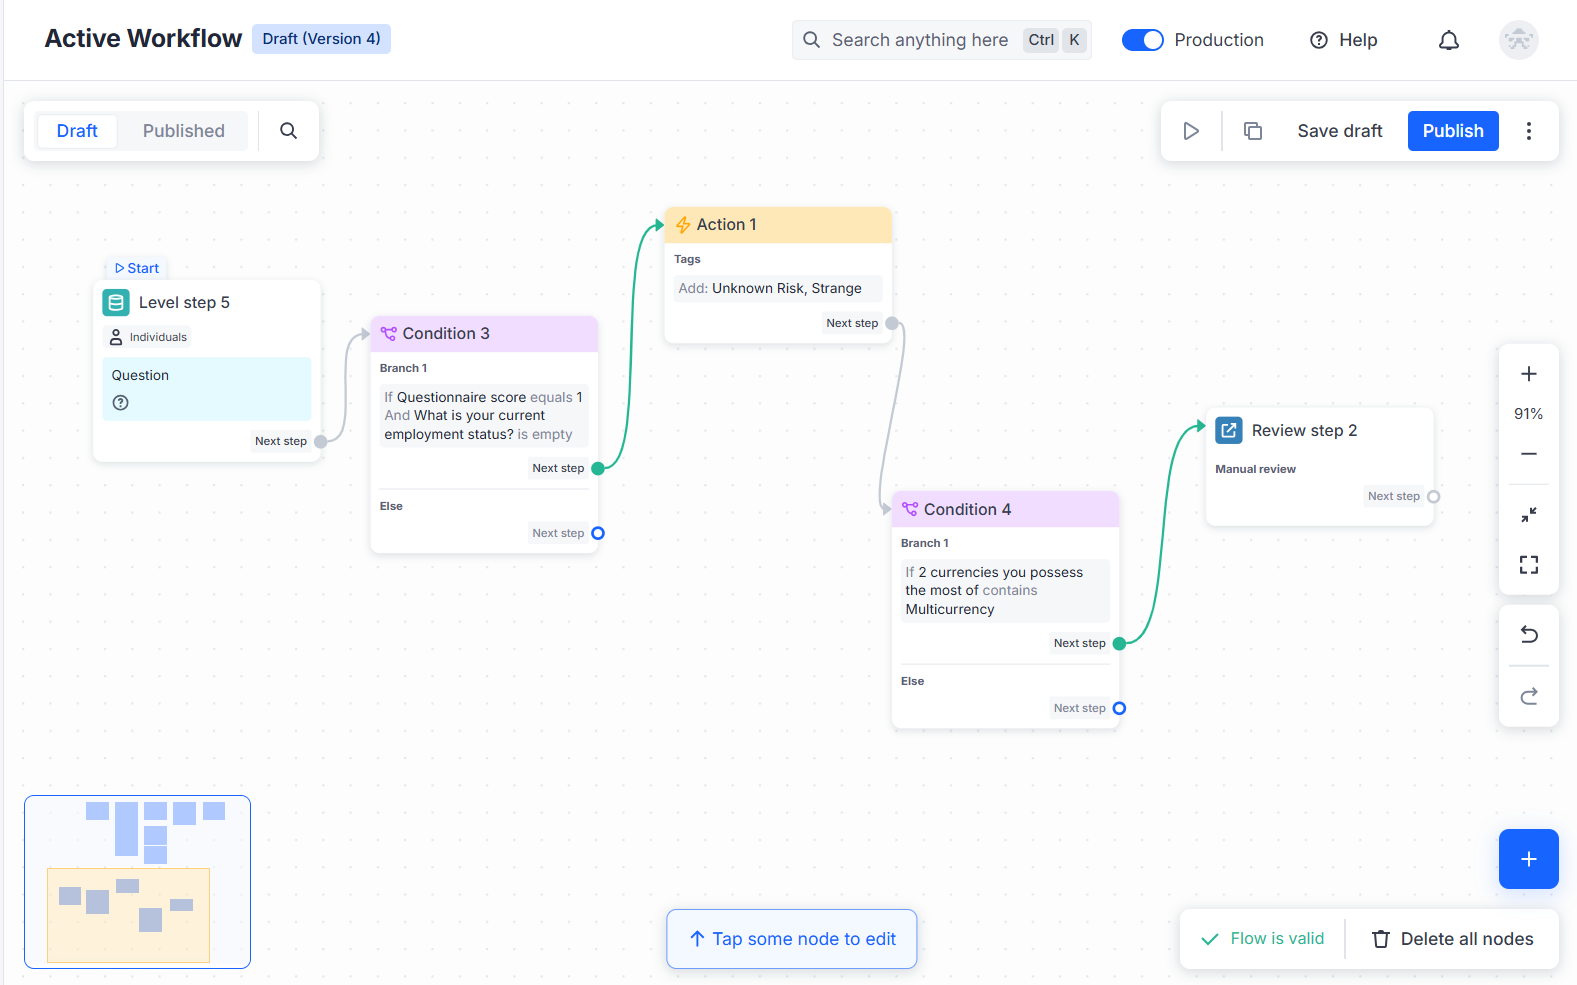
Build conditions
A conditional node is an optional node directing applicants further down the flow, depending on the specified criteria.
For example, you may want to ask applicants from the USA and Canada to go through identity verification, and by that check, you obtain information about their age, country, and so on. Then you decide to decline applicants whose age is less than 16, and for the rest cases, you need to additionally direct applicants to different checks, depending on their country.
To set up a conditional node:
- Select whether to approve or reject applicants.
- Set up a logical condition
IF,IF NOT,OR,OR NOT,IS IN, andEQUALSand add necessary values in accordance with your scenario. For example, you can use blocklists to form a list of suspicious applicants and auto-reject each of them by defining a condition. - Add a new conditional branch for another group of applicants, depending on the obtained information.
- For every branch, proceed with the next step, which can be: Level step, Action, Terminal step.
Condition specifics
These are implementation details and behaviors to be aware of when configuring Workflow builder conditions.
Expand to view additional details on logical conditions, variables, and regular expressions.
|
Affected feature |
Behavior |
|---|---|
|
General expressions |
You can use regular expressions to check if a field matches certain conditions. There are some of the expressions that might be useful:
|
|
|
These conditions are both used for comparison:
|
|
|
Uses negative values for future expiry dates because the value represents the difference between the current date and the expiry date. For example, if the current year is 2026, a document expiring in 2056 has a value of approximately |
Condition logic
The same applicant can trigger only one condition branch at a time and will follow that scenario. Therefore, when adding a conditional node, keep the following logic in mind:
- If you create two branches with similar condition settings but different subsequent steps, only the first branch will execute. Instead of duplicating similar condition branches, add multiple subsequent steps to the same branch.
- If you check multiple different conditions at the same time using separate branches, only one branch will be triggered and its scenario will run. To evaluate multiple conditions at once, use
AND/ORoperators to create a combined condition within a single branch. Alternatively, for more complex cases, you can use additional conditional nodes to evaluate information step by step and define the next steps accordingly.
Set up review steps
You can use the review step node to send applicants for manual review or block them automatically—for example, due to non-compliant personal data—with the final rejection decision. Applicants who got a final rejection will not be allowed to even upload documents.
To set up a review step node:
- Select the type of node, which can be Final reject or Manual review.
- Specify the corresponding assignment:
- For the final review, choose from the list of rejection labels as necessary.
- In case of manual review, applicants are automatically assigned the Requires action status and queued for manual processing by compliance officers. You can also use this functionality to create Queues. Then you will also need to specify the tag you want to add to the applicant when configuring the action.
Configure actions
An action node adds certain information to applicant profiles for further filtering.
To set up an action node:
- Add an action type that you want to be performed. You can set the following:
- Tag — to assign a tag (or several tags) to the applicant.
- Note — to leave a note in the applicant profile.
- Source key — to add or delete the applicant source key and change their level accordingly.
- Case — to create a case for investigation based on a specific criteria.
- Proceed with the next step if necessary, or leave as it is for defining the end of the flow.
Transfer Action workflow into Standard workflow
You can use the Transfer node to move applicants from an Action workflow to a Standard workflow and continue verification on a selected level.
To configure the transfer:
- In the Dashboard, open Integrations → Workflow builder, and open the Action Workflow tab.
- Right-click anywhere on the canvas and select Transfer node.
- In the node settings, select the verification level that applicants should be transferred to.
- Publish the workflow.
Note
- The Transfer node cannot be used as a starting point in a workflow. It must be placed after another node and is used to redirect applicants to a Standard workflow. The node is terminal, meaning no additional nodes can be added after it.
- The transfer is one-way. Applicants cannot return to the previous workflow after the transfer.
- Documents submitted for the reset steps become inactive and must be provided again.
Manage Workflow nodes
Some convenient management options are available for Workflow Builder nodes:
- Select, copy, and paste: Choose any nodes and transfer their copies into another Workflow builder canvas. For example, you can reuse the required nodes across multiple keys or copy workflow examples to your own canvas.
- Organize: Select nodes and place them in a structured, straightforward order with a single click.
The following table shows how you can manage nodes using shortcuts and canvas buttons:
| Action | Instructions |
|---|---|
| Select |
|
| Copy |
|
| Paste |
|
| Organize | Select the required sequence of nodes and click Organize above the selected area. |
NoteAfter pasting, some nodes may require additional configuration. For example, if you move nodes to another key, you might need to update the verification levels and tags used.
TipIf you are a Reusable KYC partner, you can copy nodes, save them to a
.txtfile, and share it with other partners so they can paste the nodes directly into their Workflow builder canvas.
Review flow history
Every time you make changes to your flow and publish it, the previous state is saved as an archived version, allowing you to revert to any of the available versions at any time.
To see the available versions, in the top-right corner, open the menu and select Version history.
Create multiple versions of your workflow
Before putting your flow into operation, you may want to improve it or create one or several alternatives.
To copy your flow and experiment with changing different steps:
- Click Copy to Test Workflow.
- Switch to the Test Workflow tab.
- Change your flow as needed.
- Click Run flow.
- Click Generate to get the permalink to your flow.
- Pass verification by checking every step.
- Click Copy to Active Workflow to replace your previous flow.
- Return to the Active Workflow tab and proceed with publishing your flow.
Publish your flow and go live
When the whole logic is built and tested, do not forget to save and publish your draft. The created flow will then be shown in the Published view.
To initiate your flow from the Dashboard, click Run and generate a permalink for passing verification in the SDK.
Review verification results
Once the check is performed, you will receive the applicantReviewed webhook with the verification status. This webhook is triggered in the following cases:
- Applicant completes the flow (either receives a final approval or a final rejection at any stage)
- Applicant receives the Resubmission requested status while completing the flow
To review results via applicant profiles, go to the Applicants page, select an applicant, and check on Summary, which is a comprehensive report that includes the applicant data, check results, and uploaded documents.
Updated 16 days ago