Verify applicants from different countries via Workflow Builder
Effectively verify applicants from different countries.
In certain jurisdictions, it is required to verify applicants in accordance with the specific requirements and local regulations.
The Workflow Builder flows allow you to create and configure the verification procedure tailored even to the most complex cases, including verification of applicants from different countries.
Depending on the applicant’s country, you can transfer them to certain verification levels, reject the profile, send them to manual review, or request passing additional verification.
How Workflow Builder flows work
The Workflow Builder flows are designed to facilitate the process of setting up verification and creating different scenarios involving multiple groups of applicants.
There are four types of nodes that you place within the canvas and configure the verification flow connecting them between each other in a necessary way. Then you can test your flow and go live.
Create flow for verifying applicants from different countries
Set up a verification flow via Workflow Builder for working with applicants from different countries.
Step 1. Create verification level
In the first step, you must create an initial node that will include a verification level that collects information about the applicant’s country:
- Add a verification level.
- Include the Country field in the Applicant data verification step.
Step 2. Create client list with restricted countries
When working with applicants from different countries, you may want to decline some of them, depending on the selected country. To do so, you will need to create a client list that defines the restricted countries and place this list on the flow’s canvas:
- Create a custom client list with the Key entry type.
- Add items for restricting specific countries using the alpha-3 code.
Step 3. Go to Workflow Builder and add level step node
Start building a verification flow by adding the initial node to the Workflow Builder canvas:
- In the Dashboard, go to Workflow builder and select Active workflow.
- Navigate to the Standard Workflow tab and go to the Draft view.
- Add a level step to the canvas.
- From the Level name drop-down list, select the configured verification level.
Step 4. Configure nodes to reject applicants from high-risk countries
Once you get the picture of the verification process that you want to set up, you can add more nodes to your canvas and adjust them by the logic that is suitable for each case—request additional checks or reject applicants.
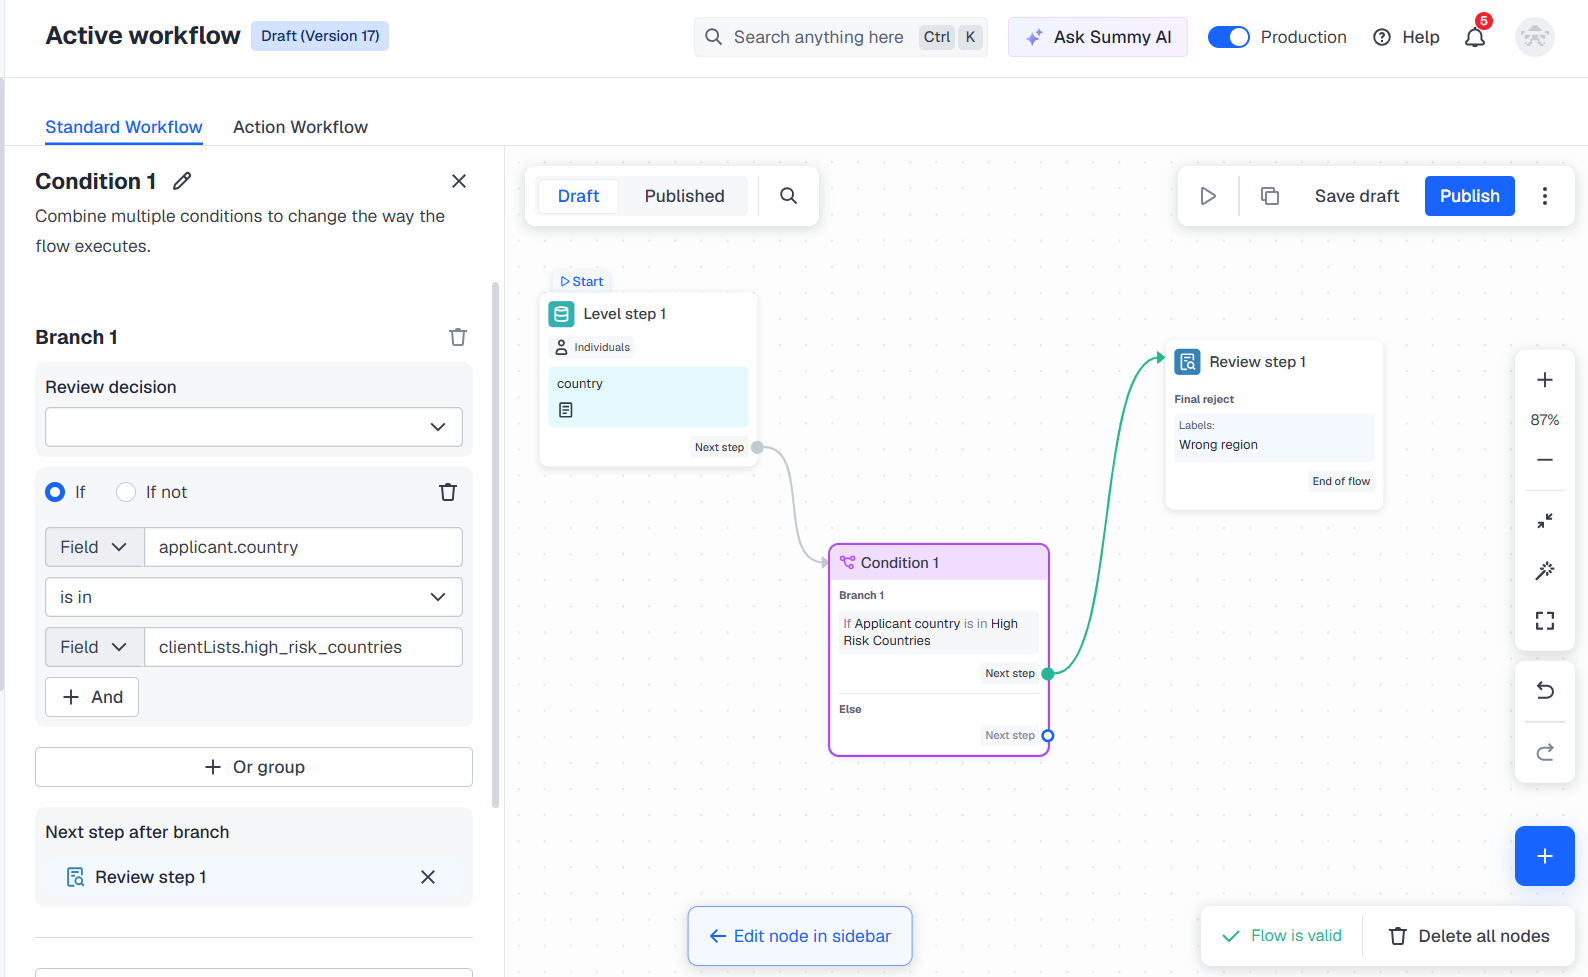
Add a verification flow branch that will reject applicants if their country is on the list of restricted ones:
- Click on the initial node created earlier and select Condition as the next step.
- Configure the condition branch:
- Select the If logical operator.
- From the Field drop-down list, select the
applicant.countryparameter. - Set a logical condition—select is in.
- Identify the name of the created client list. In the second Field drop-down—enter the name in the following format:
client.Lists.your_name.
- Within the created condition branch, click Choose next step and select Review step.
- Adjust the Review step node:
- In the review step configuration, identify the type of terminal step—select Final reject.
- Specify reasons or add labels that will explain the decision.
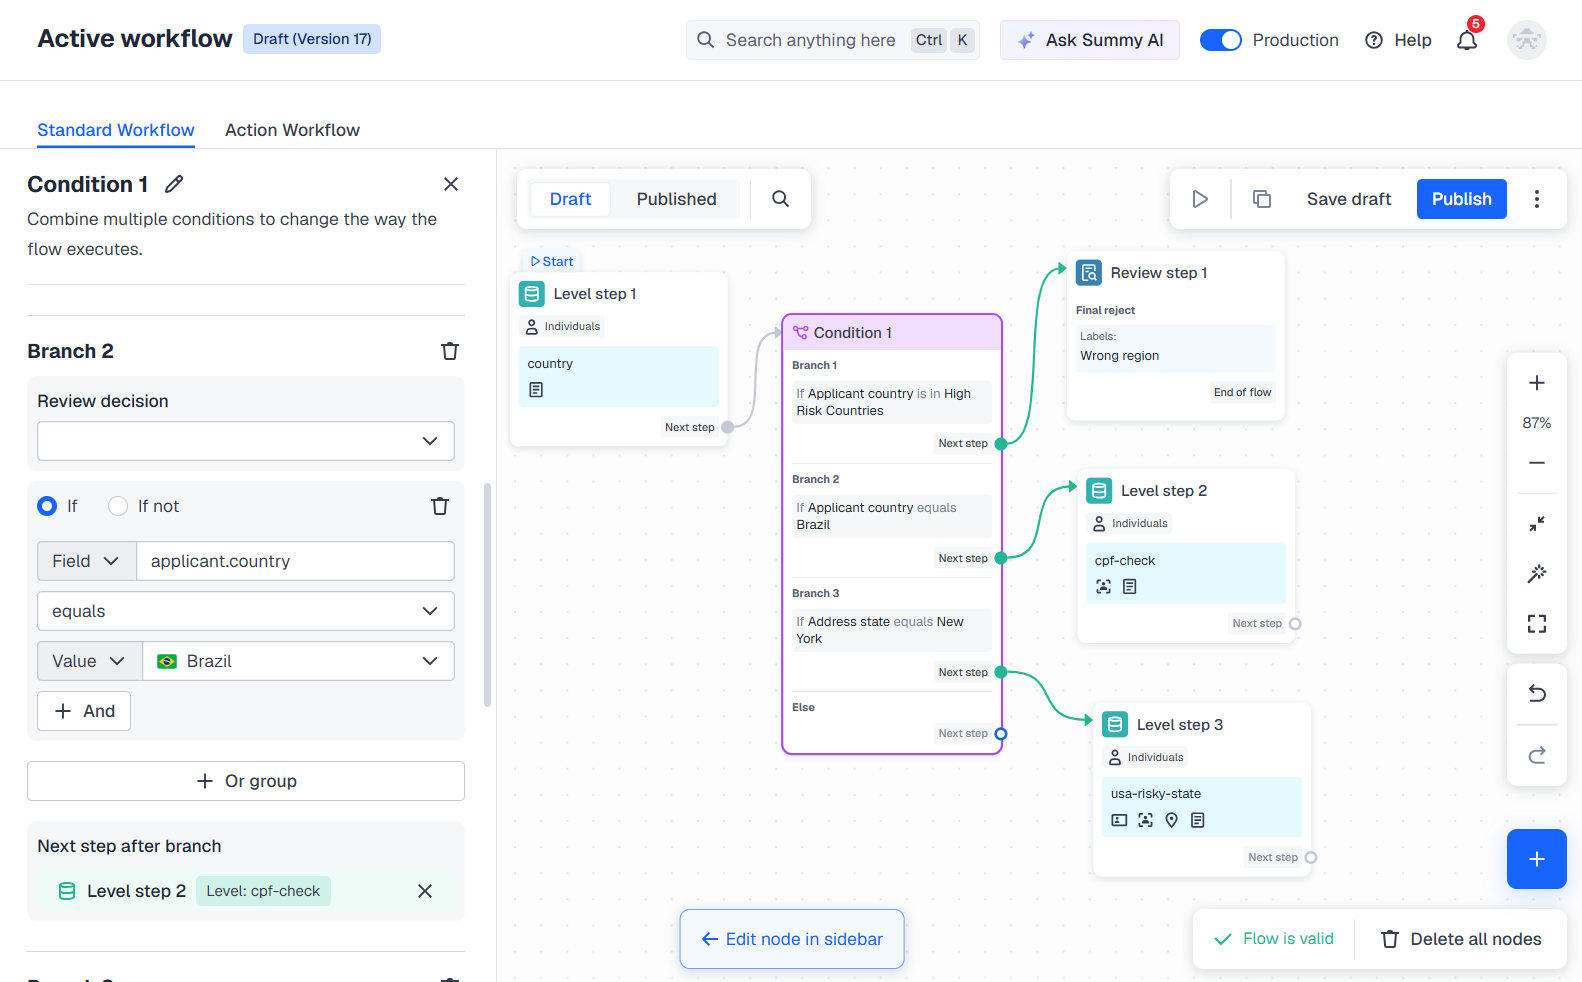
Step 5. Add nodes to manage applicants from specific countries
Besides the restriction, you may need to assign different checks to applicants from particular countries and states. For example, you can transfer applicants from Brazil to the Non-Doc Verification level (the CPF check) to increase conversion rates and request passing additional checks for applicants from certain states of the US that you consider risky:
- Go back to the condition node and add a new branch.
- Configure the created condition branch:
- From the Field drop-down list, select the
applicant.countryparameter. - Set a logical condition—select equals.
- Specify the country in Value.
- From the Field drop-down list, select the
- Add the level step node as the next step after the brunch and select the CPF check level from the list.
- To manage applicants from the US, add another branch in the condition node.
- Set up the branch:
- From the Field drop-down list, select the
poi.address.stateparameter. - Set a logical condition—select equals.
- Specify the state in Value.
- Add the level step node as the next step after the brunch and select the verification level for the risky US states.
- From the Field drop-down list, select the
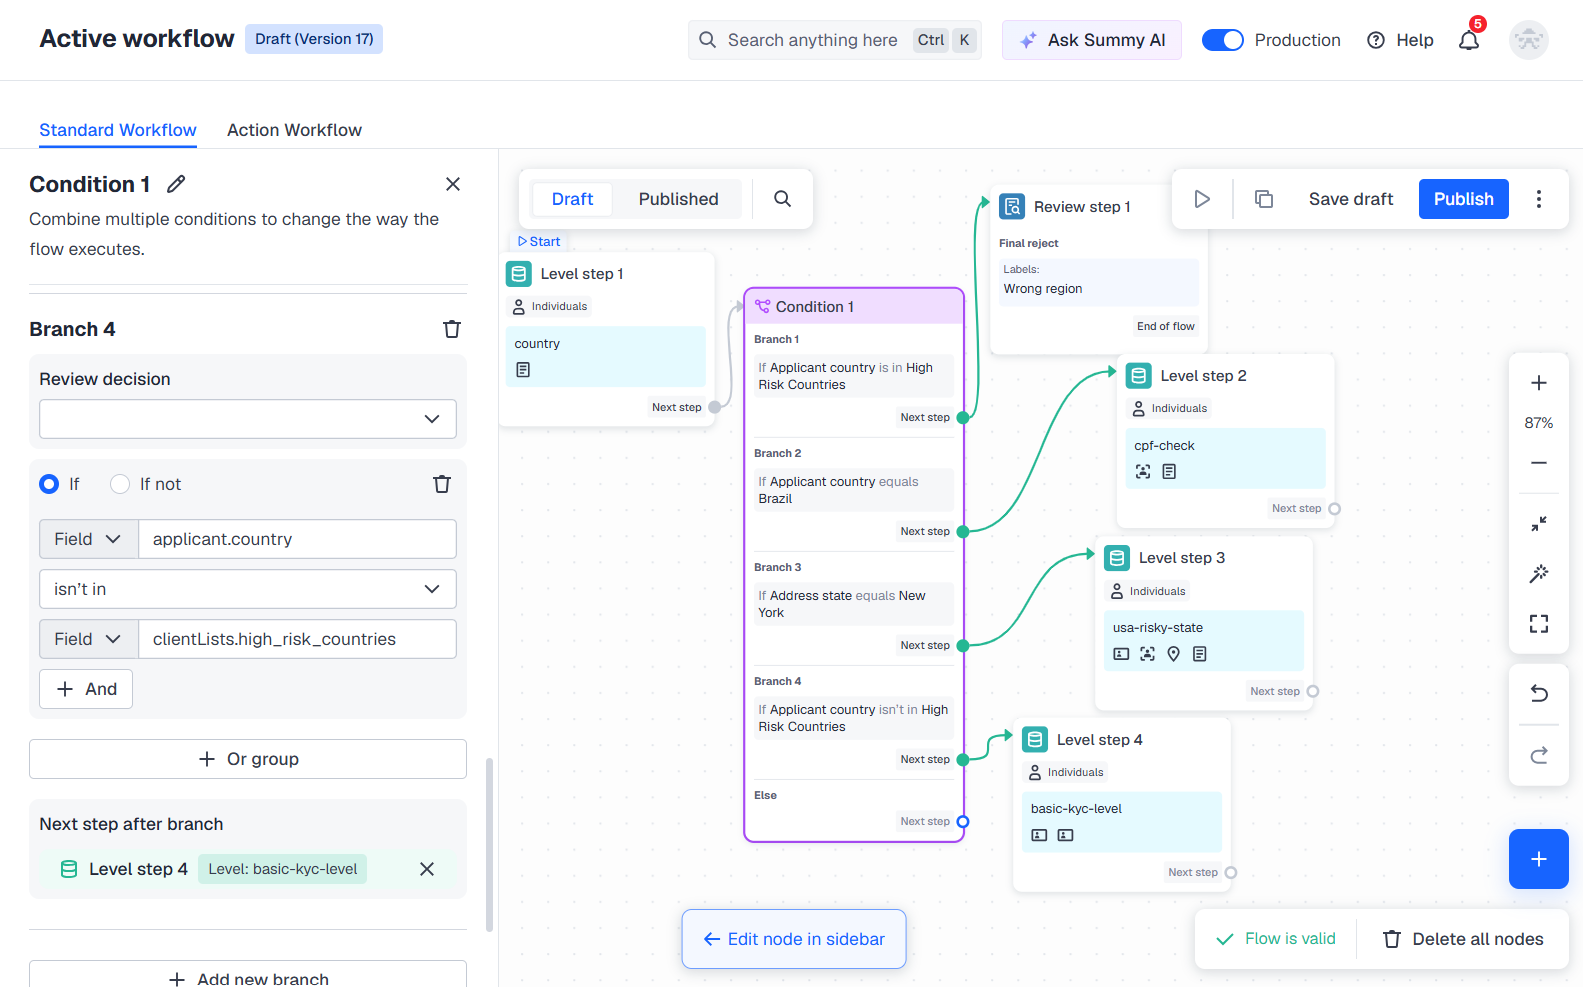
Step 6. Cover all other cases
Include one more branch to manage any other case where the applicant’s country is not considered high-risk and does not require specific verification:
- Go back to the condition node and add a new branch.
- Configure the created condition branch:
- From the Field drop-down list, select the
applicant.countryparameter. - Set a logical condition—select isn’t in.
- In the second Field drop-down, enter the name of the list of restricted countries that you have included in the flow before.
- From the Field drop-down list, select the
- Add the level step node as the next step after the brunch and select the basic verification level suitable for all other cases.
Step 7. Start using flow
Once the flow is created and configured, you can save the draft, perform test verification, and publish the flow to run the checks:
- Save the draft and experiment with your flow — create copies and conduct tests.
- Publish the flow to go live once the flow configuration is tested.
Step 8. Receive verification results
Get verification results via the webhooks or view them in applicant profiles.
Updated 16 days ago