Delegate rejected applicants for manual review
Thoroughly check rejected applicants by sending them for manual review.
At Sumsub, applicants might be declined with a Rejected or Resubmission requested status, depending on the nature of violation.
Why do you need to review rejected applicants manually
Some of the cases may require more thorough consideration of the applicant profile. For example, you may need to check the applicants rejected by the Watchlists-related tags manually to make sure that the refusal is fair.
Create verification flow considering rejection reasons
Add a verification flow that takes into account the reasons for rejection and delegates particular applicants for manual review.
Step 1. Create verification level and add level step node
Create a new verification level or add an existing one to the Workflow Builder’s canvas:
- Create a verification level and add verification steps
- Configure the level settings and save them.
- In the Dashboard, go to Workflow builder and select Active workflow.
- Navigate to the Standard Workflow tab and go to the Draft view.
- Add a level step to the canvas, and attach the created verification level by selecting it from the list.
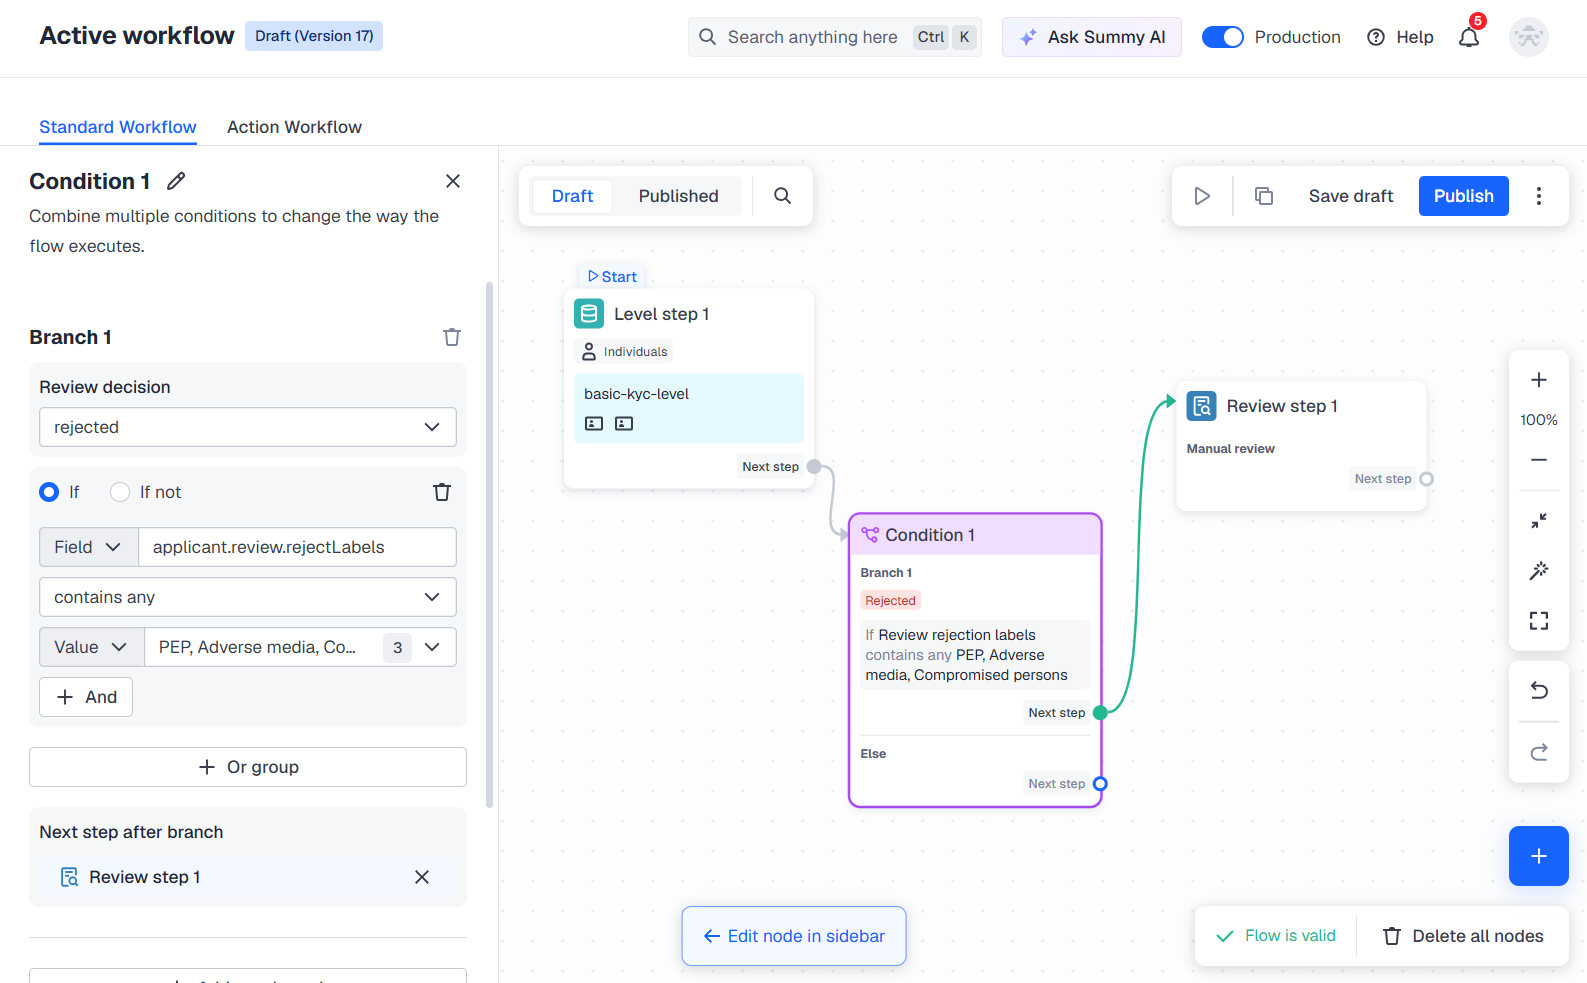
Step 2. Configure nodes to consider rejection labels
Add the Condition and Review step nodes to complete the verification flow and send rejected applicants for hand-operating review:
- Click on the initial node created earlier and select Condition as the next step.
- Configure the condition branch:
- Choose the rejected and resubmission options from the Review decision drop-down list.
- Select the If logical operator.
- From the Field drop-down list, select the
applicant.review.rejectLabelsparameter. - Set the contains any logical condition.
- From the Value list, select the rejection labels.
- Within the created condition branch, click Choose next step and select Review step.
- Configure the Review step node settings:
- Identify the type of terminal step—select Manual review.
Step 3. Start using flow
Once the flow is created and configured, you can save the draft, perform test verification, and publish the flow to run the checks:
- Save the draft and experiment with your flow — create copies and conduct tests.
- Publish the flow to go live once the flow configuration is tested.
Step 4. Receive verification results
Get verification results via the webhooks or view them in applicant profiles.
Updated 4 months ago