
Configure adaptive merchant verification flow for marketplaces
Validate merchant authenticity to build buyer trust.
Not only private individuals but also entire companies can pose a threat to your business. As an online retail platform or marketplace, you can face various problematic merchants that might damage your reputation and put your platform's safety at risk:
- Ghost stores.
- Fake merchant listings.
- Fraudulent sellers.
- Shell companies with no verifiable ownership.
Sumsub product ecosystem covers this case by combining Business Verification and Workflow Builder, which complement each other in combating unreliable merchants:
- The company checks confirm the counterparty's information and structure, and verify its beneficiaries.
- Workflow Builder makes the verification process flexible, considering different conditions and taking appropriate action based on the check results — with no complex integration required.
Set up merchant verification
Build an adaptive verification scenario so merchant verification can cover a wide range of cases.
Step 1. Create verification levels
Add verification levels that include different checks depending on the verification stage and results. The current scenario might require three separate verification levels, each covering a specific goal:
- Initial company verification level for collecting merchant documents and data. It confirms that a company is real, active, and has all the documents required for registration and operation.
- UBO verification level for establishing the company structure and verifying individuals with significant control over the business.
- Directors verification level for verification of the individuals who are at the head of the company in case UBO verification is incomplete or no UBOs can be found.
Create the initial company verification level:
- Add a business verification level and set up its general settings. Refer to this article for instructions.
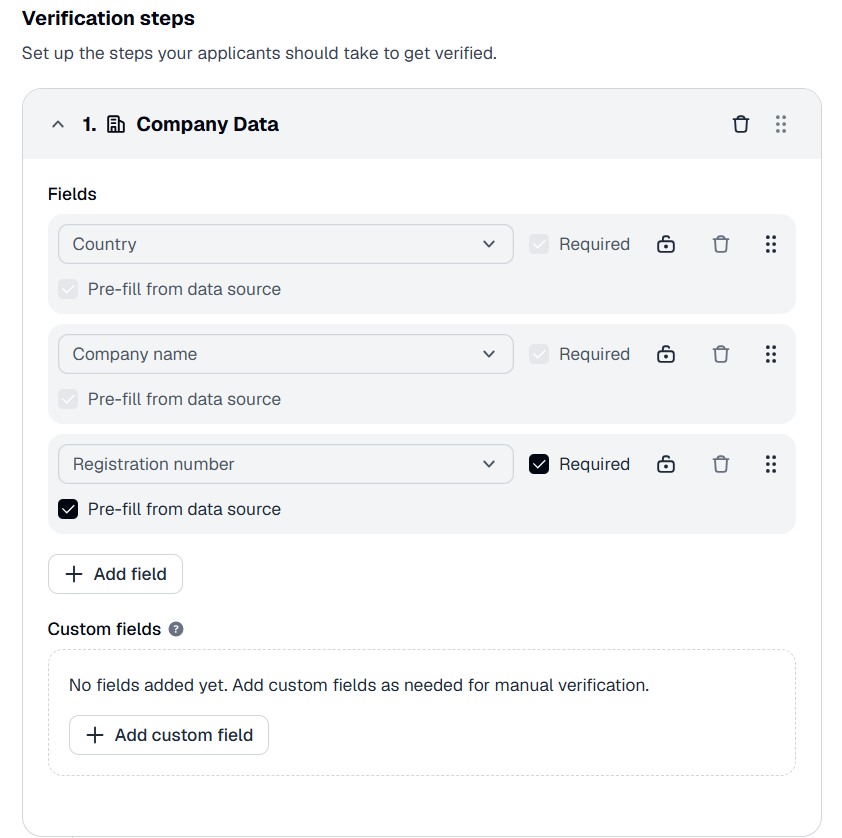
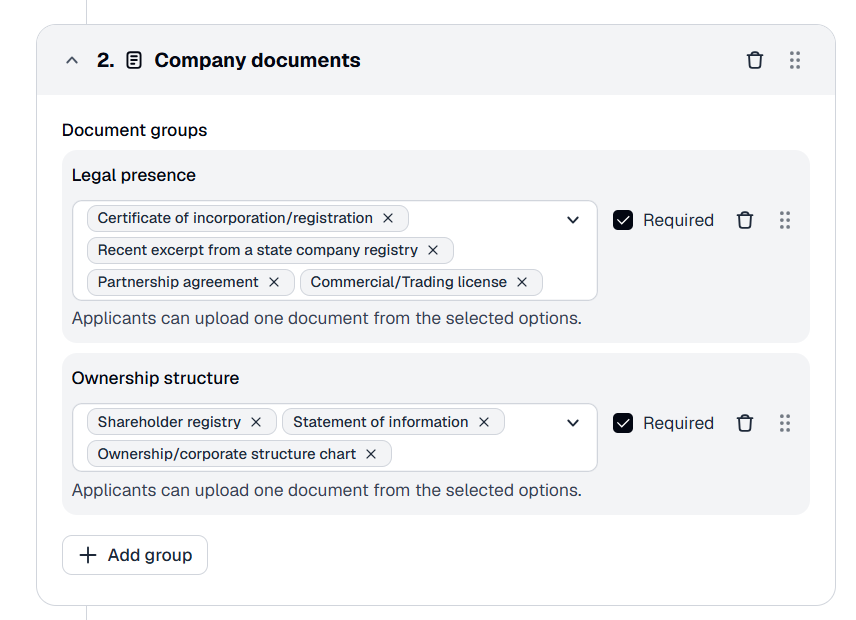
- Include the required verification steps:
- Company data. This step collects basic information about the company (for example, Company name, Country, and Registration number). Depending on the settings, the company data can be obtained from corporate registries or entered by the applicant manually.
- Company documents. This step collects documents required for business verification. You can include documents from predefined groups — Legal presence, Ownership structure, Company details, or Representative authorization — or add custom options.
Create the UBO verification level:
- Add a business verification level and set up its general settings.
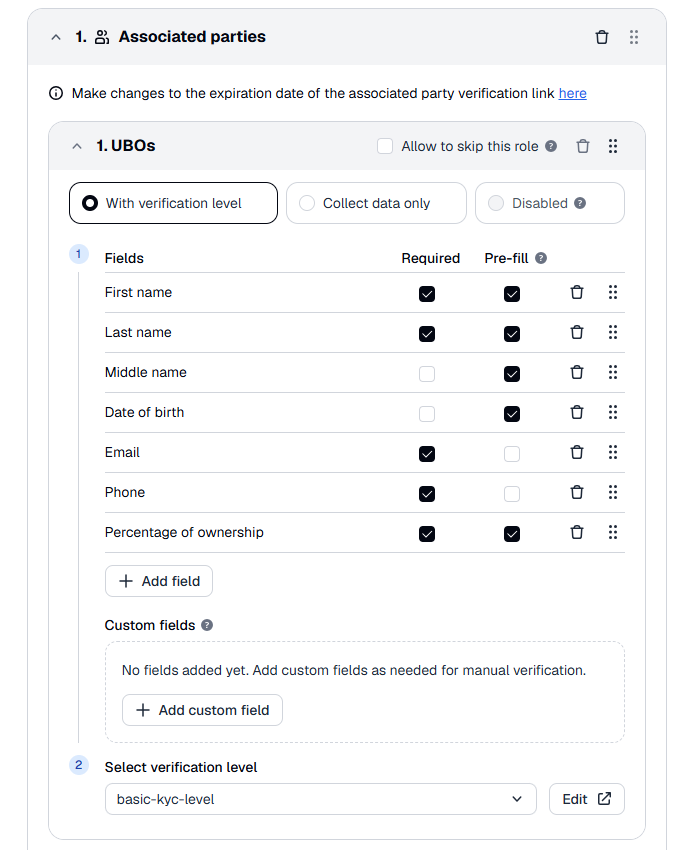
- Include the Associated parties verification step and add UBOs as a beneficiary type.
Create the Directors verification level:
- Add a business verification level and set up its general settings.
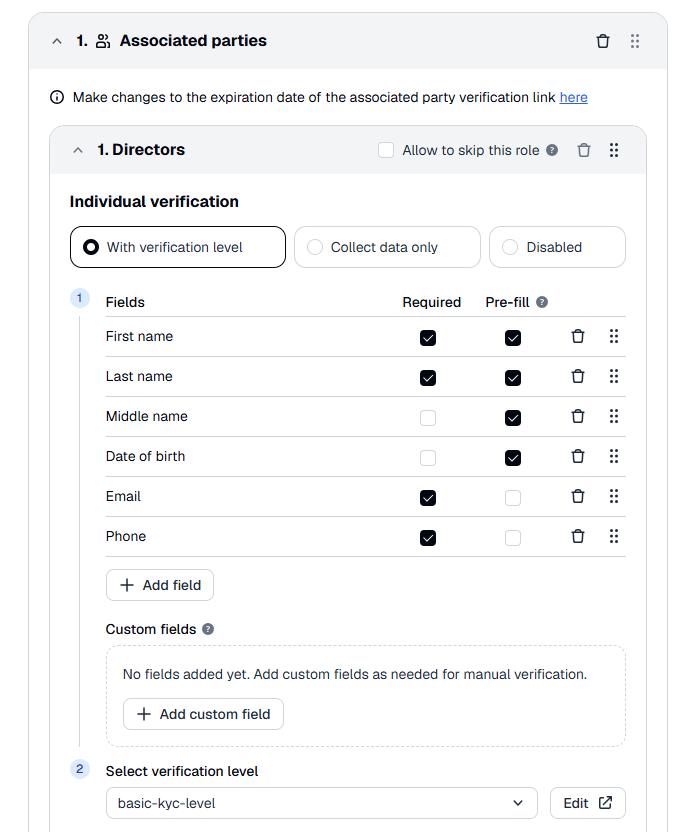
- Include the Associated parties verification step and add Directors as a beneficiary type.
Step 2. Add initial merchant check node
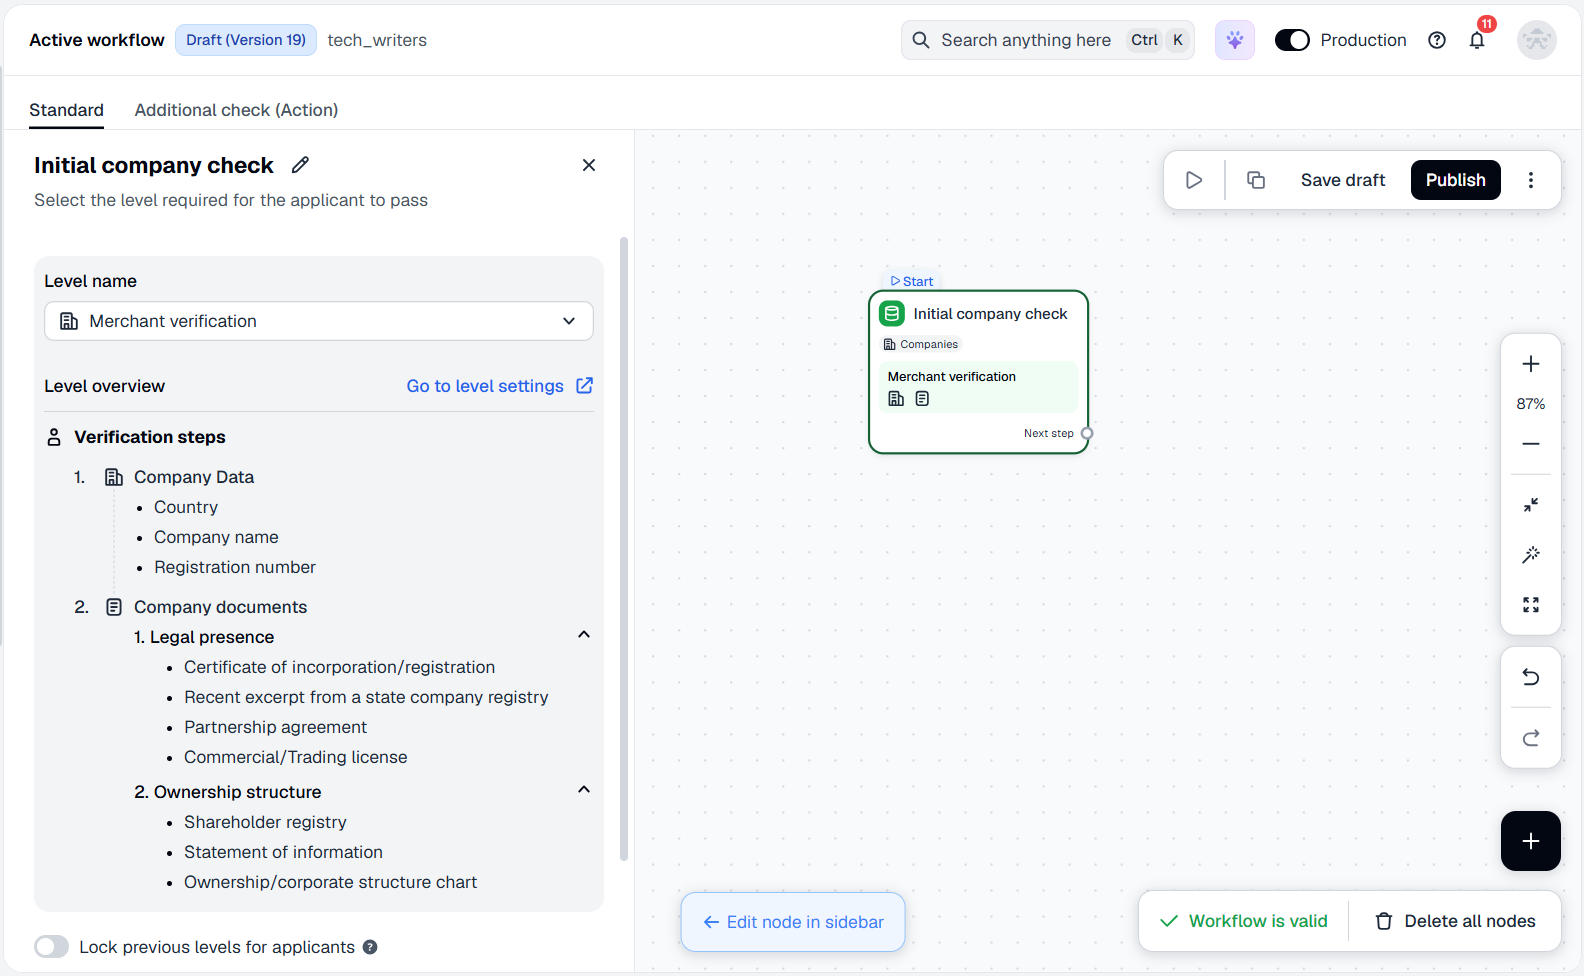
Go to Workflow Builder to place the level node, which launches the verification flow. To add the Level step node:
- In the Dashboard, go to Workflow builder and select Active workflow.
- Navigate to the Standard tab and go to the Draft view.
- Add Level step to the canvas and attach the previously created initial company verification level by selecting it from the list.
Step 3. Configure inactive company rejection
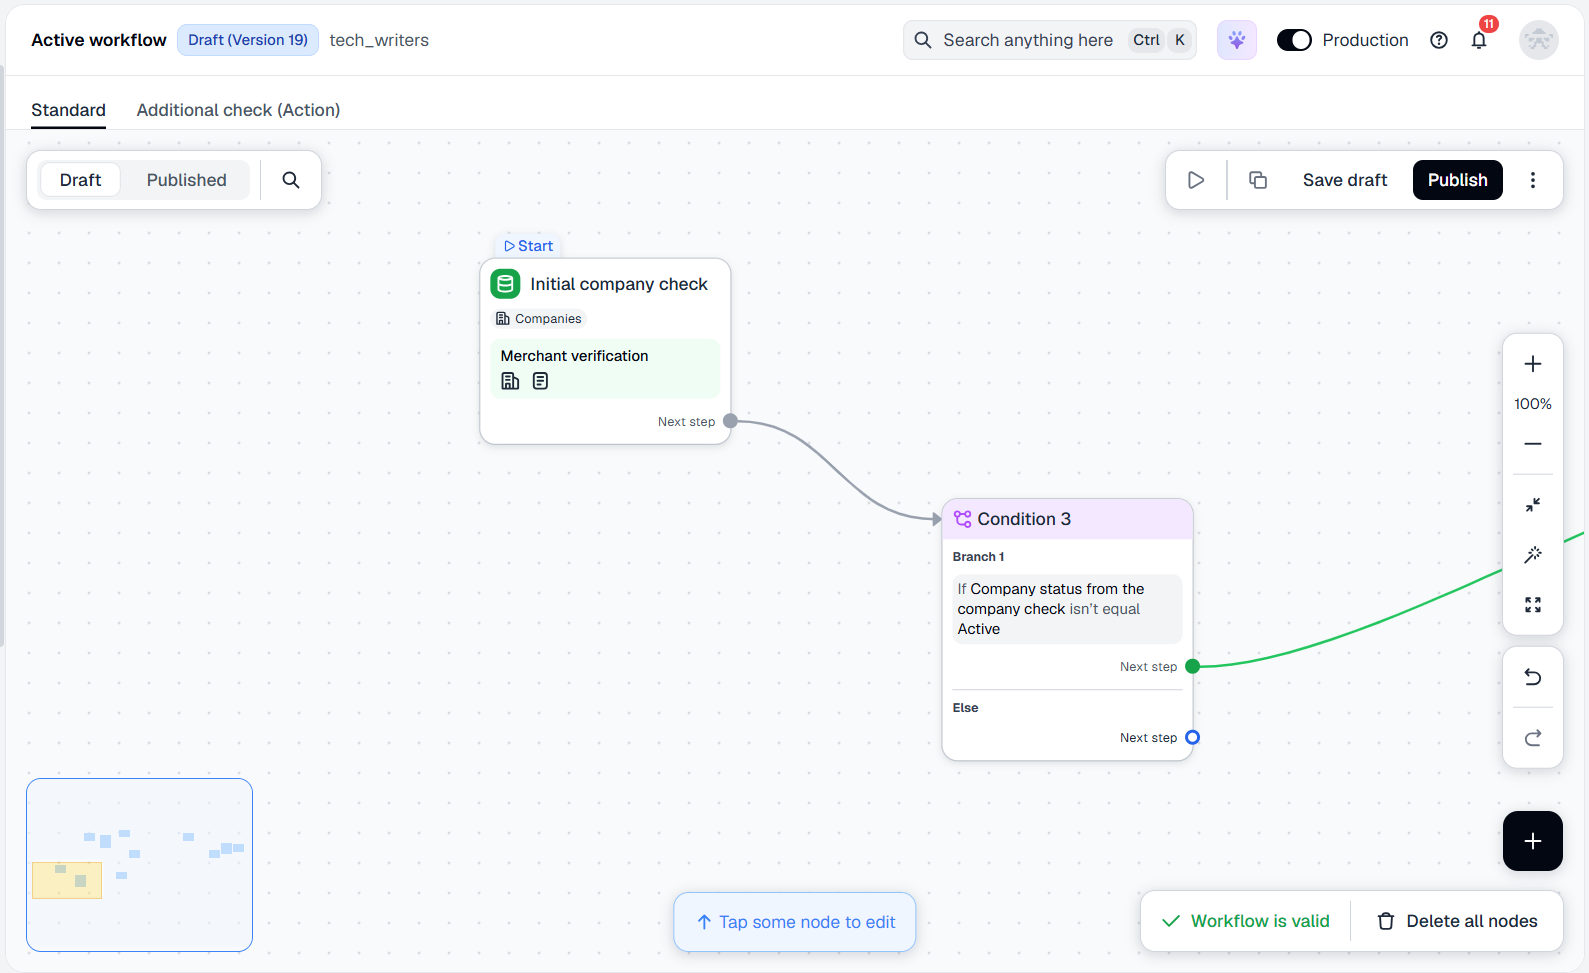
Adjust the verification flow so inactive companies are assigned tags and rejected. Set up the condition:
- Click on the initial node created earlier and select Condition as the next step.
- Select the If logical operator.
- From the Field drop-down list, select the
checks.company.info.statusparameter. - Set the logical condition to isn’t equal and specify Active as the value below.
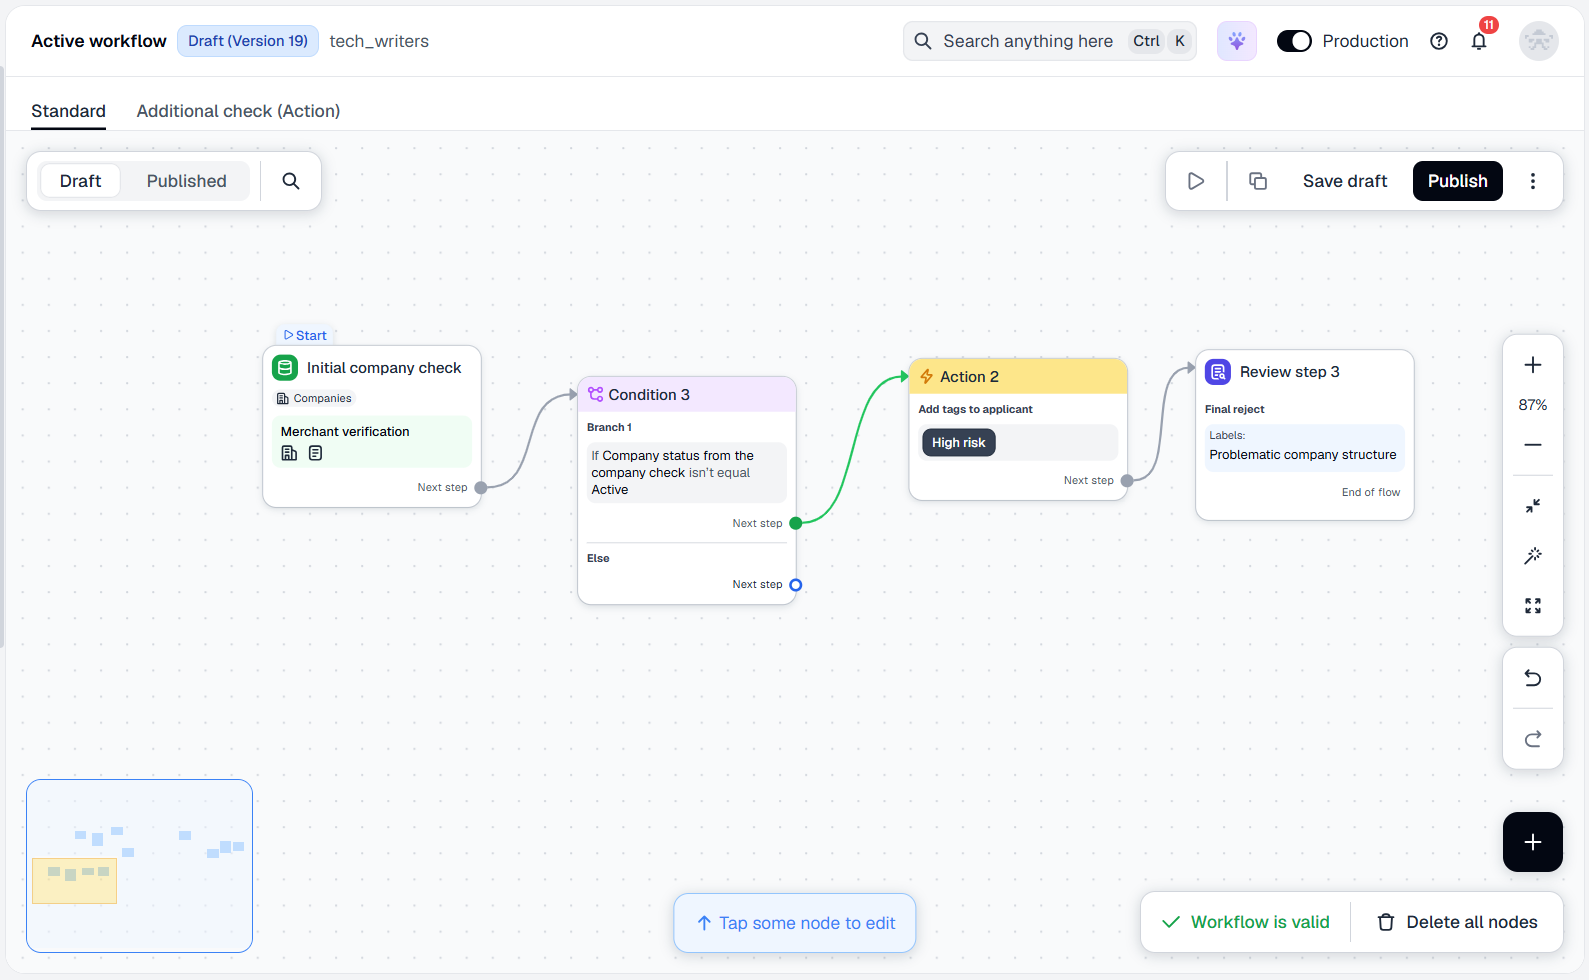
Configure the rejection path:
- Within the added Condition node, select Action as the next step.
- Select the type of action: Manage tags.
- Select the Add tags checkbox.
- From the drop-down list below, choose the required tags to assign.
- Click Choose next step and select Review step.
- In the Review step configuration, identify the type of terminal step: select Final reject.
- Specify reasons or add labels to explain the decision.
Step 4. Add beneficiaries verification
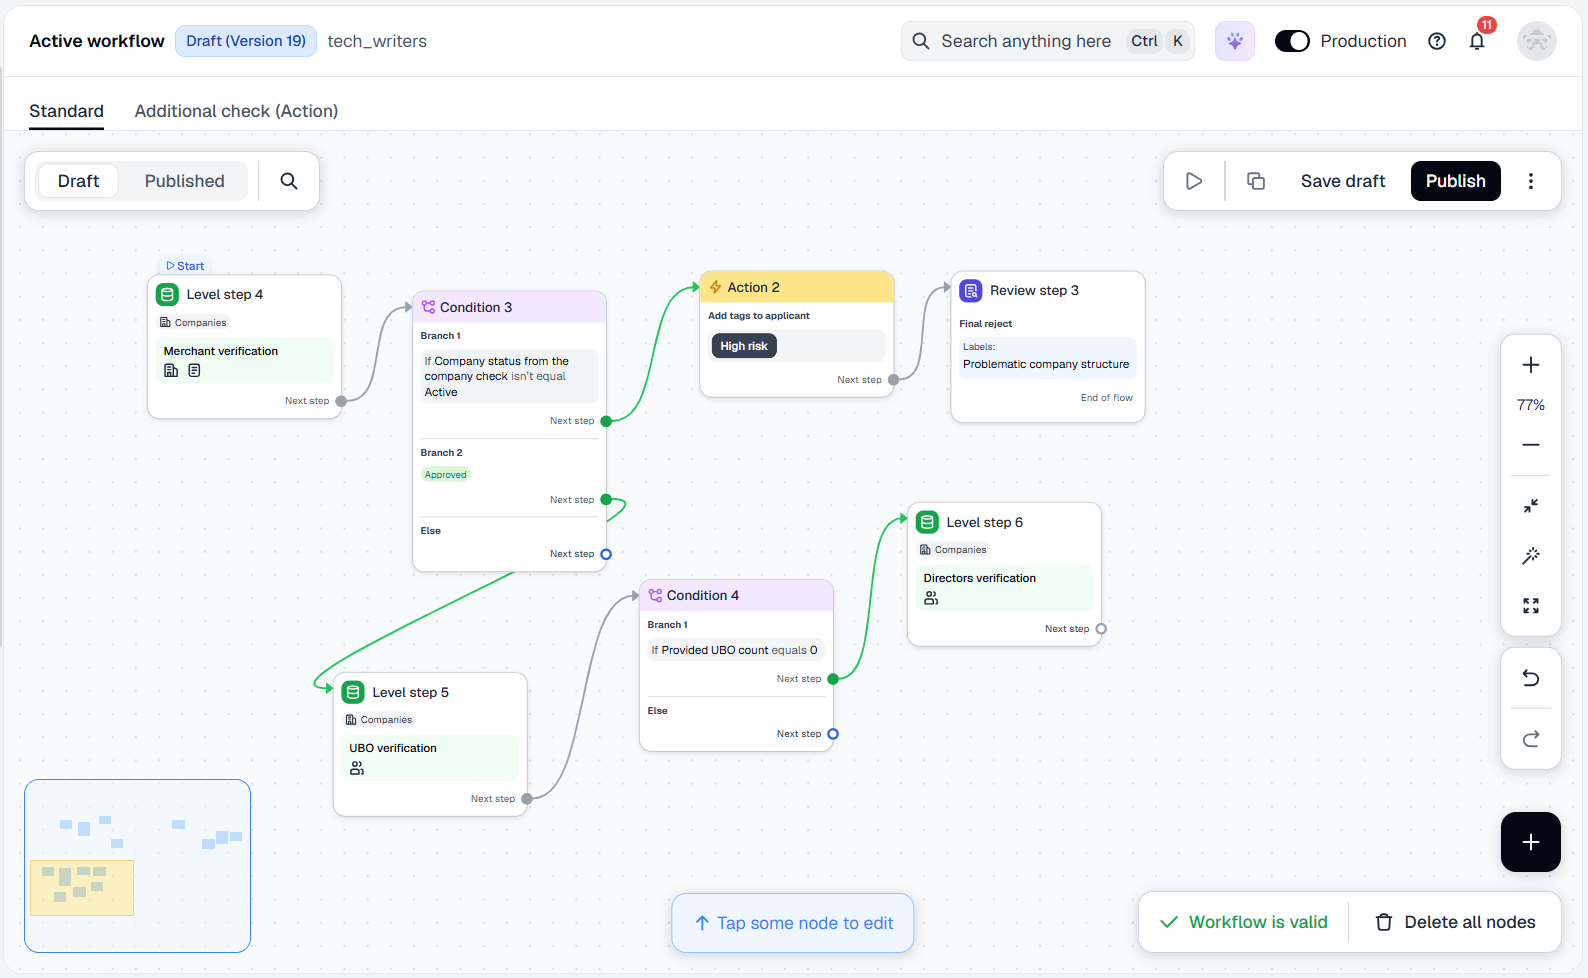
Place a sequence of nodes that covers UBOs and Directors verification (if applicable).
Set up the UBO verification flow:
- Go back to the previously configured Condition node and add another branch to route applicants who successfully pass the initial merchant verification to the next step.
- Within the branch, select the Review decision option: approved.
- Click Choose next step and add the Level step node.
- Within the added Level step node, select the UBO verification level.
Configure the Directors verification flow:
- Within the Level step node with the UBO verification level, select Condition as the next step.
- Configure the Condition node:
- Select the If logical operator.
- From the Field drop-down list, select the
applicant.fixedInfo.companyInfo.beneficiaryStats.counts.ubosparameter. - Set the logical condition to equals and specify
0as the value below. - Add the next step within the current condition branch: Level step.
- In the added Level step node, select the Directors verification level from the list.
Step 5. Add manual review
Set up manual review for cases when no information on company directors has been provided.
Configure manual review:
- Within the Level step node with the Directors verification level, select Condition as the next step.
- Set up the Condition step:
- Select the If logical operator.
- From the Field drop-down list, select the
applicant.fixedInfo.companyInfo.beneficiaryStats.counts.directorsparameter. - Set the logical condition to equals and specify
0as the value below. - Add the next step within the current condition branch: Review step.
- Adjust the Review step settings: set the type to Manual review.
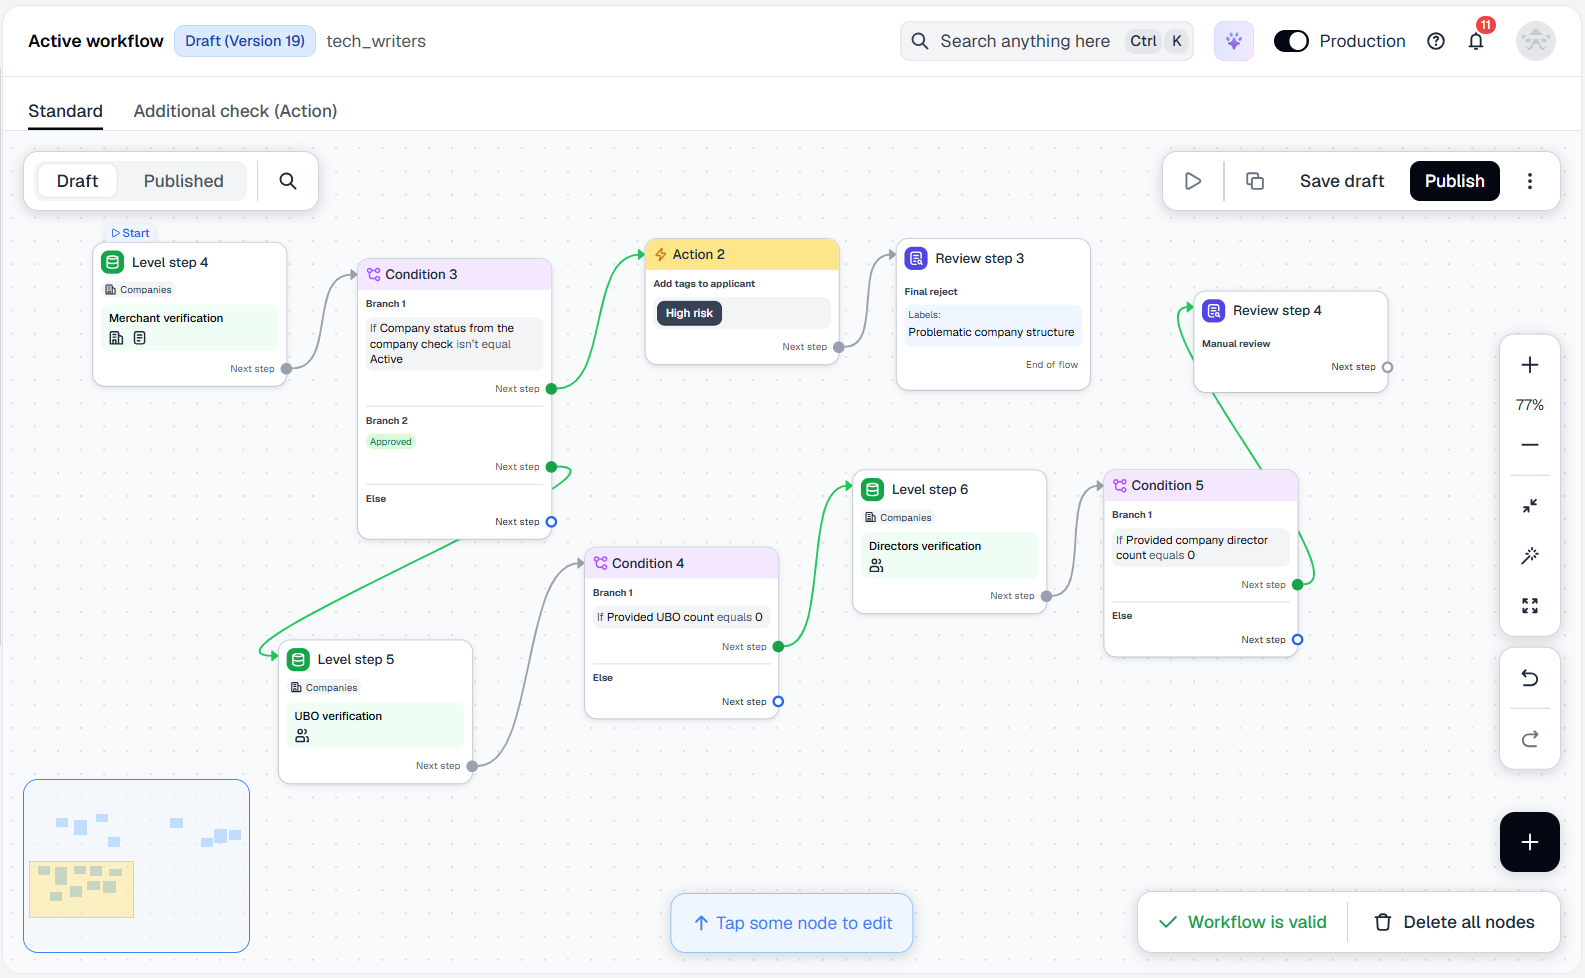
Step 6. Start using flow
Once the flow is created and configured, you can save the draft, perform test verification, and publish the flow to run the checks:
- Save the draft and experiment with your flow — create copies and conduct tests.
- Publish the flow to go live once the flow configuration is tested.
Step 7. Receive verification results
Get verification results via the webhooks or view them in applicant profiles.
With this flow in place, merchant verification runs automatically: a pass means a reliable counterparty, while a reject or manual review comes with clear reasons and labels to guide your next steps.
Updated 26 days ago