Handle applicants based on their IP address
Create verification flows to manage applicant profiles based on their IP address.
By using Workflow Builder and Client lists with IP addresses, you can design a seamless process that considers Advanced IP check results and determines the next steps accordingly.
The main use cases for an IP-based flow are:
- Building a whitelisting flow. Ignore risk labels for specific IP addresses and assign appropriate tags to applicant profiles.
- Managing risky IP addresses. Send certain profiles for manual review or require additional verification if their IP addresses are on your list of suspicious ones.
- Rejecting applicants automatically. Decline applicant profiles if their IP addresses are on your client list of risky addresses.
How we detect IP address
The IP address of the applicant’s device is extracted during the Advanced IP check along with other data like location, Internet provider, risk level, VPN, connection type, and so on.
The check includes the following steps:
- An applicant starts verification, and their IP address is detected and monitored during the verification process.
- The system checks the data and returns the result as labels.
Build verification flow to manage applicants based on their IP address
To manage applicant profiles based on their IP data, you need to create a verification level, configure its settings, add a client list with IP ranges, and design the flow using Workflow Builder.
For example, let's create a Workflow Builder flow that updates tags for applicant profiles with specific IP addresses and adds extra checks for another group whose IP addresses are considered risky.
Step 1. Create verification level
Add a verification level including an Advanced IP check:
- Create a verification level and add verification steps.
- Configure the level settings and save it.
- Enable the Advanced IP check — on the Configurations tab of the verification level settings, open the Fraud prevention section, and enable the IP insights checkbox.
Step 2. Create client list with IP Ranges
Add a new client list with the IP Ranges entry type to include IP addresses that will trigger further actions within the flow:
- In the Dashboard, go to the Client lists page.
- Provide a list title and optional description.
- Select the IP Ranges entry type.
- Set the Custom list type.
- Click Create.
- Add applicant IP addresses in the CIDR format and save the changes.
Depending on the case, you may need to create one or few separate client lists to cover scenarios involving tag changes and the assignment of extra checks.
Step 3. Go to Workflow Builder and add initial node
Start building a verification flow by adding the initial node to the Workflow Builder canvas:
- In the Dashboard, go to Workflow builder and select Active workflow.
- Navigate to the Standard Workflow tab and go to the Draft view.
- Add a level step to the canvas.
- From the Level name drop-down list, select the configured verification level.
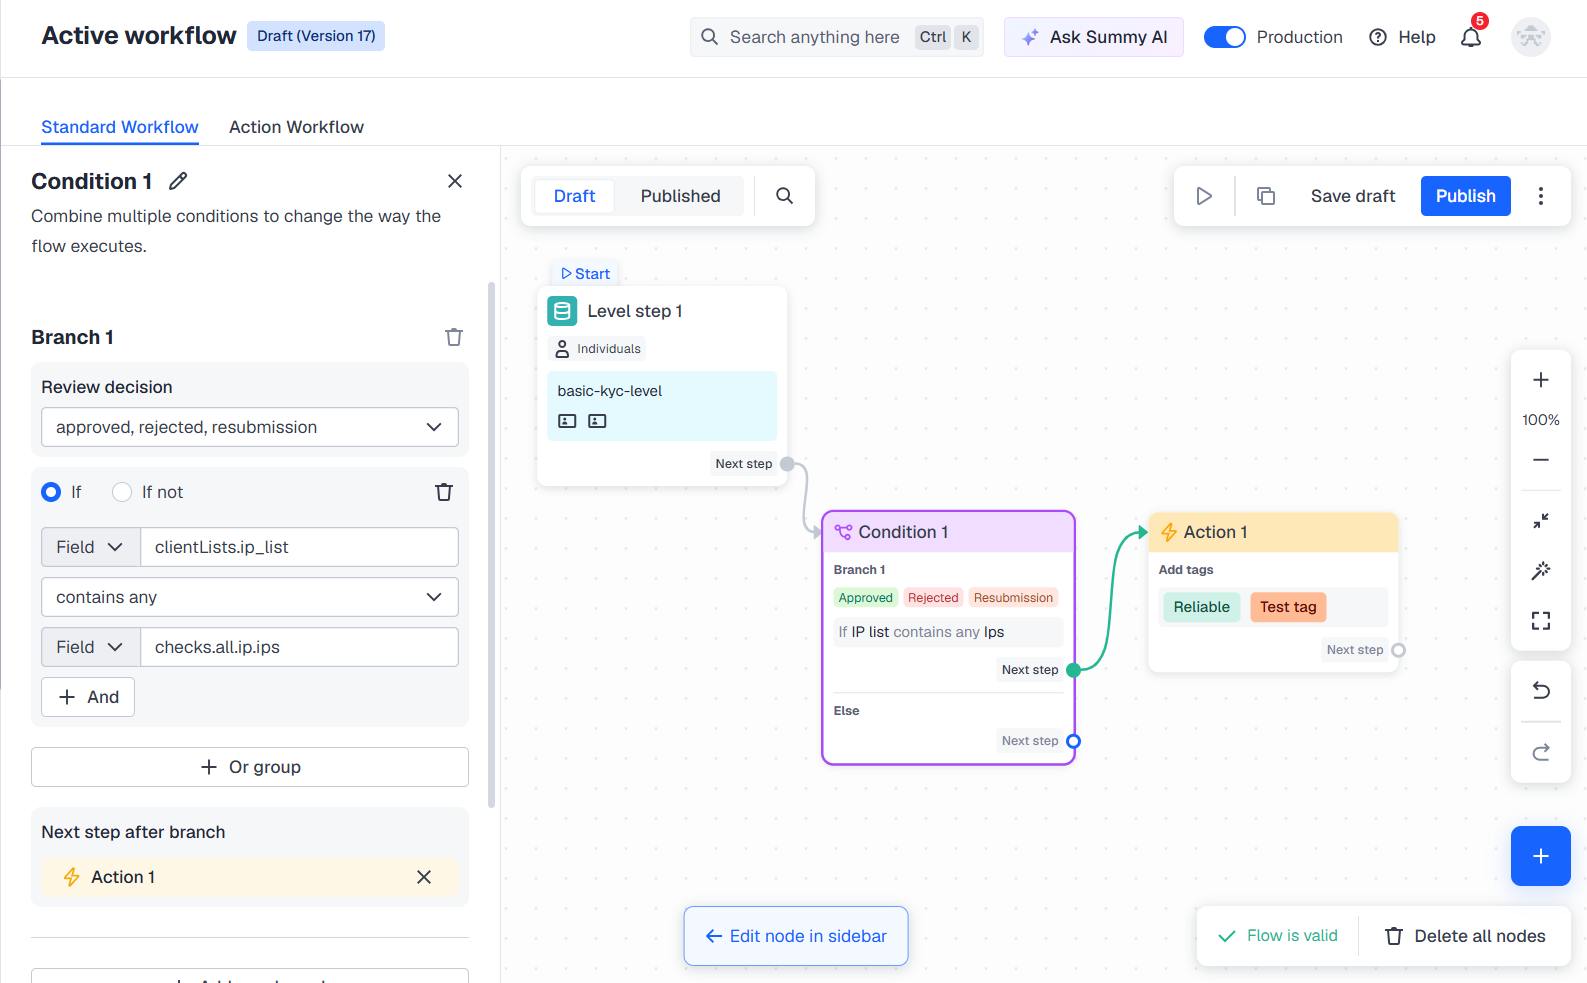
Step 4. Configure nodes to add tags
Add a verification flow branch that will add particular tags to applicant profiles if their IP address is on the list. For instance, you can use this for whitelisting specific IP addresses by changing the tags:
- Click on the initial node created earlier and select Condition as the next step.
- Configure the condition branch:
- Set Review decision—rejected, resubmission, approved.
- Select the If logical operator.
- Identify the name of the created client list. In the Field drop-down—enter the name in the following format:
client.Lists.your_name. - Set a logical condition—select contains any.
- From the second Field drop-down list, select the
checks.all.ip.ipsparameter.
- Within the created condition branch, click Choose next step and select Action.
- Configure the Action node:
- Set the type of action—Add/Remove tags.
- From the Value drop-down list, select the tags.
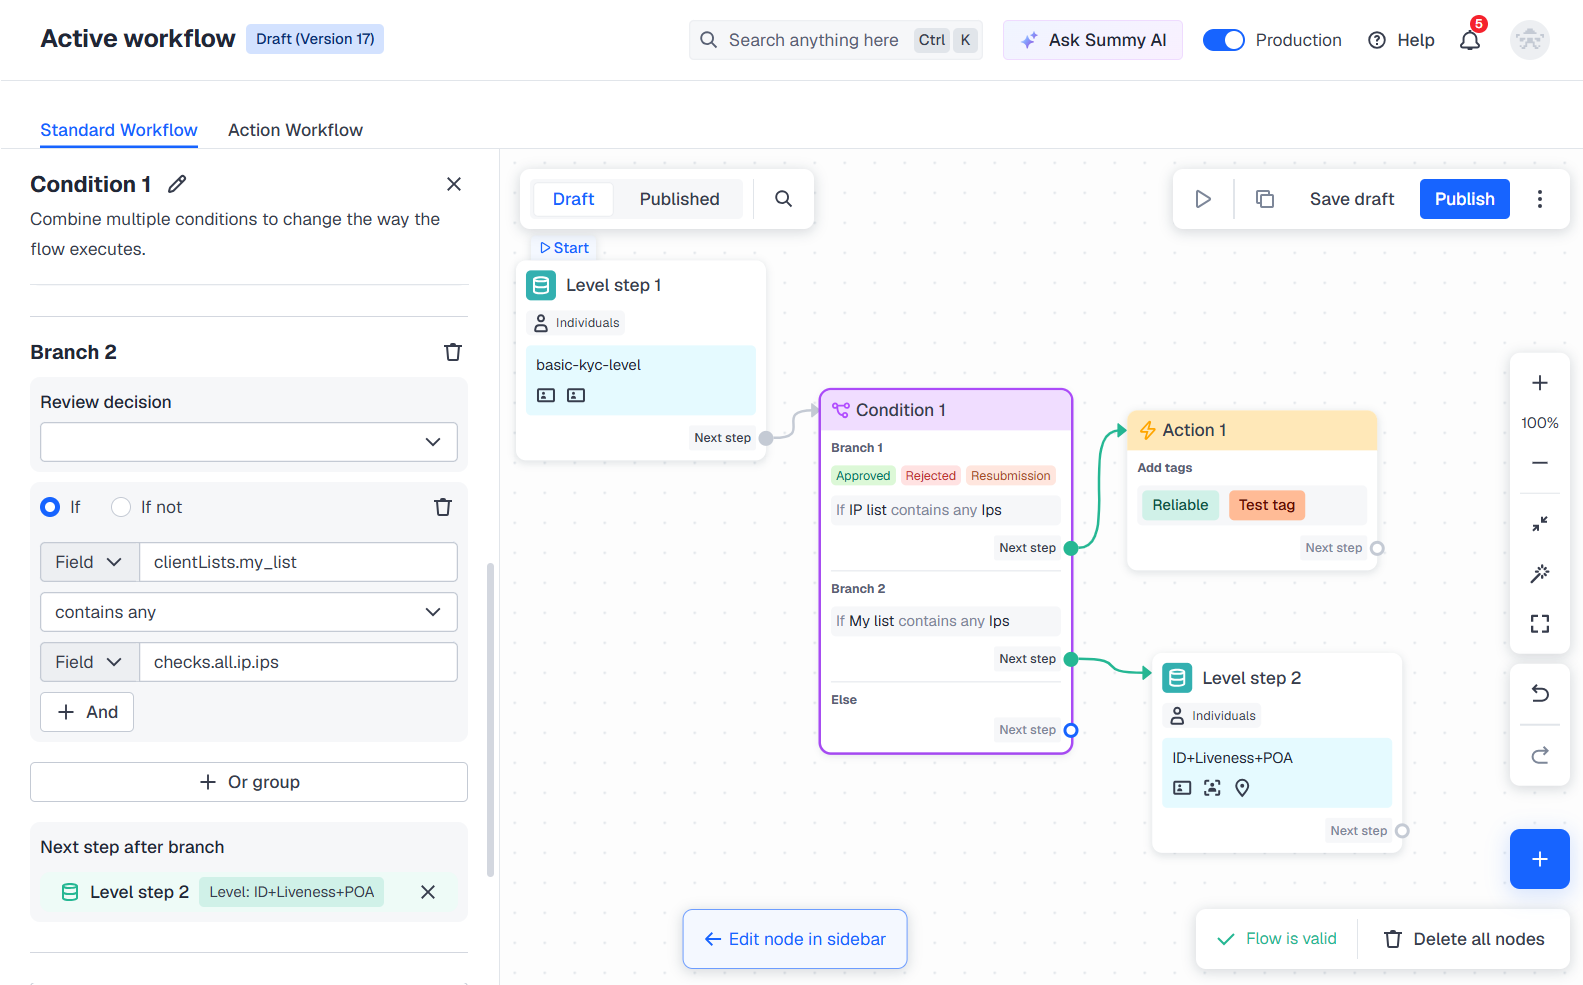
Step 5. Include additional checks
In addition to the tags, you can include additional checks for the profiles that have suspicious IP addresses mentioned in another one of your client lists:
- Go back to the condition node and add a new branch.
- Configure the condition branch:
- Set Review decision—rejected, resubmission, approved.
- Select the If logical operator.
- Identify the name of the created client list. In the Field drop-down—enter the name in the following format:
client.Lists.your_name. - Set a logical condition—select contains any.
- From the second Field drop-down list, select the
checks.all.ip.ipsparameter.
- Within the created condition branch, click Choose next step and select Level step.
- From the Level name drop-down list, select the verification level.
Step 6. Start using flow
Once the flow is created and configured, you can save the draft, perform test verification, and publish the flow to run the checks:
- Save the draft and experiment with your flow — create copies and conduct tests.
- Publish the flow to go live once the flow configuration is tested.
Step 7. Receive verification results
Get verification results via the webhooks or view them in applicant profiles.
Updated 4 months ago