Submit transactions and review results
Detect all suspicious transaction activities with one solution.
You can submit transactions in any of the following ways:
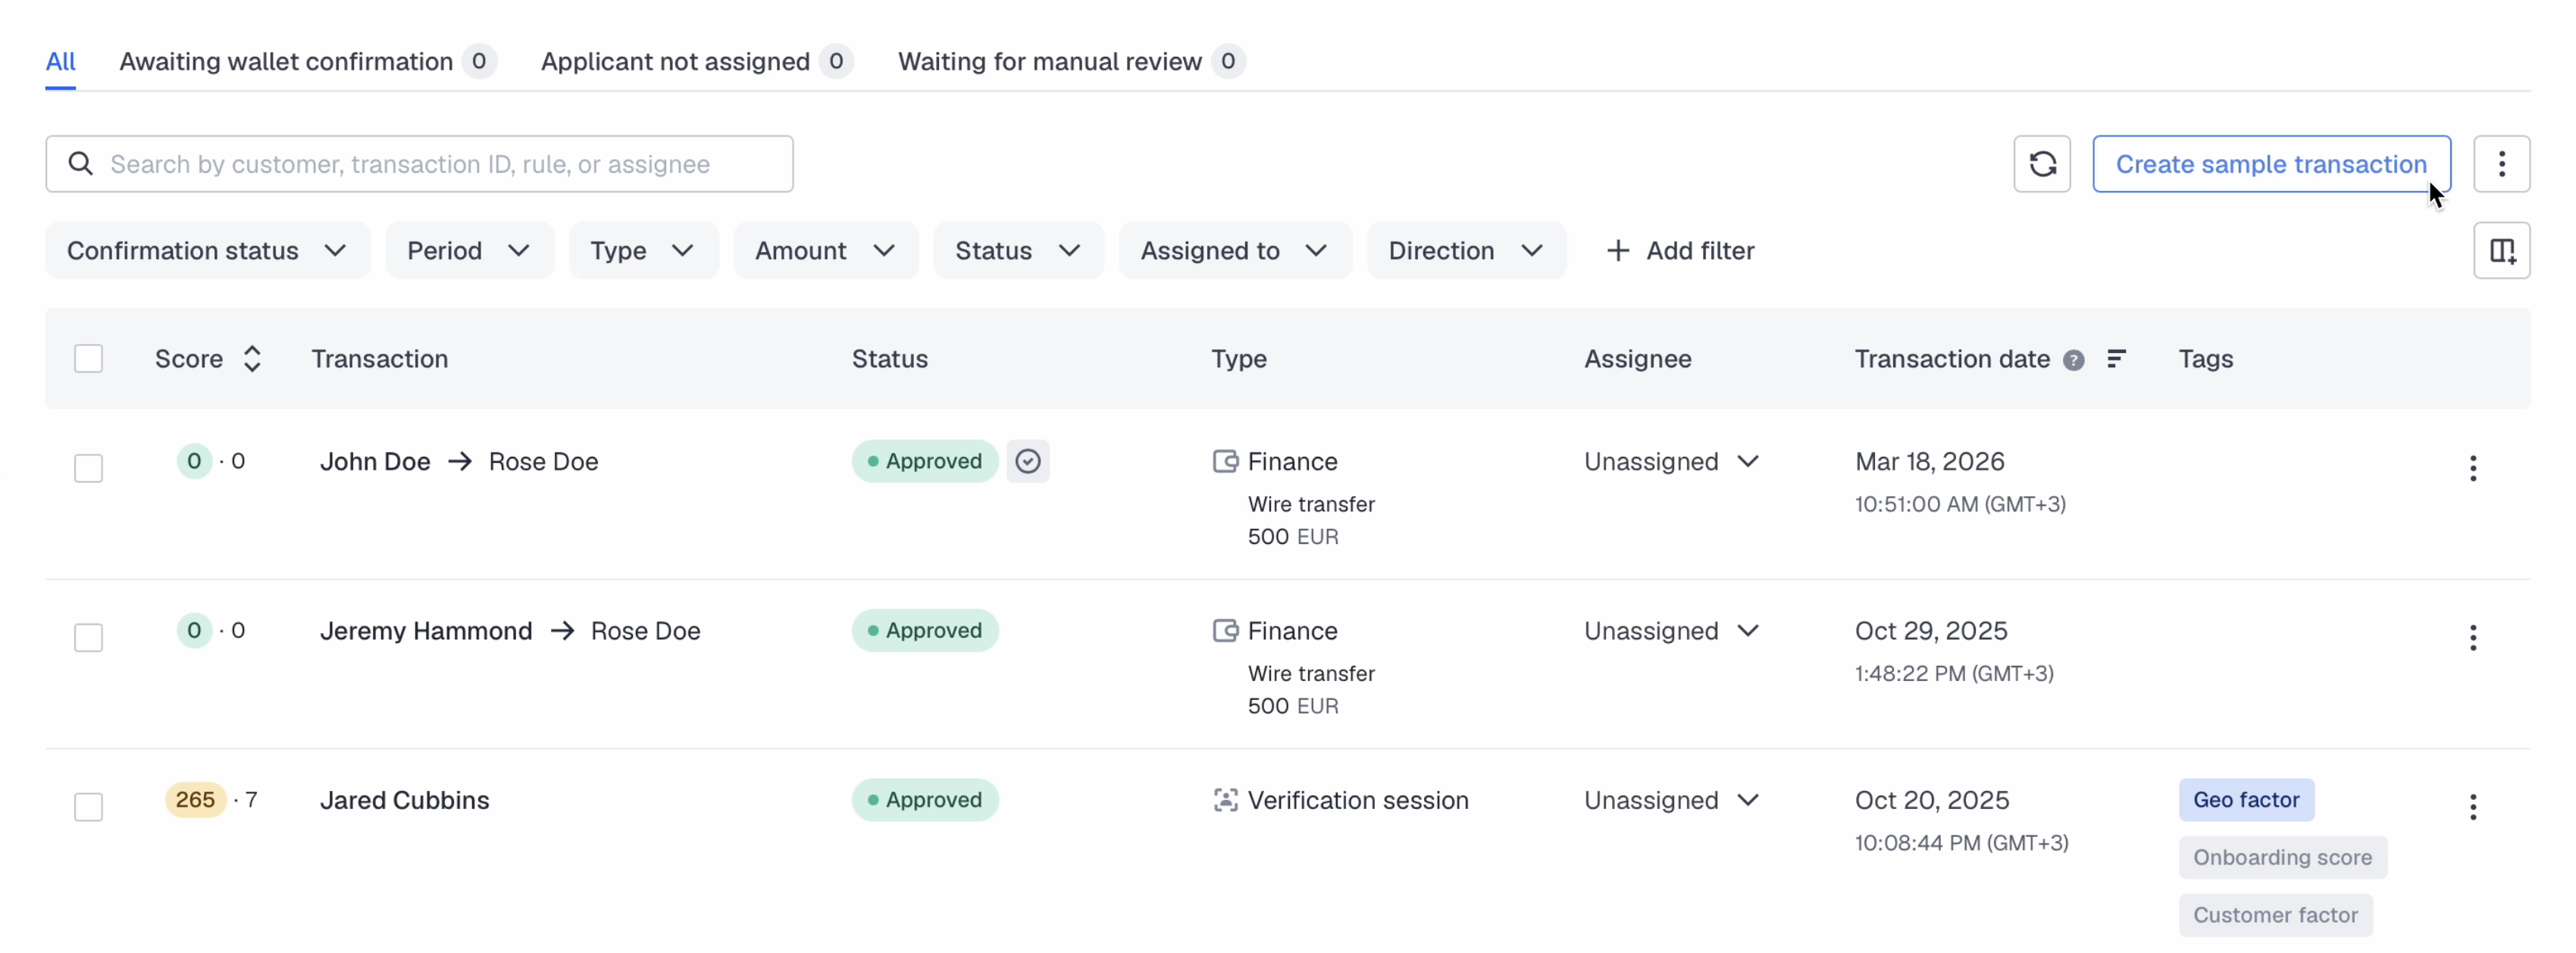
Once the transaction is submitted and processed, you can find it on the Transactions page.
Each transaction comprises monitoring results that may vary, depending on the transaction and applicant type. In the transaction body, you will also see the list of matched rules.
To manage transactions, use Case management.
Submit transactions via API
To submit transactions via the Sumsub API, use the following methods:
- Submit transactions individually
- Submit transactions for non-existing applicants
- Bulk transaction import
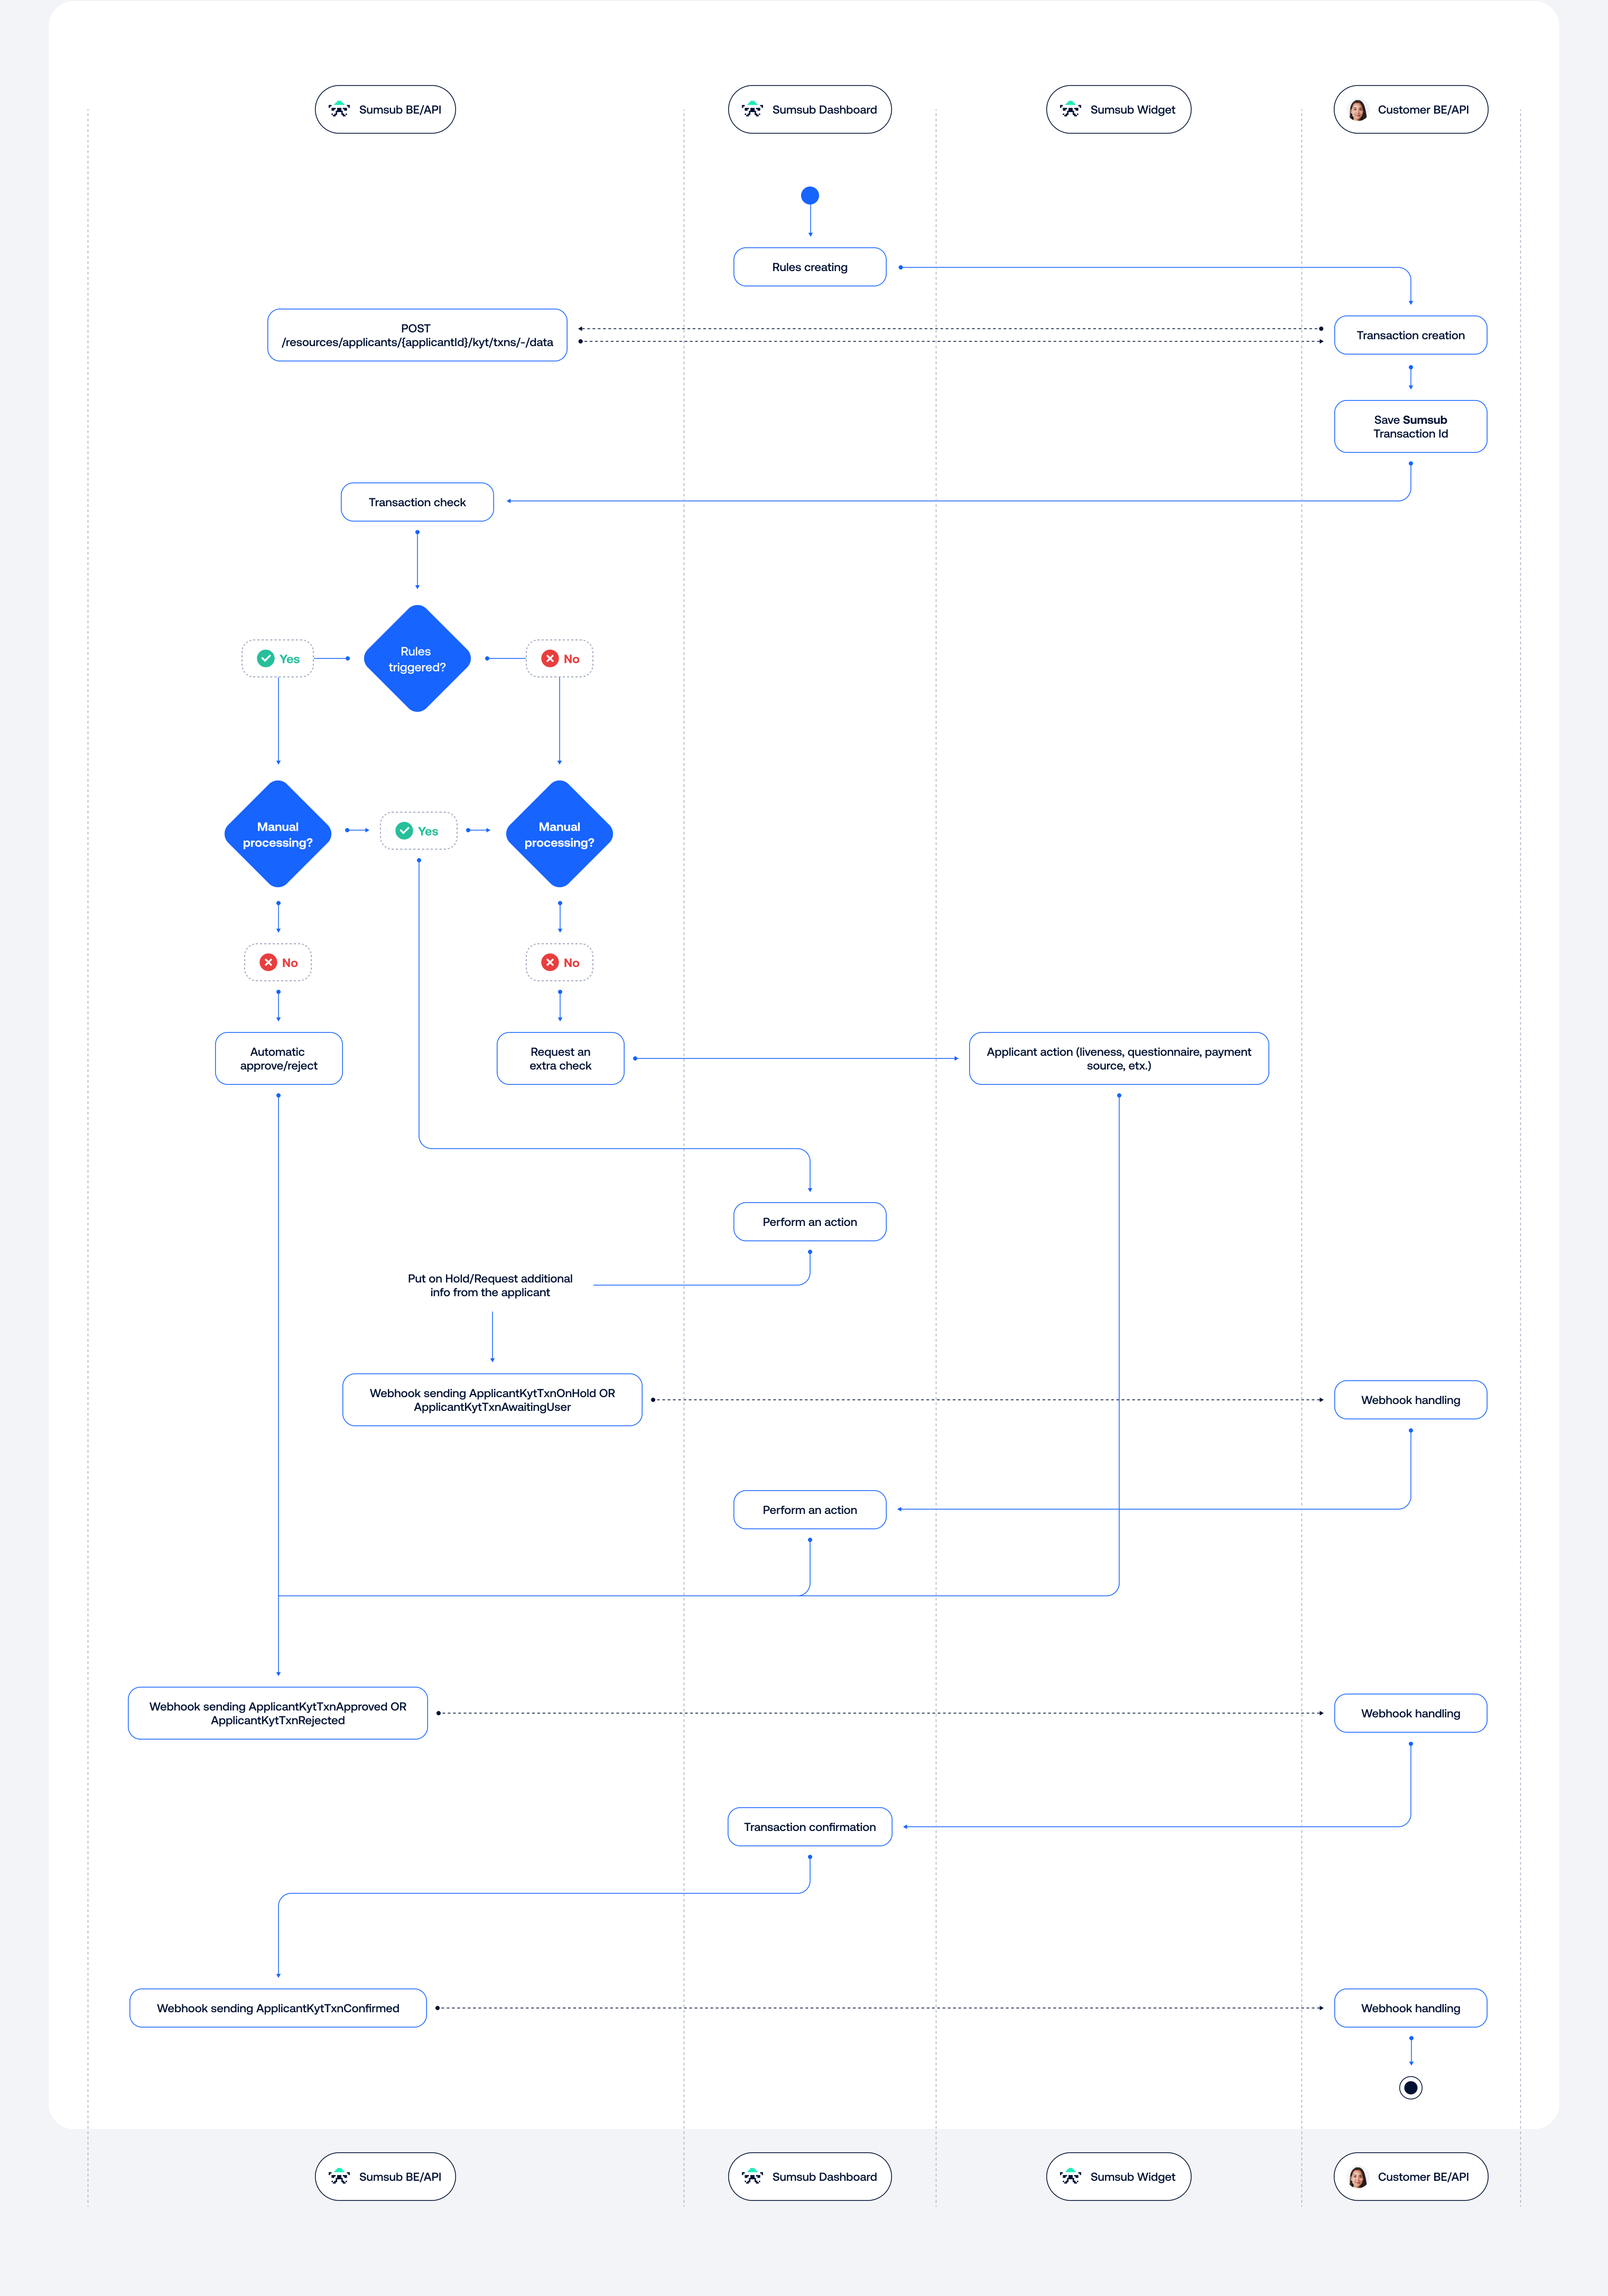
Default TM integration flow
Create transactions in the Dashboard
To create transactions in the Dashboard:
-
Open the Transactions page and click Create sample transaction.
-
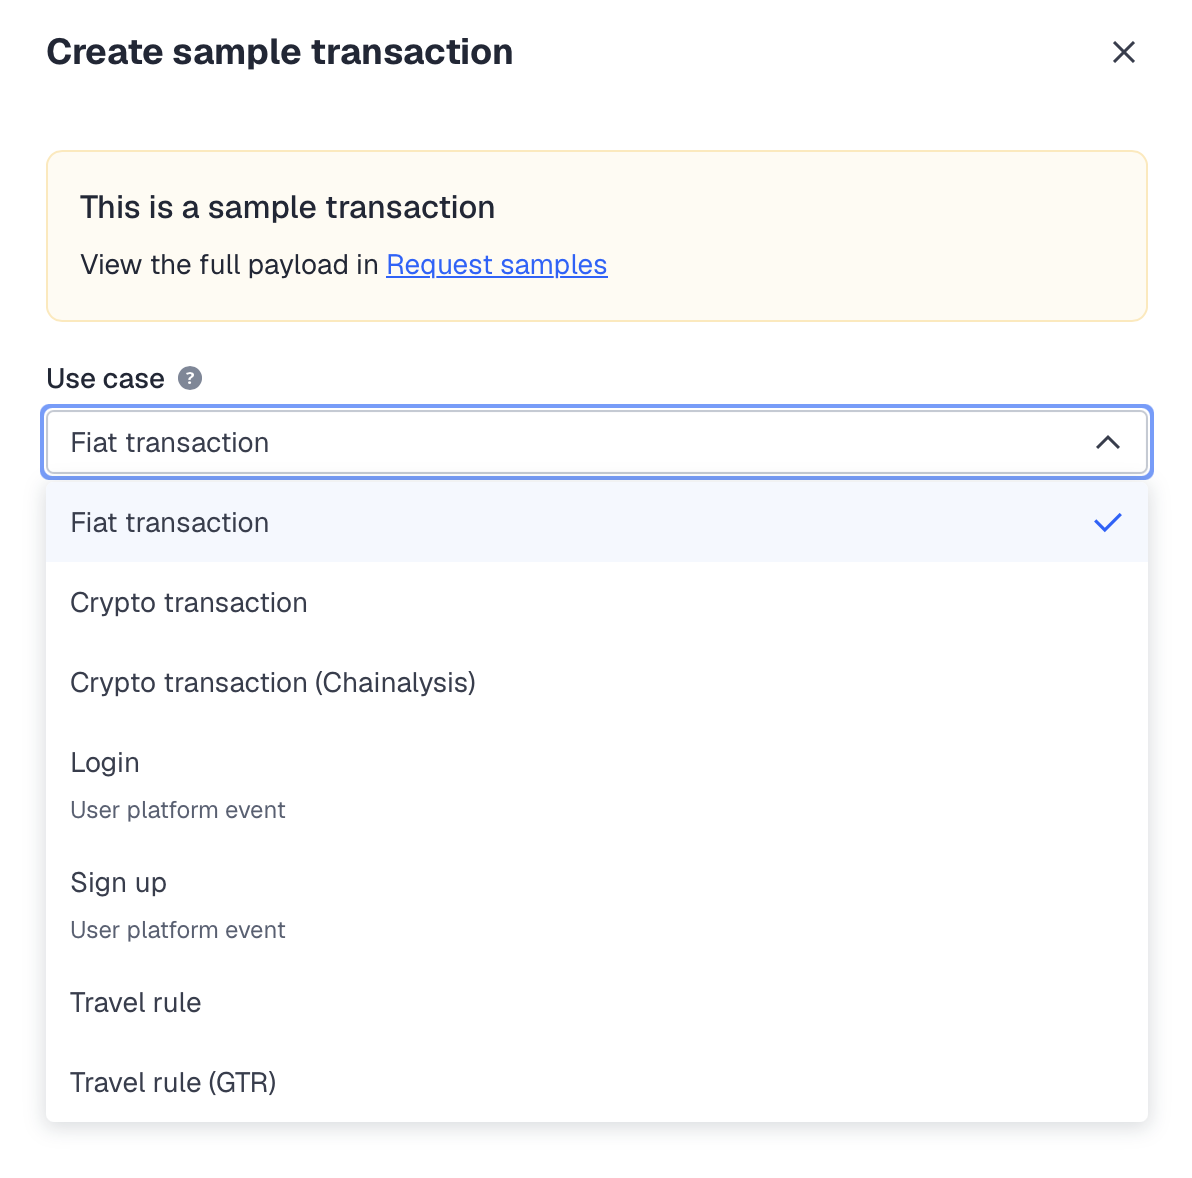
From the Use case drop-down list, select a transaction type:
- Fiat — foreign currency transactions.
- Crypto transaction — cryptocurrency transfers.
-
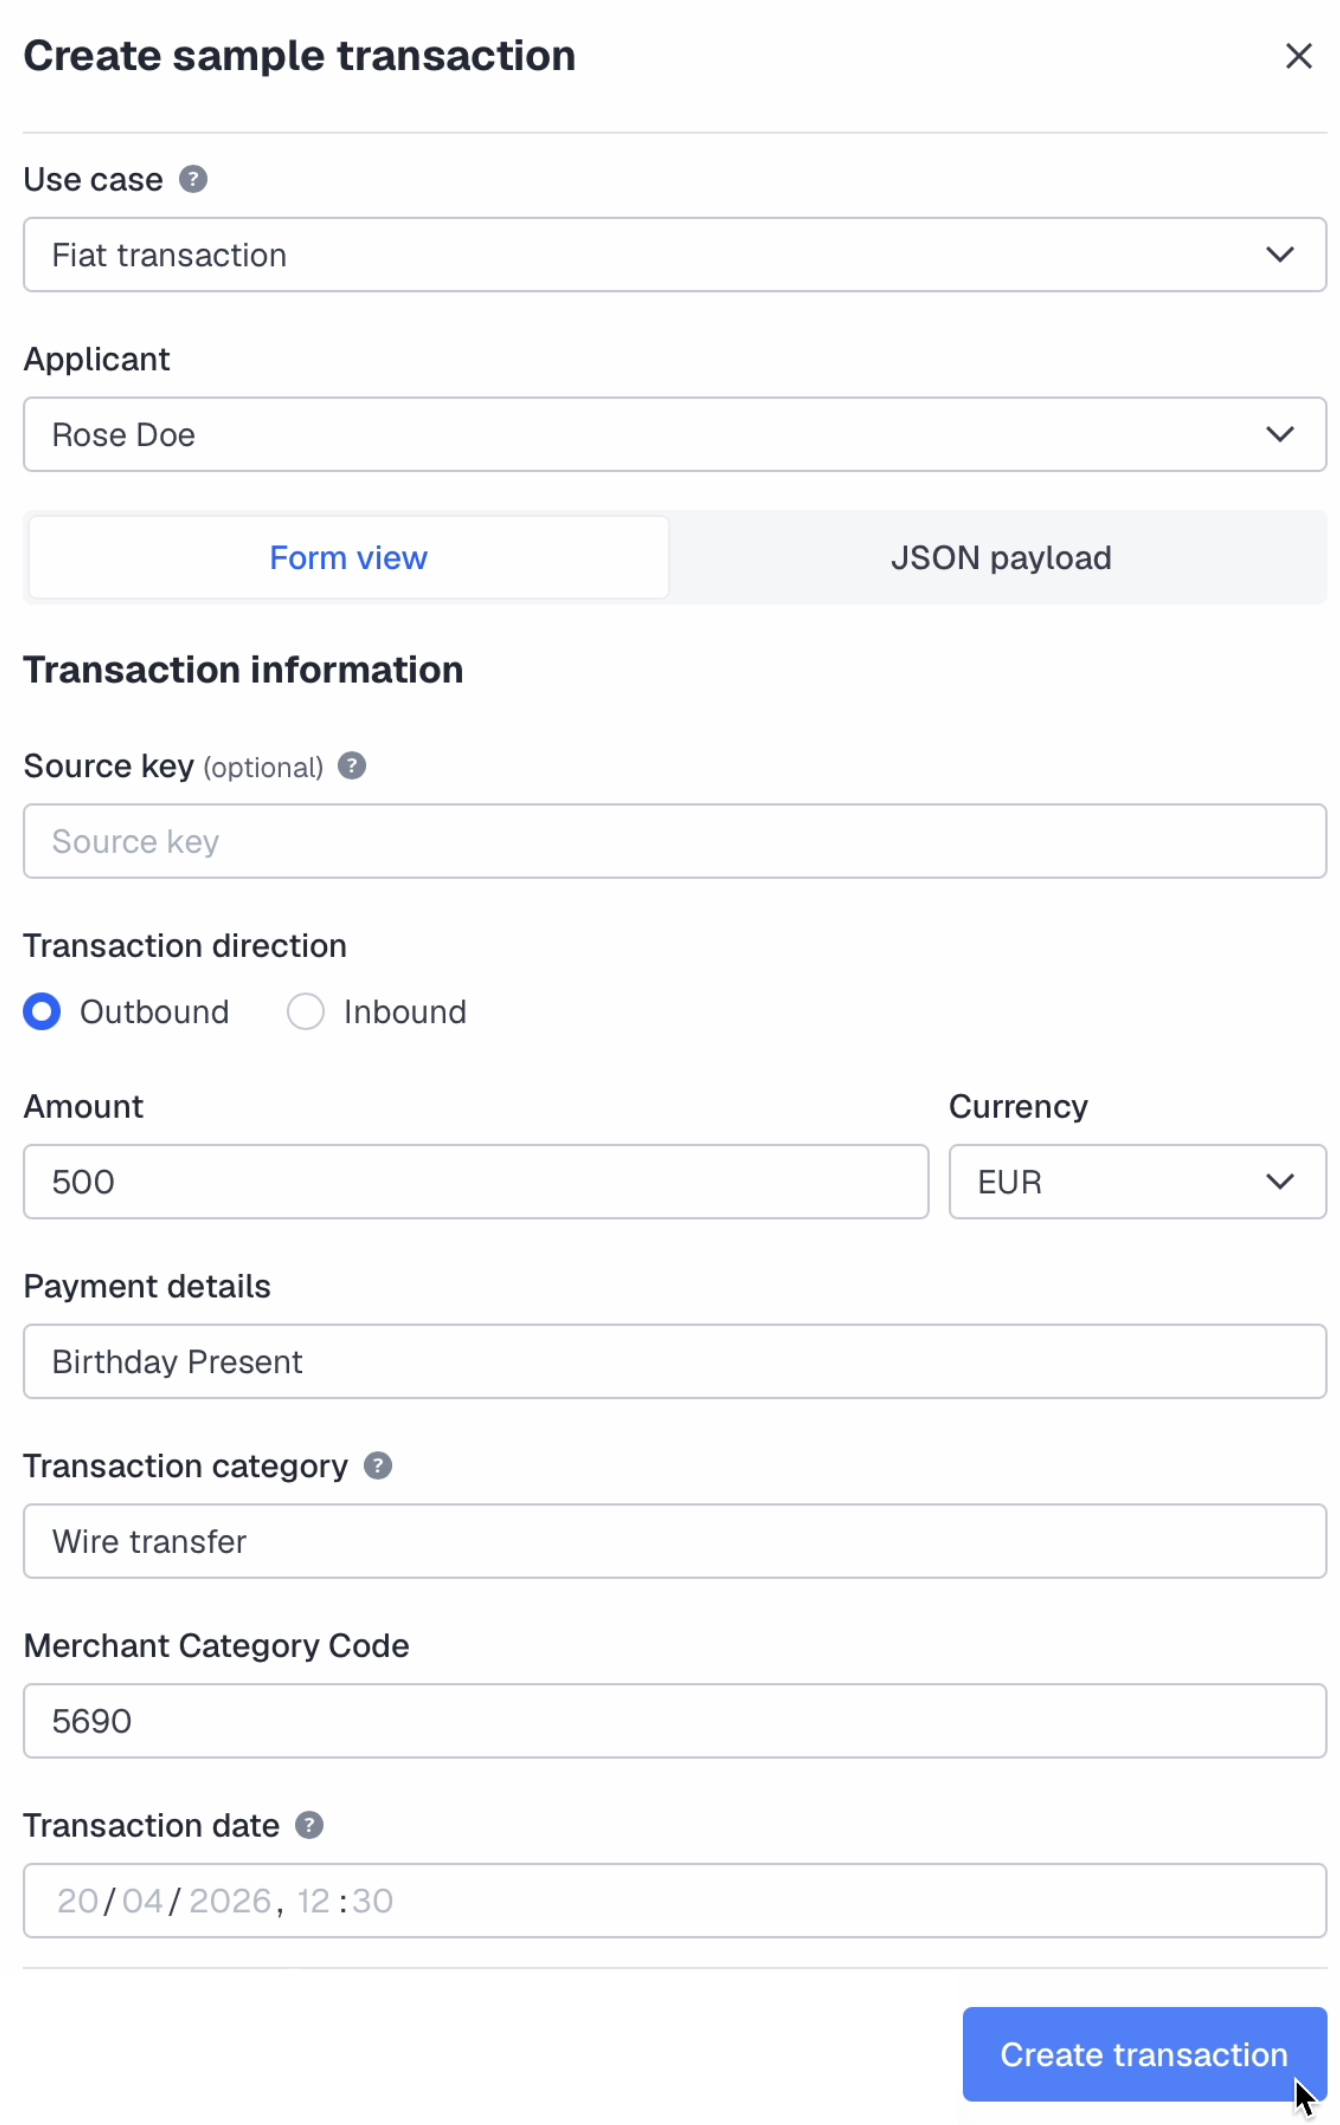
From the Applicant drop-down list, select the applicant on behalf of whom you want to produce the transaction.
-
Select whether the transaction is inbound or outbound (for Fiat and Crypto transactions only).
-
Enter the transaction information based on the transaction type:
- Fiat — amount, currency, payment details (the purpose of payment), beneficiary full name and external user ID, and the transaction date (custom or current).
- Crypto transaction — amount, asset (cryptocurrency), payment details (the purpose of payment), blockchain TXID, sender full name, external user ID, applicant wallet address, and the transaction date (custom or current).
-
Set the custom transaction date by selecting the associated checkbox if necessary.
-
Click Create transaction.
In addition to the UI wizard, you can submit transactions in JSON on the JSON payload tab.
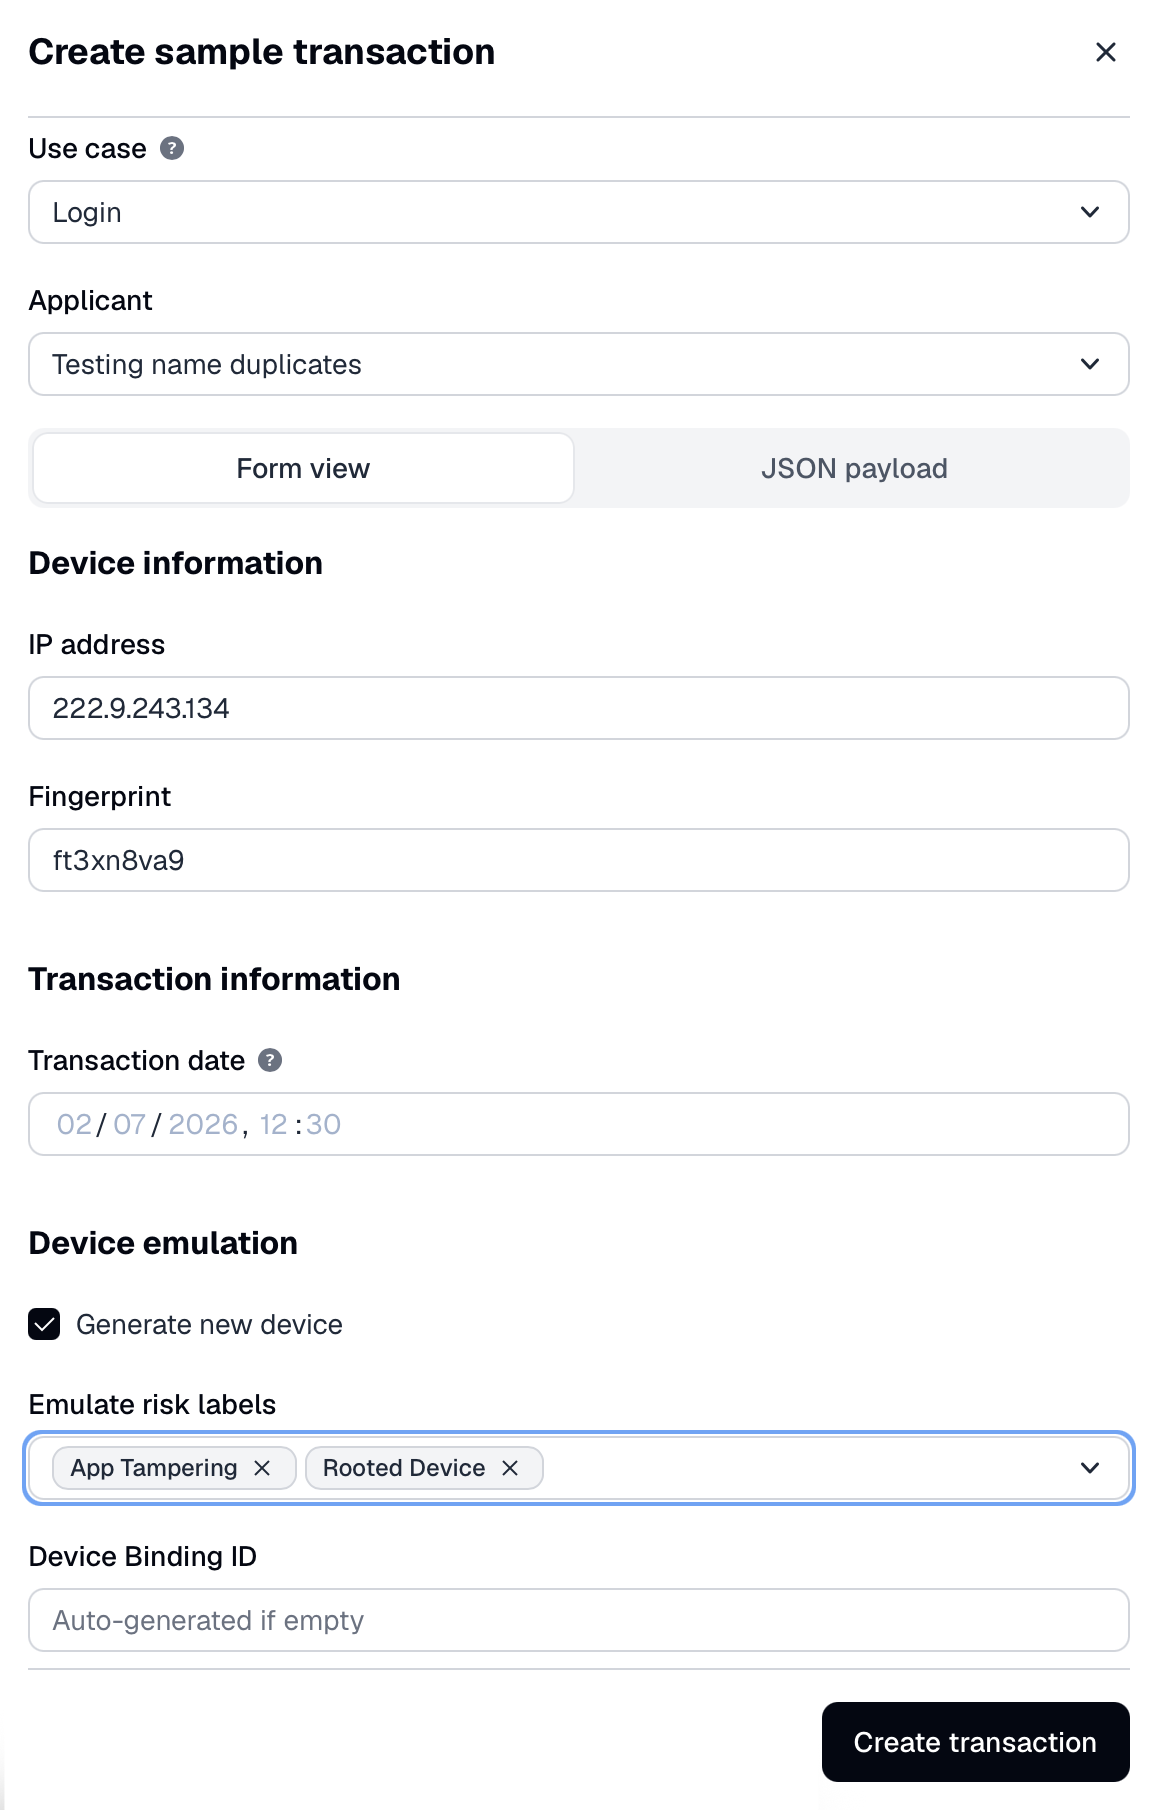
Device emulation
When creating a sample transaction in the Dashboard, you can emulate a device and apply different risk labels to test device-related outcomes. Device emulation is available for the following use cases: Fiat, Crypto, Login, and Sign up.
To emulate a device for a sample transaction:
- In the Dashboard, go to Transactions and Travel Rule → Transactions.
- Click Create sample transaction.
- From the Use case drop-down list, select one of the supported use cases: Fiat, Crypto, Login, or Sign up.
- Fill in the required transaction details.
- Scroll down to the Device emulation section and select the Generate new device checkbox.
- Select the required risk label to emulate the corresponding device-related risk outcome.
- Click Create transaction.
Upload transactions in bulk
You can upload up to 1000 transactions in bulk using the Newline Delimited JSON format (ndjson).
Bulk upload available upon request. To extend the default upload limit, reach out to your Customer Success Manager or Support team.
To upload transactions:
- Go to the Transactions page.
- From the menu, select Upload transactions.
- Select the Score saved transactions checkbox if you want your transactions to be scored.
- Upload a valid ndjson file.
- Click Upload.
You can use the following templates as a reference:
Explore transaction statuses
During the transaction processing, the system assigns various statuses depending on the stage and result of the verification. The following table outlines the possible transaction statuses and their descriptions.
Dashboard status | Description |
|---|---|
Approved | Transaction successfully passed all checks and was approved. |
Rejected | Transaction triggered one of the rules, which caused the transaction to be rejected, or it was rejected manually. |
Requires action | Τransaction triggered a rule that requires manual review, and is now waiting for your approval or rejection. |
Awaiting user | Transaction triggered a rule that requested additional documents from the applicant and is now waiting for them to be uploaded. |
Pending | Transaction has been stored and is waiting in the processing queue for pre-scoring steps, such as data retrieval from external services. |
Not scored | Transaction was either imported without scoring (for example, to include previous transactions in aggregate calculations without rescoring each one), or scoring failed to complete due to an issue. You can score it manually or leave it with this status. |
View transaction events
Events log any activities on transaction status change. Every time a transaction receives a new status, such an event is saved for future references.
To see the events, in the Dashboard, open the Events page. Also, each transaction event belonging to the applicant is automatically logged in the applicant profile on the Transactions -> Events tab.
Updated 12 days ago