Combine non-document and standard verification via Workflow Builder
Boost your conversion rates and decrease the number of failed verifications with Workflow Builder.
At Sumsub, we have a few complex identity verification solutions that can be easily combined within one verification flow—a standard documentary identity verification and Non-Doc Verification, which is a document-free approach.
Why do you need to combine Non-Doc and standard verification
Combination of two verification methods in one flow allows you to secure your entire verification process in case something goes wrong during the checks:
- Technical issues on the Non-Document verification source’s side—the government databases might not be available to retrieve and validate the data for a certain period of time.
- Unexpected errors due to the incorrectly provided data—applicants may make spelling errors while entering their personal data.
Therefore, if an applicant fails the Non-Doc Verification, they can be sent to the basic-kyc-verification level, so they could attempt verification for one more time by providing the required documents.
Create versatile verification flow
Add a verification flow that combines two verification types to maintain the highest conversion rate and make verification more user-friendly for your applicants.
Step 1. Create verification levels
Create and configure verification levels to be added to the Workflow Builder’s canvas. In this case, you will need to create two different verification levels—the non-doc and documentary-based ones.
- Add a non-doc verification level:
- Create a verification level including the Non-doc verification step.
- Configure the level settings and save them.
- Add a standard verification level:
- Create another verification level and add any steps that your applicants will be asked to complete. These may include proving their identity with a passport or ID card, or providing proof of address, applicant data, and so on.
- Configure the level settings and save your changes.
Step 2. Add initial node to Workflow builder
Once all the levels are created, go to Workflow Builder and start working on the flow:
- In the Dashboard, go to Workflow builder and select Active workflow.
- Navigate to the Standard Workflow tab and go to the Draft view.
- Add a level step to the canvas.
- From the Level name drop-down list, select the Non-Doc verification level you have created before.
Step 3. Include alternative verification step
To provide the ability to proceed with standard verification, configure the Condition node and add one more verification level to the flow:
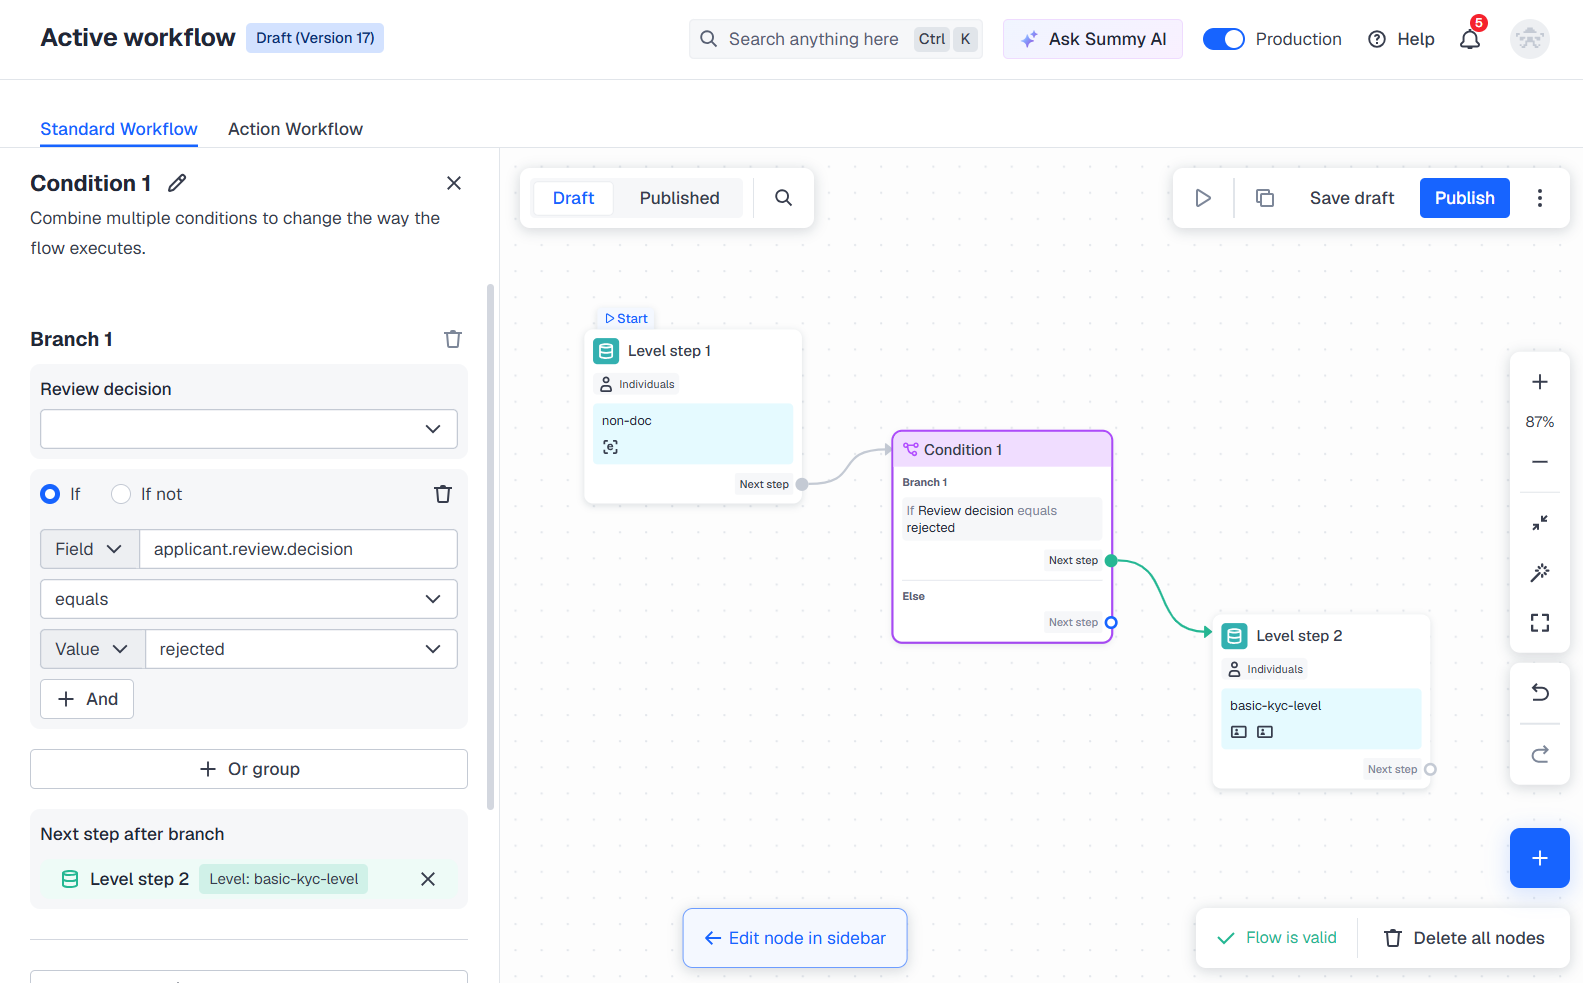
- Click on the initial node created earlier and select Condition as the next step.
- Configure the condition branch:
- Select the If logical operator.
- From the Field drop-down list, select the
applicant.review.decisionparameter. - Set a logical condition—choose equals.
- From the Value drop-down list, select rejected and resubmission.
- Within the created condition branch, click Choose next step and select Level step.
- In the level step configuration, identify the documentary verification step that you created earlier.
Step 4. Start using flow
Once the flow is created and configured, you can save the draft, perform test verification, and publish the flow to run the checks:
- Save the draft and experiment with your flow — create copies and conduct tests.
- Publish the flow to go live once the flow configuration is tested.
Step 5. Receive verification results
Get verification results via the webhooks or view them in applicant profiles.
Updated 4 months ago