Assign tags using Workflow Builder
Classify applicants using tags.
With Workflow Builder, you can add tags to your applicant profiles way too much faster to divide them into groups according to common features, such as a particular industry (crypto, gambling, banking, and so on), level of risk, or AML hits.
How tags work
Applicant tags at Sumsub is a functionality that allows you to create labels and assign them to applicants for classification and filtering.
Tags can be added to profiles manually via the applicant page in the Dashboard or assigned via Workflow Builder.
Assigned tags do not affect verification results, but still help you distinguish several groups of applicants on the basis of common features.
Implement tags in verification flow via Workflow Builder
Create tags and add a verification flow that will assign these tags, depending on the verification result.
Step 1. Create tags
Create applicant tags to classify your applicants:
- In the Dashboard, go to the Applicant tags tab and select Create tag at the bottom of the tag list.
- Provide a name for the new tag and select a tag color.
- Select the Include tag to applicant summary report checkbox if you want to see tags in your reports.
Step 2. Create verification level and add level step node
Build a verification level to conduct required checks and add it to the Workflow Builder’s canvas:
- Create a verification level and add verification steps.
- Configure the level settings and save them.
- In the Dashboard, go to Workflow builder and select Active workflow.
- Navigate to the Standard Workflow tab and go to the Draft view.
- Add a level step to the canvas, and attach the created verification level by selecting it from the list.
Step 3. Add nodes to determine common features
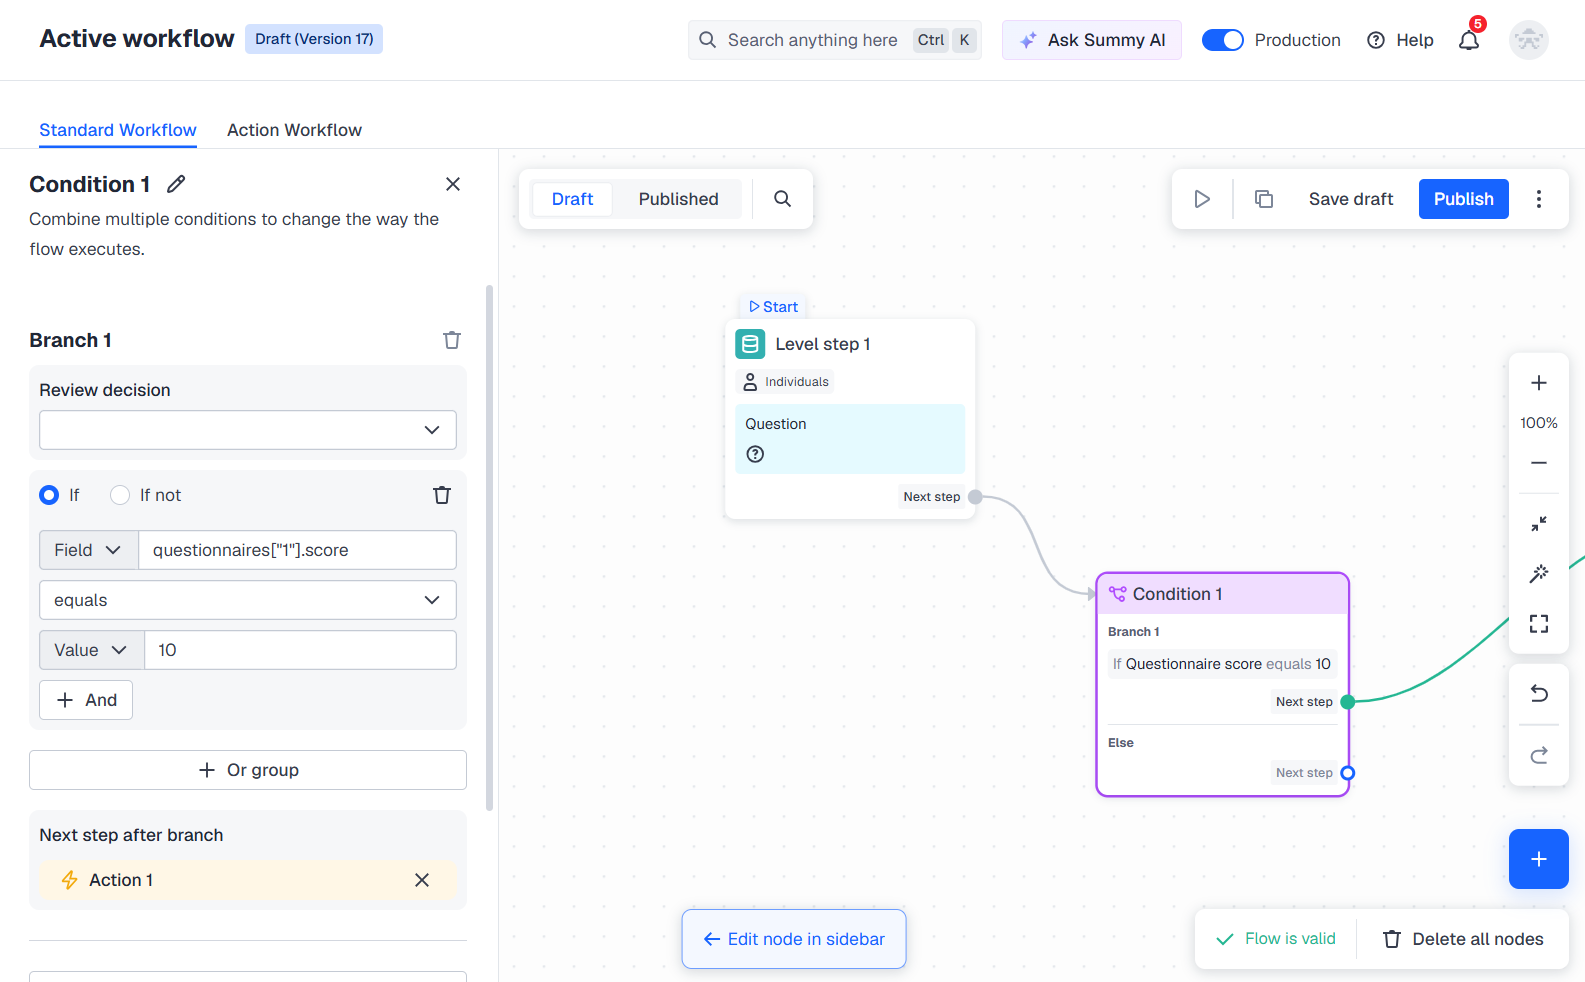
Add the Condition step node that considers verification results and regulates the further steps. For example, you create a verification level including the Questionnaire step and design a logic that takes into account the questionnaire score to attribute applicants to a particular group:
- Click on the initial node created earlier and select Condition as the next step.
- Configure the condition branch:
- Select the If logical operator.
- From the Field drop-down list, select the
questionnaireName.scoreparameter. - Set a logical condition (in our case, we use equals) and specify the score value.
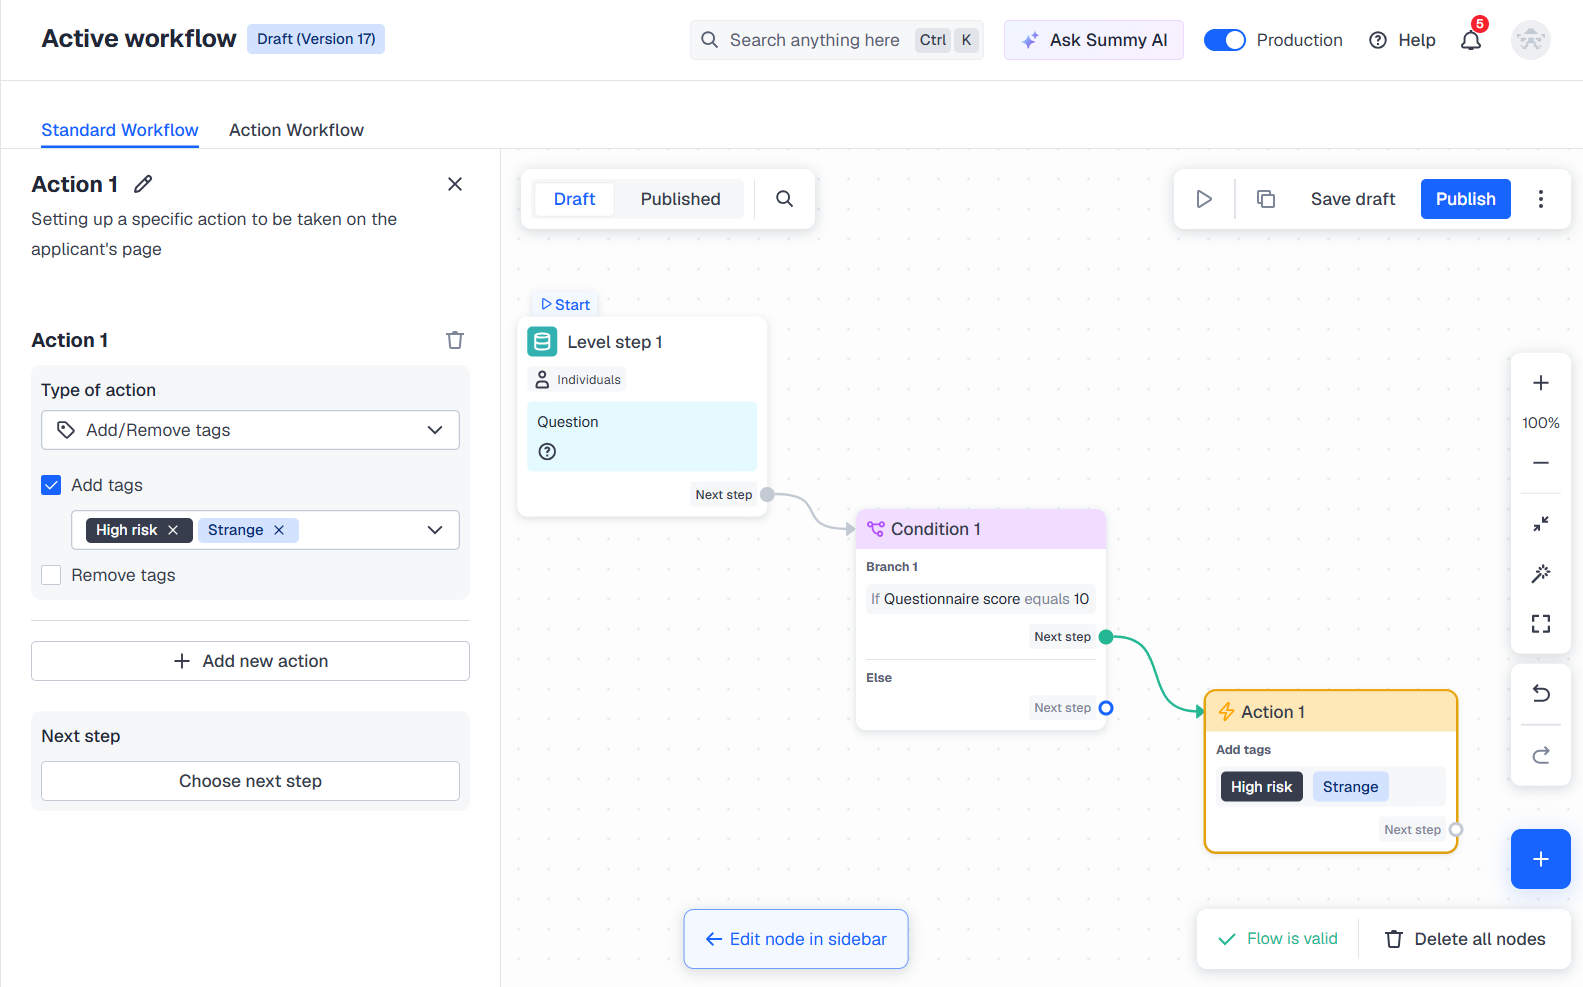
Step 4. Include tags assignment
Assign tags according to the received verification results:
- Within the created condition branch, click Choose next step and select Action.
- Configure the Action node settings:
- From the Type of action drop-down list, select Add/Remove tags.
- Identify tags that will be assigned to profiles with the established questionnaire score—select one or several tags.
Step 5. Start using flow
Once the flow is created and configured, you can save the draft, perform test verification, and publish the flow to run the checks:
- Save the draft and experiment with your flow — create copies and conduct tests.
- Publish the flow to go live once the flow configuration is tested.
Step 6. Receive verification results
Get verification results via the webhooks or view them in applicant profiles.
Updated 4 months ago