Migrate to Case Management 2.0
Transition to the new version of our Case Management solution for faster and focused case investigation.
The fundamental difference between Case Management 1.0 and Case Management 2.0 is the use of blueprints instead of queues.
Blueprints are much more flexible compared to queues and provide a huge field for customization. Also, blueprints allow for faster and more focused case investigation, as they let you select the type and amount of data analyzed for the specific blueprint.
NoteThis guide is valid only for customers using Case Management V1. If you already use the new version or do not use Case Management at all, the migration is not required.
Transition to Case Management 2.0
Analyze your queues
The migration is a perfect time for refactoring your methodology and approach:
- In the Dashboard, go to Case Management 1.0 and open queue settings.
- Check your queues and make a decision on creating blueprints. You can create a blueprint for each queue or utilize more advanced logic.
Create blueprints
Now, it is time to create blueprints:
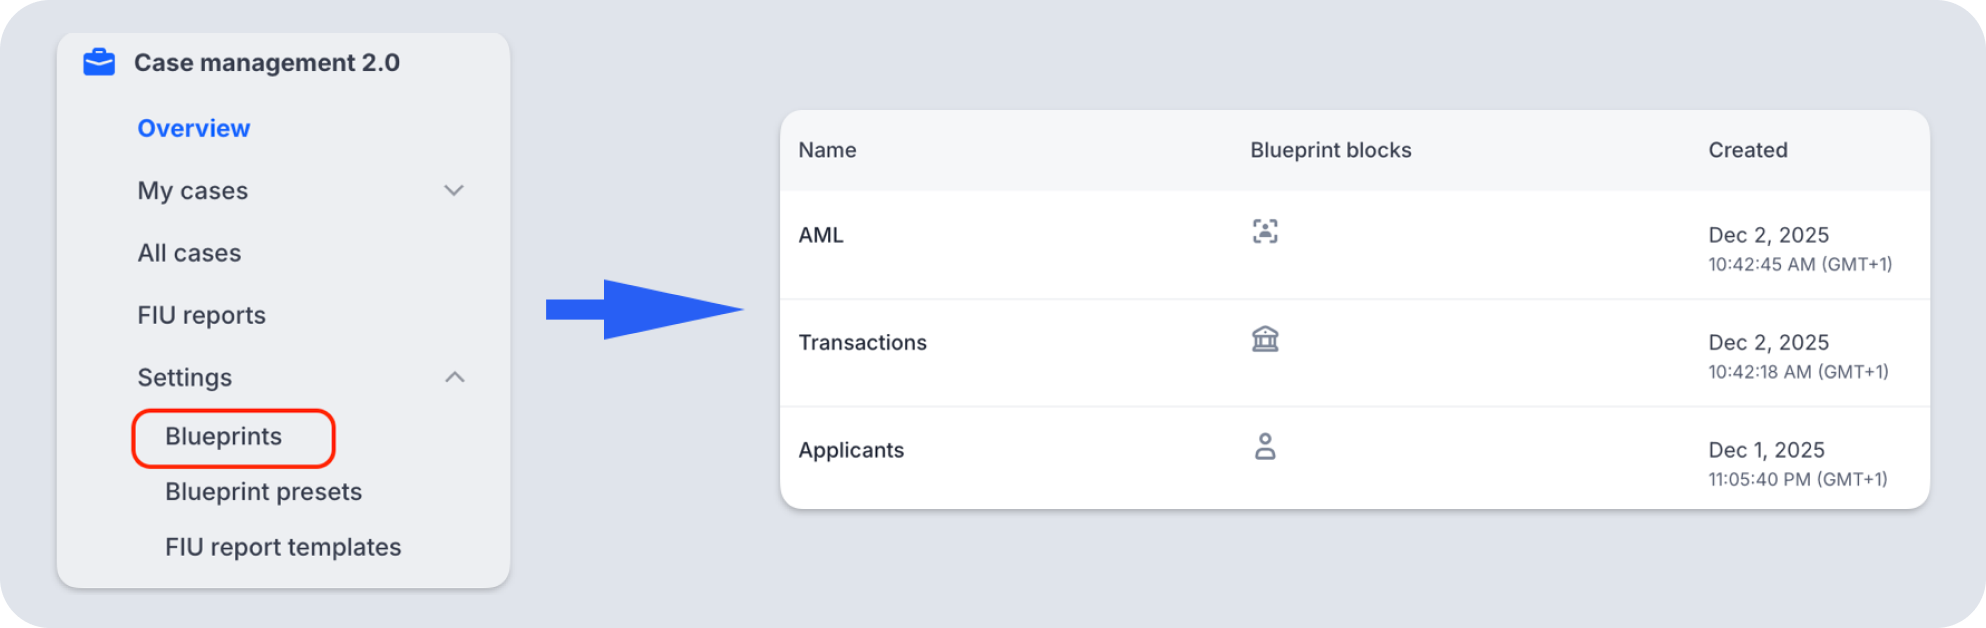
- Navigate to Blueprints settings.
- Create the needed blueprints, as described in this article.
Add blueprints to rules
After creating the blueprints, you must update all the rules that affect case creation:
- Navigate to your Installed rules list.
- Open a rule that affects case creation and attach the right blueprint to it. All blueprints you created are available in the list for attachment.
- Select the Group by option: Rule and applicant or just Applicant for proper case creation.
When this step is complete, all new cases will be generated using the blueprints you set up.
Use blueprints in Workflow Builder
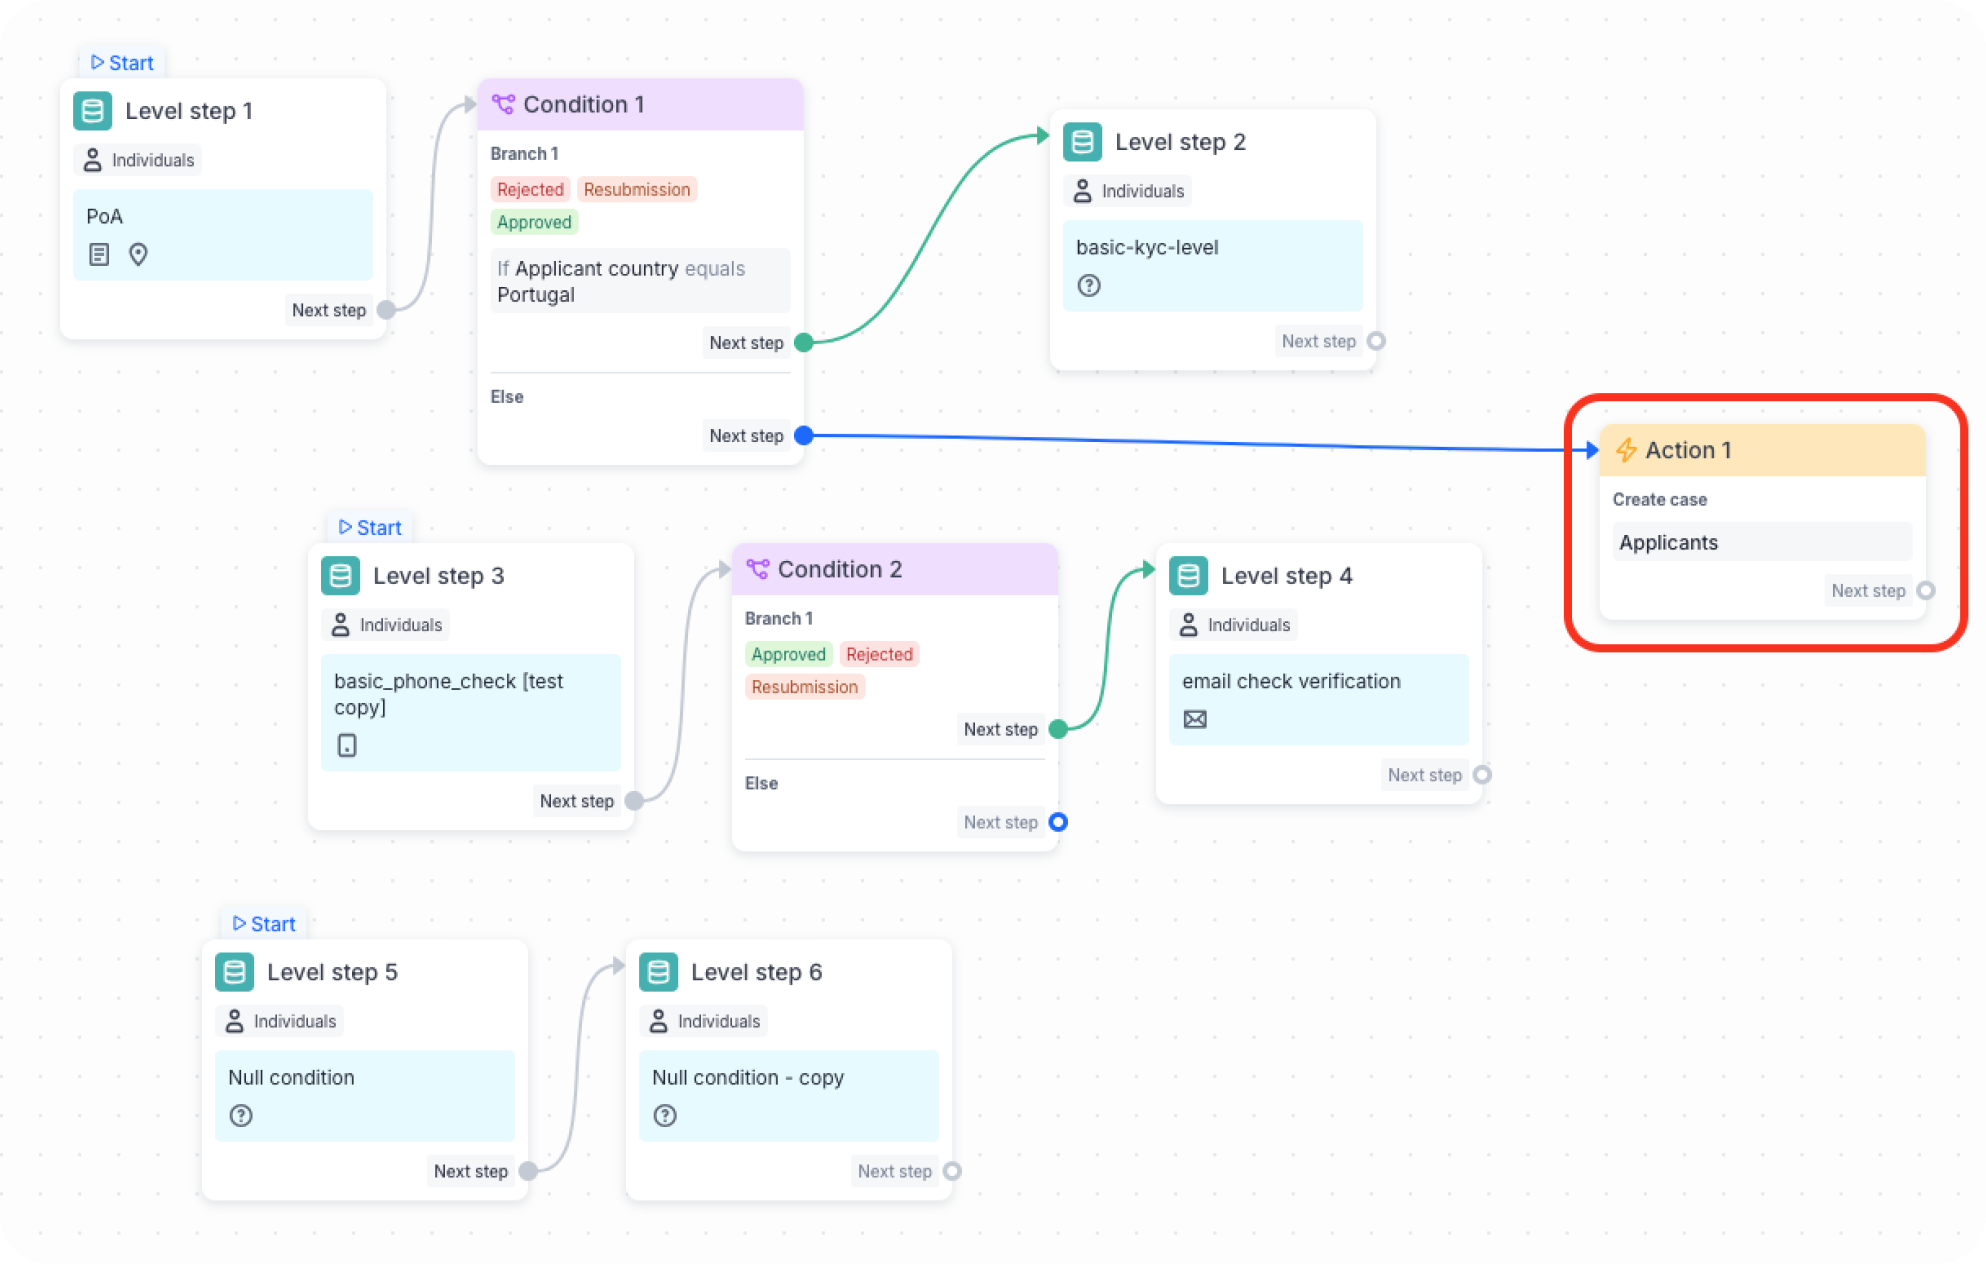
If you want to use actions with blueprints to generate cases in the Workflow builder, you should introduce the blueprints to your workflows.
Contact your Customer Success Manager at [email protected], and the Sumsub team will add a dedicated block with the Create case type of action and the selected blueprints to the Builder.
Utilize blueprints for AML Monitoring
If you generate cases for Ongoing AML Monitoring:
- Navigate to Configurations.
- Select the needed blueprint from the Blueprints drop-down menu.
Migrate existing cases
There are two ways to migrate your unresolved cases:
- If you have fewer than 25 unresolved cases, you must resolve them manually without any additional actions.
- If you have more than 25 unresolved cases, you can either resolve them manually or request automated migration from your Customer Success Manager.
For the automated migration of the unresolved cases, provide the table in the following format to your Customer Success Manager:
| Queue name | Blueprint name |
|---|---|
| Applicants queue | Applicants |
| Transaction queue | Transactions |
| AML queue | AML |
NoteYou will only be able to migrate cases created in 2026.
Disable Case Management 1.0
After completing the steps above, contact your Customer Success Manager to disable Case Management 1.0.
Updated 3 months ago