September 2024
The new Wallet Address Book feature for our Travel Rule solution has been released! Also, we have redesigned the applicant profile operational menu and made other changes to improve user experience.
Travel Rule
Wallet Address Book
Wallet Address Book—an API for VASPs—has been launched to upload the applicants’ wallet addresses and attribute travel rule transactions properly.
Crypto Monitoring
New product positioning
Crypto Monitoring can now be purchased independently from Transaction Monitoring.
Database Validation
New database check
RFC verification has been implemented to expand our service coverage and work with businesses in Mexico.
The main specification:
- Input data: Registro Federal de Contribuyentes number – RFC
- Output data: Name, RFC Status, email, effective date
- Database Type: Government
Non-Doc Verification
New Non-Doc Identity Verification solution
A Non-Doc Identity Verification solution for Denmark has been delivered. The feature is eIDAS-compliant and also meets the verification requirements of the Danish AML regulatory framework.
Learn more about Non-Doc Verification ->
Case management
New filter functionality
The filter functionality has been boosted—now there are the OR / AND options available to set up the search.
Learn more about Case management ->
Business verification
Verification sources improvement
The AsiaVerify business verification has been boosted—there will be more detailed company reports including information about company officers and 1st line of shareholders in 11 countries.
Learn more about Business verification ->
AML Screening
Ongoing monitoring major update
From now on, the updates on hits found during the screening will be received and processed for the applicant profiles in any status (Resubmission, Documents requested, Requires action) except Rejected, but will not be triggering any checks until the applicant uploads documents and gets approval.
Learn more about applicant statuses ->
Dashboard
App Tokens section adjustment
The Usage count column showing token usage for the last 5 days has been added in the App Tokens section.
Learn more about App Tokens ->
Feature for exporting ID document settings
A fresh feature has been added to export all necessary information about the identity document verification settings in the CSV format.
To export data:
- In the Dashboard, open the Supported ID Documents page and select Download CSV.
- In the verification level settings, open the ID document settings tab and select Download CSV.
Learn how to customize supported ID documents ->
ID verification settings update
A new setting Consider all new similar applicants as duplicates has been delivered—all applicant profiles except the primary one will be rejected.
Learn how to set up ID verification settings ->
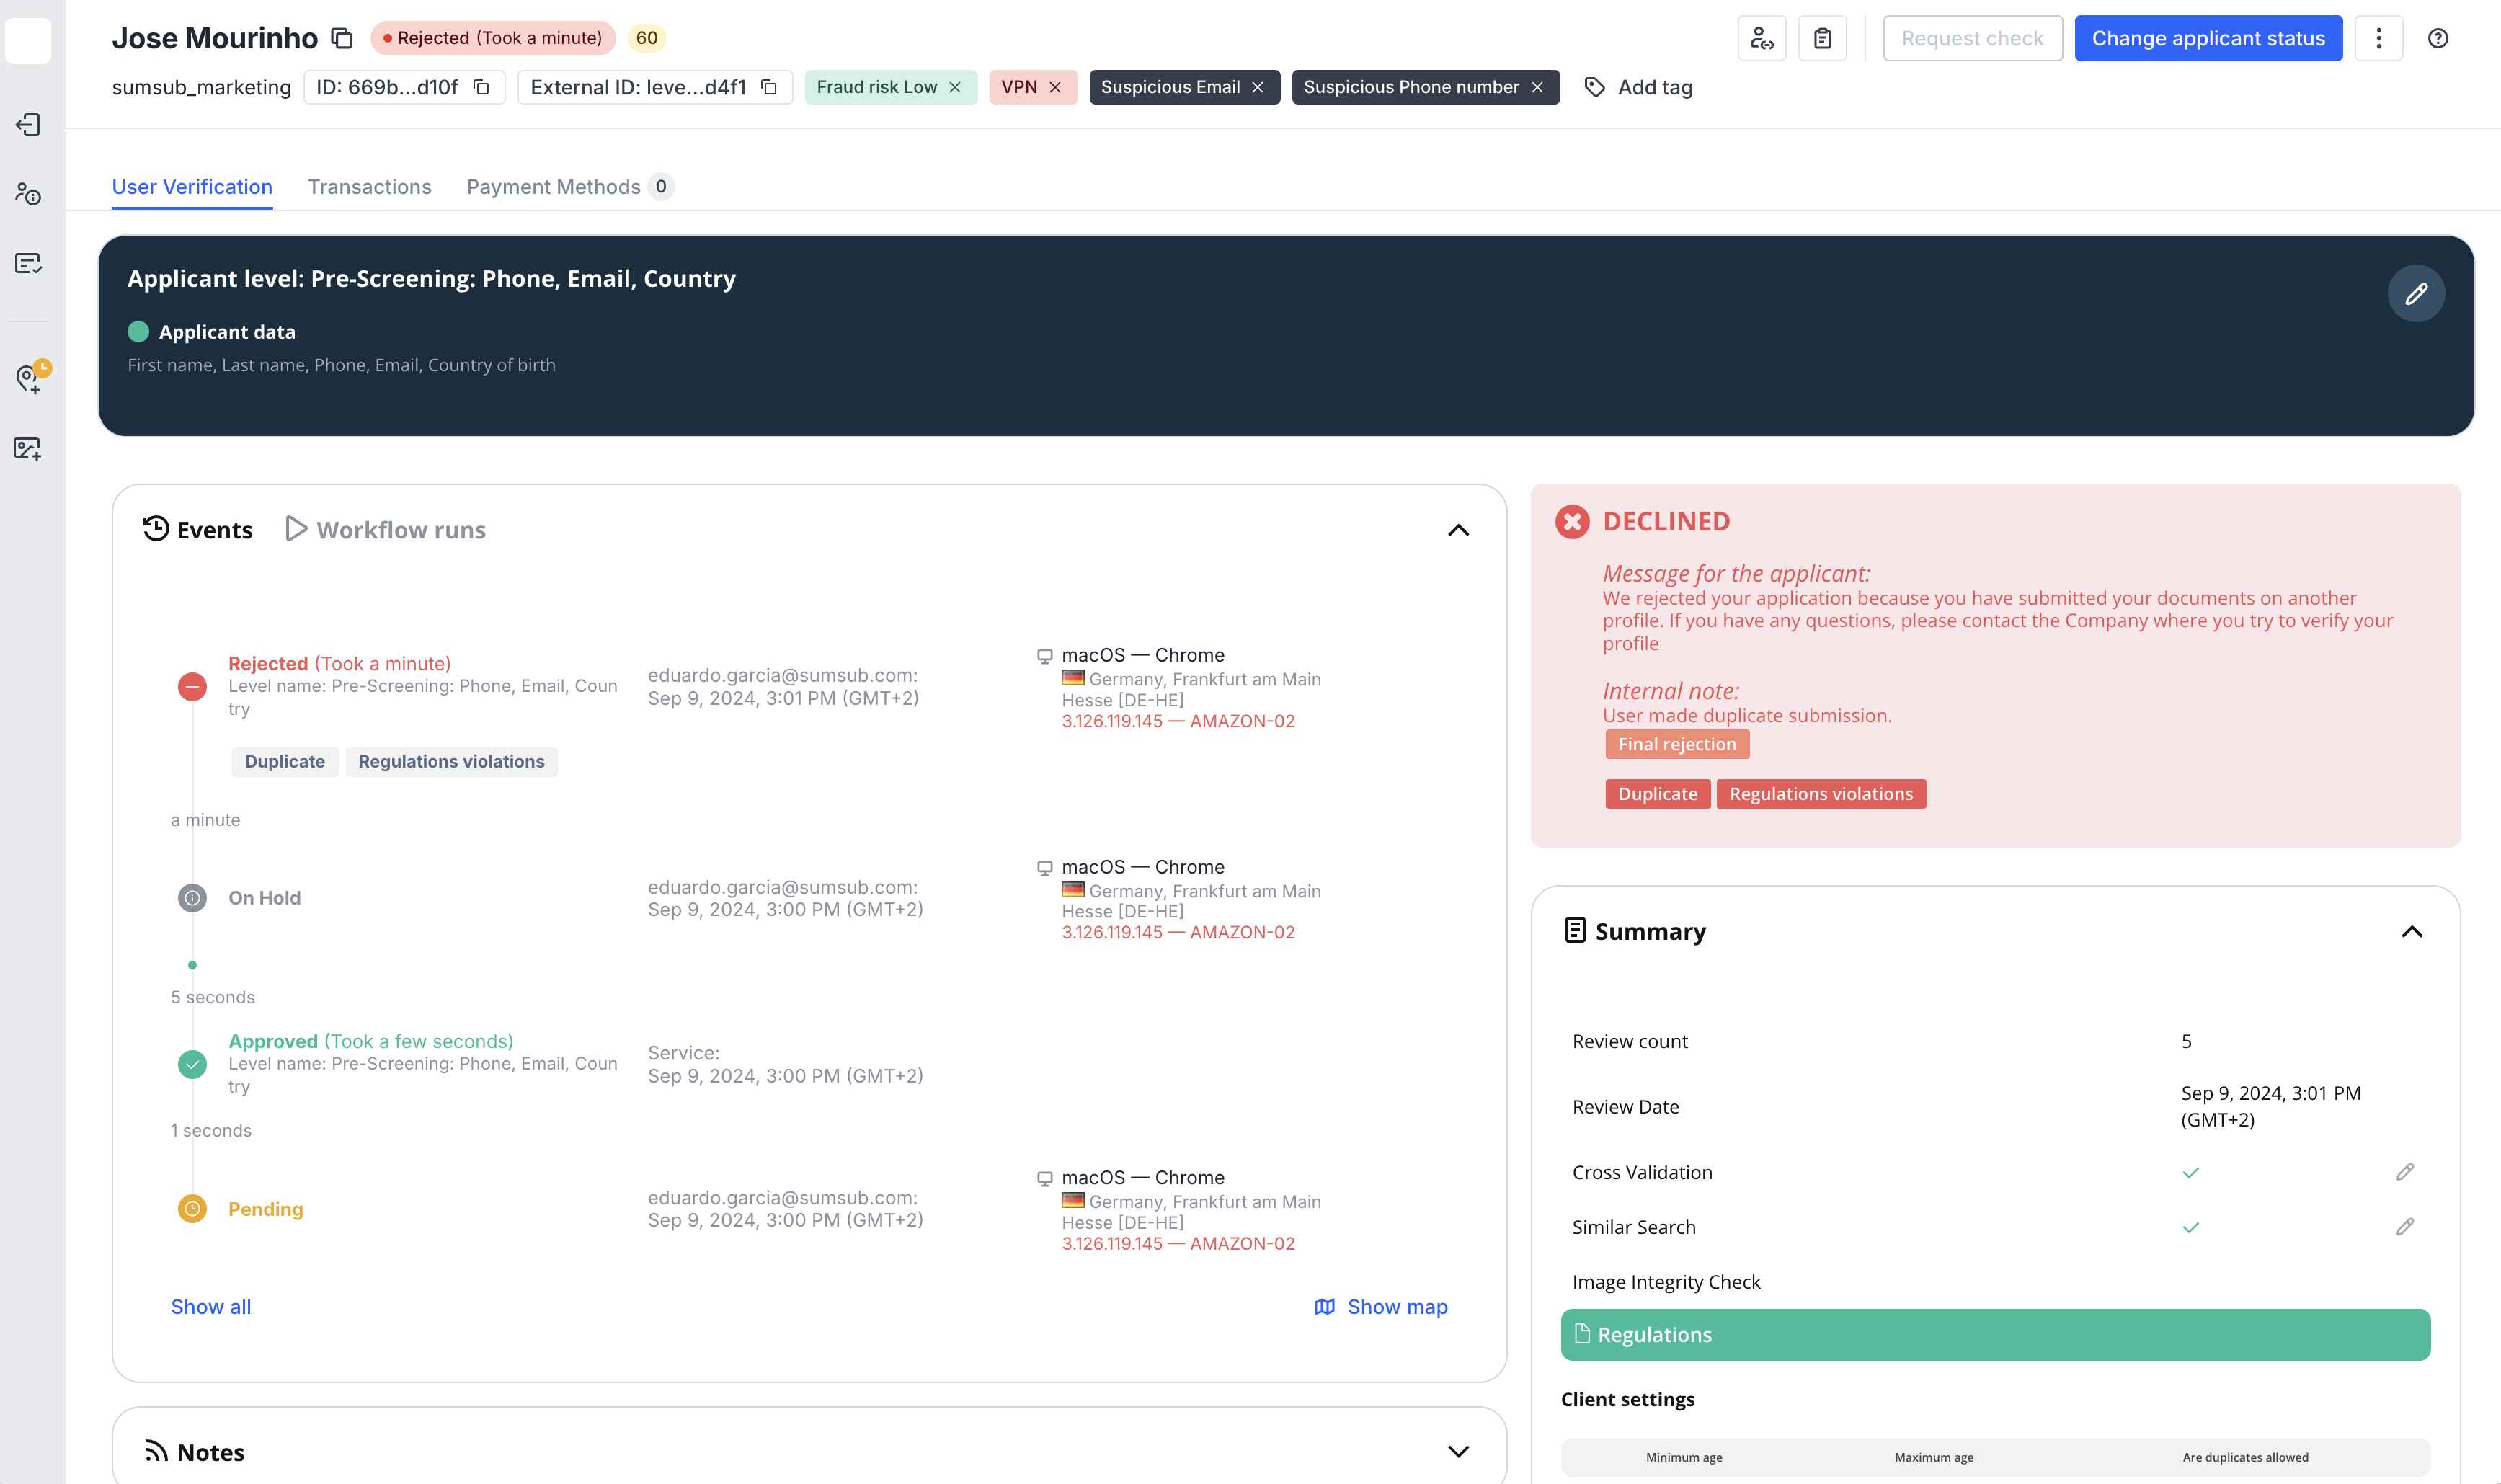
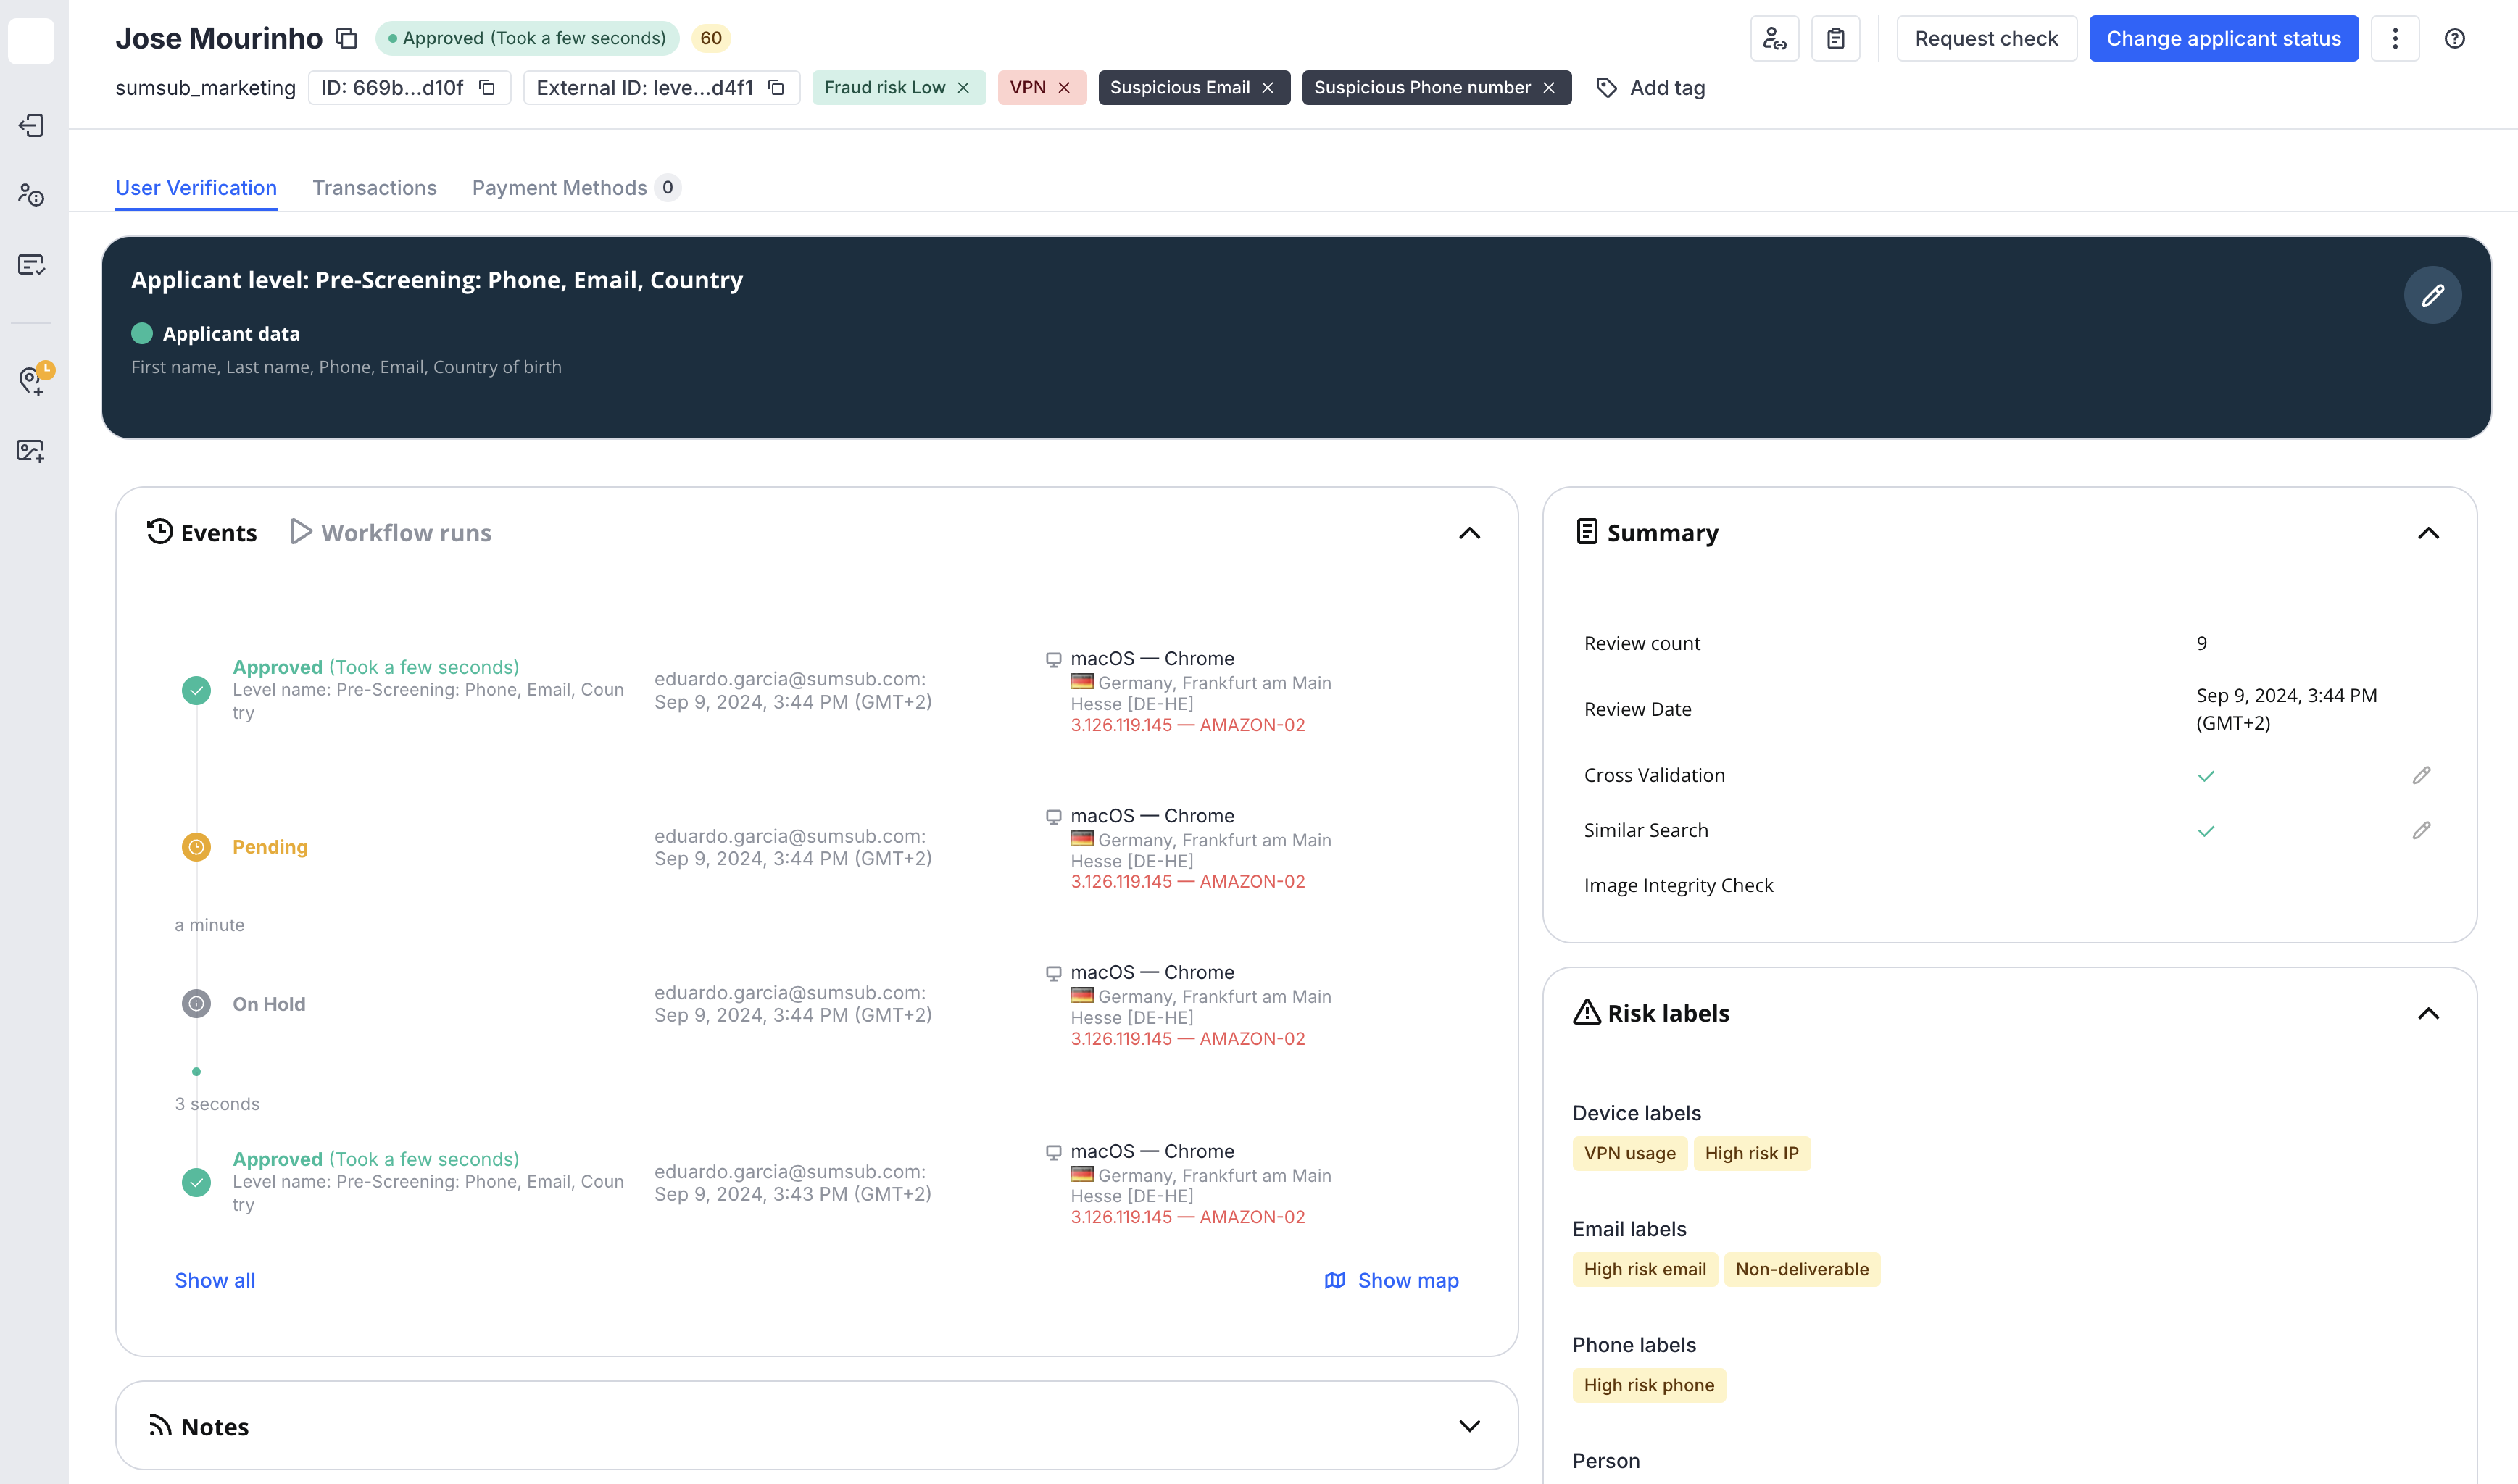
Applicant profile menu redesign
We have improved the user experience of the applicant profile page by relocating control buttons from the Action Panel to an independent menu.
The applicant page — a centralised interface where you can manage and review verification and compliance statuses of your users. This interface allows you to see the current status of each applicant’s verification process in one place. It also provides insights into why particular verification might have been rejected or flagged for further review.
In the top-right corner of the page, you will see the options to Request check or Change applicant status.

You can also click the three-dot menu and choose to Mark as Inactive. Learn more here ->.
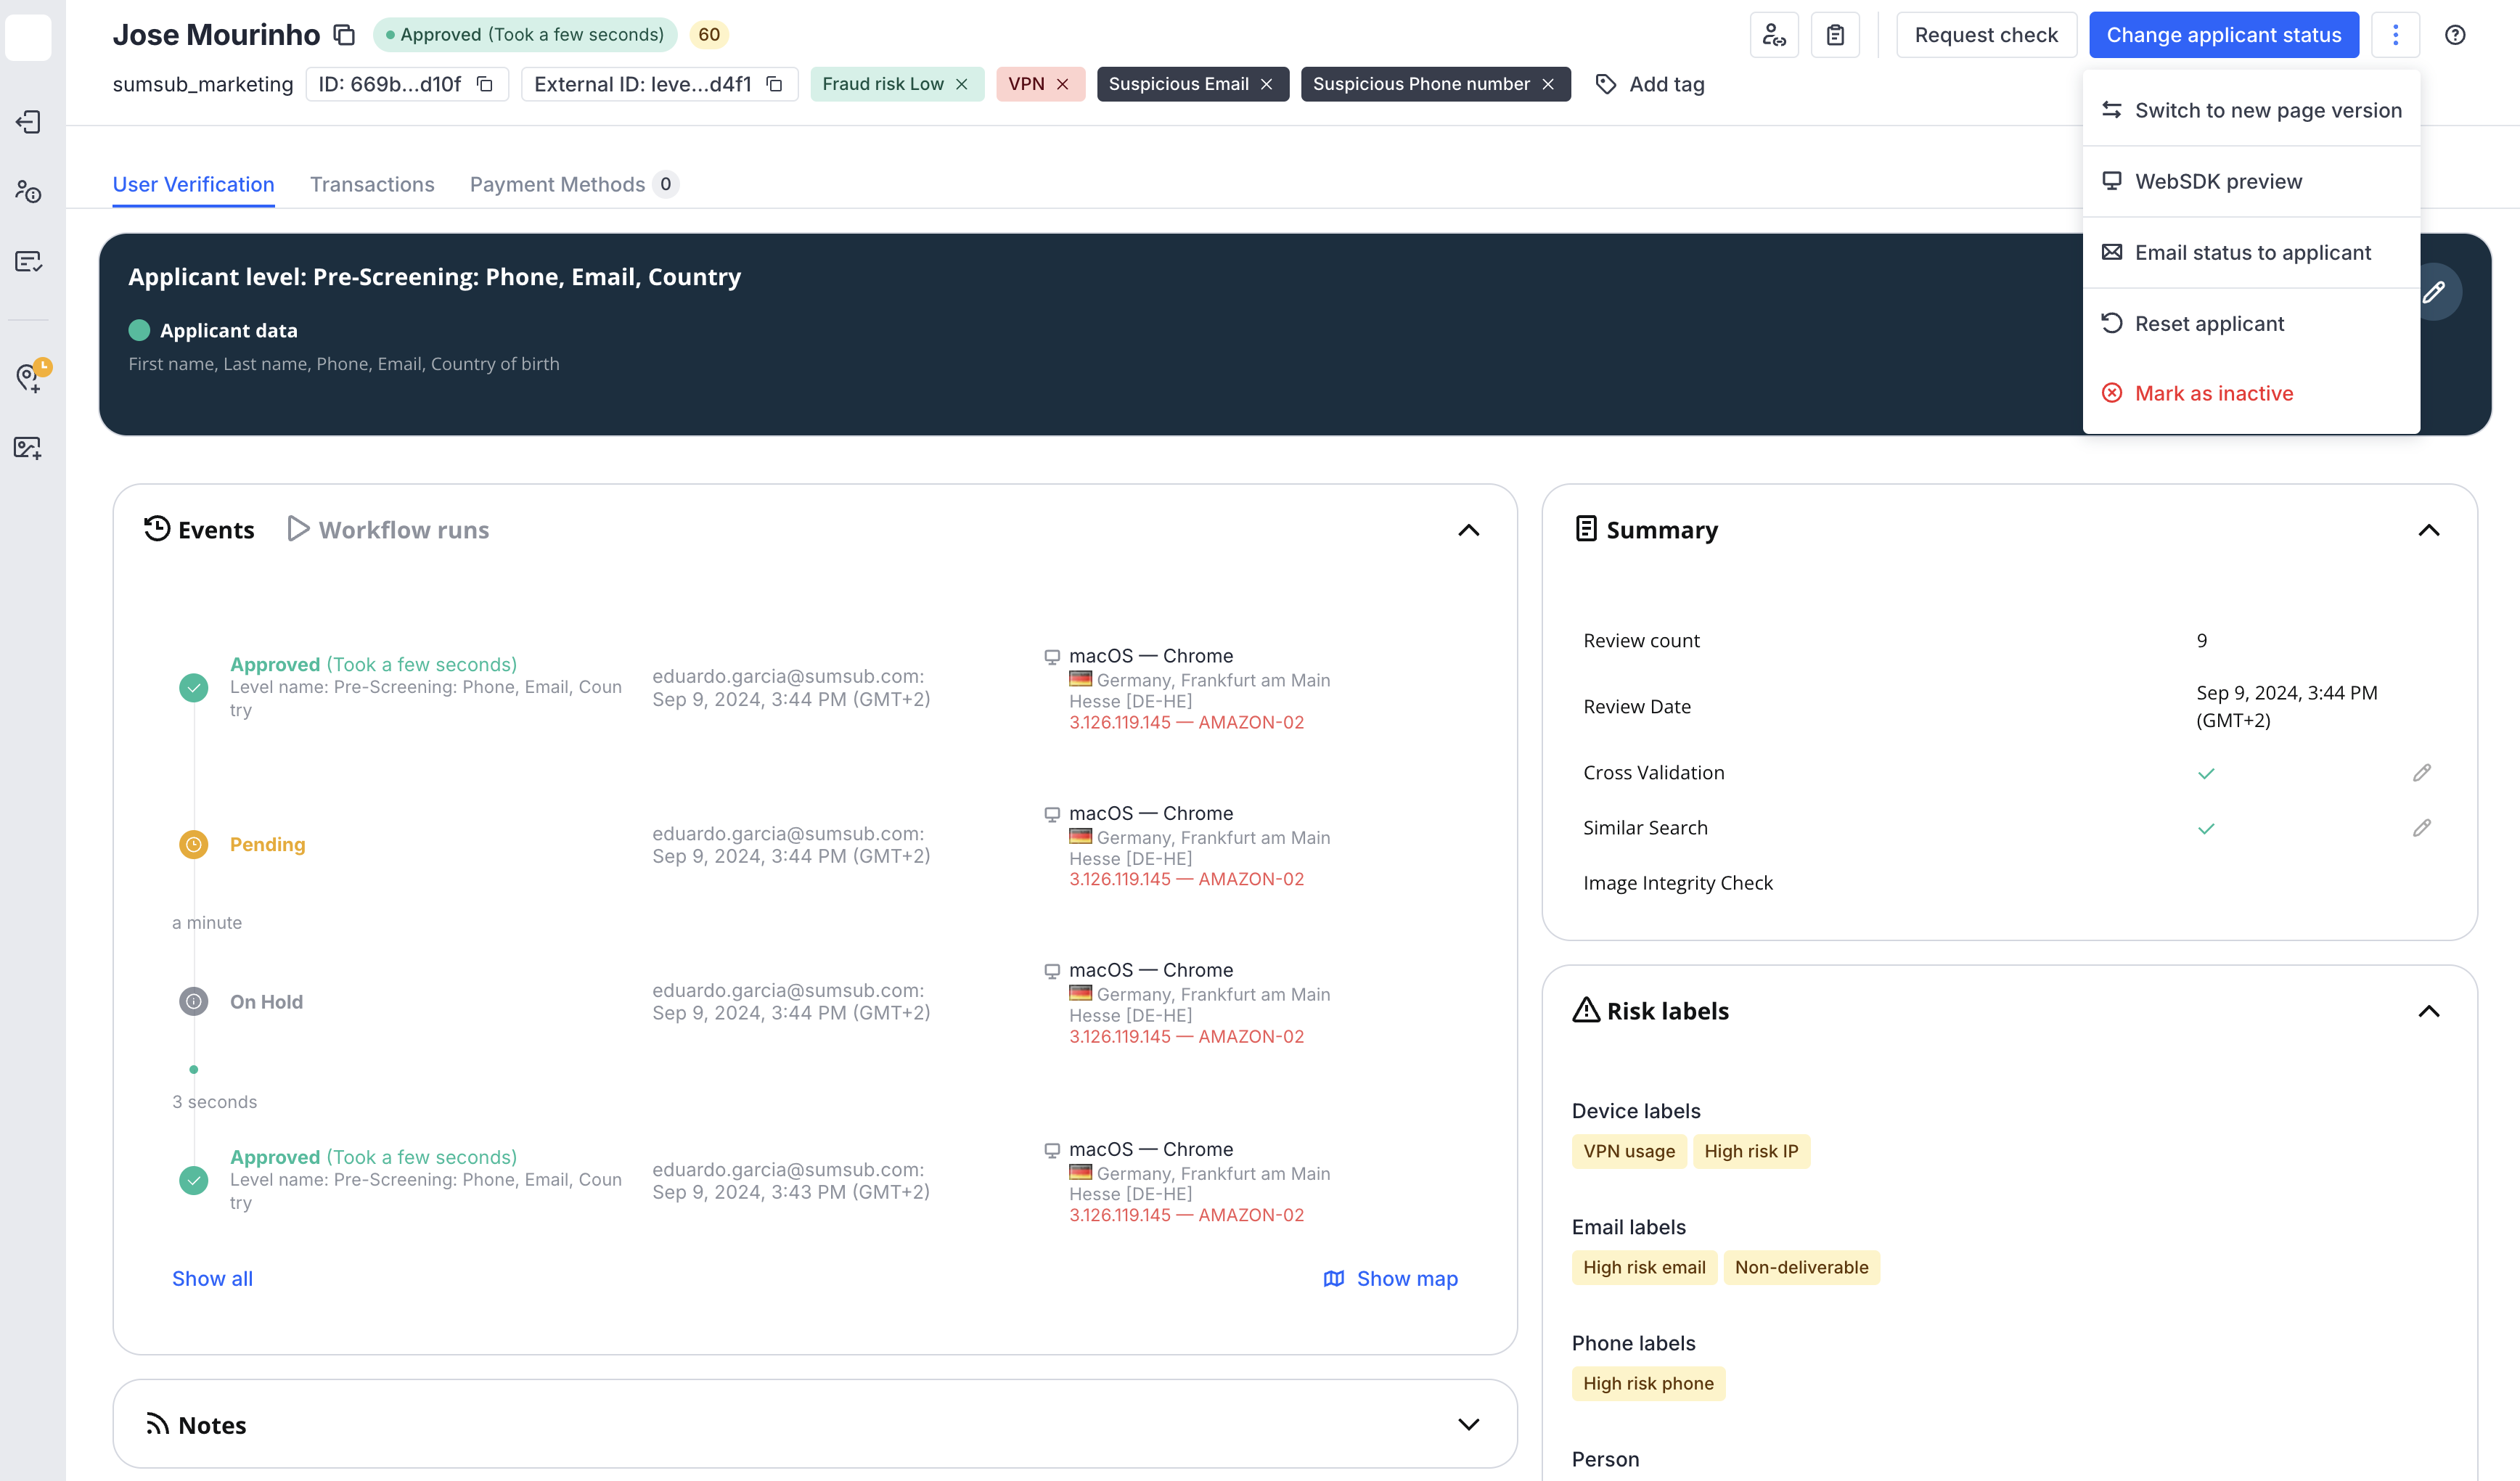
You can easily generate a WebSDK applicant link.
You can view a Summary report of the verification process.
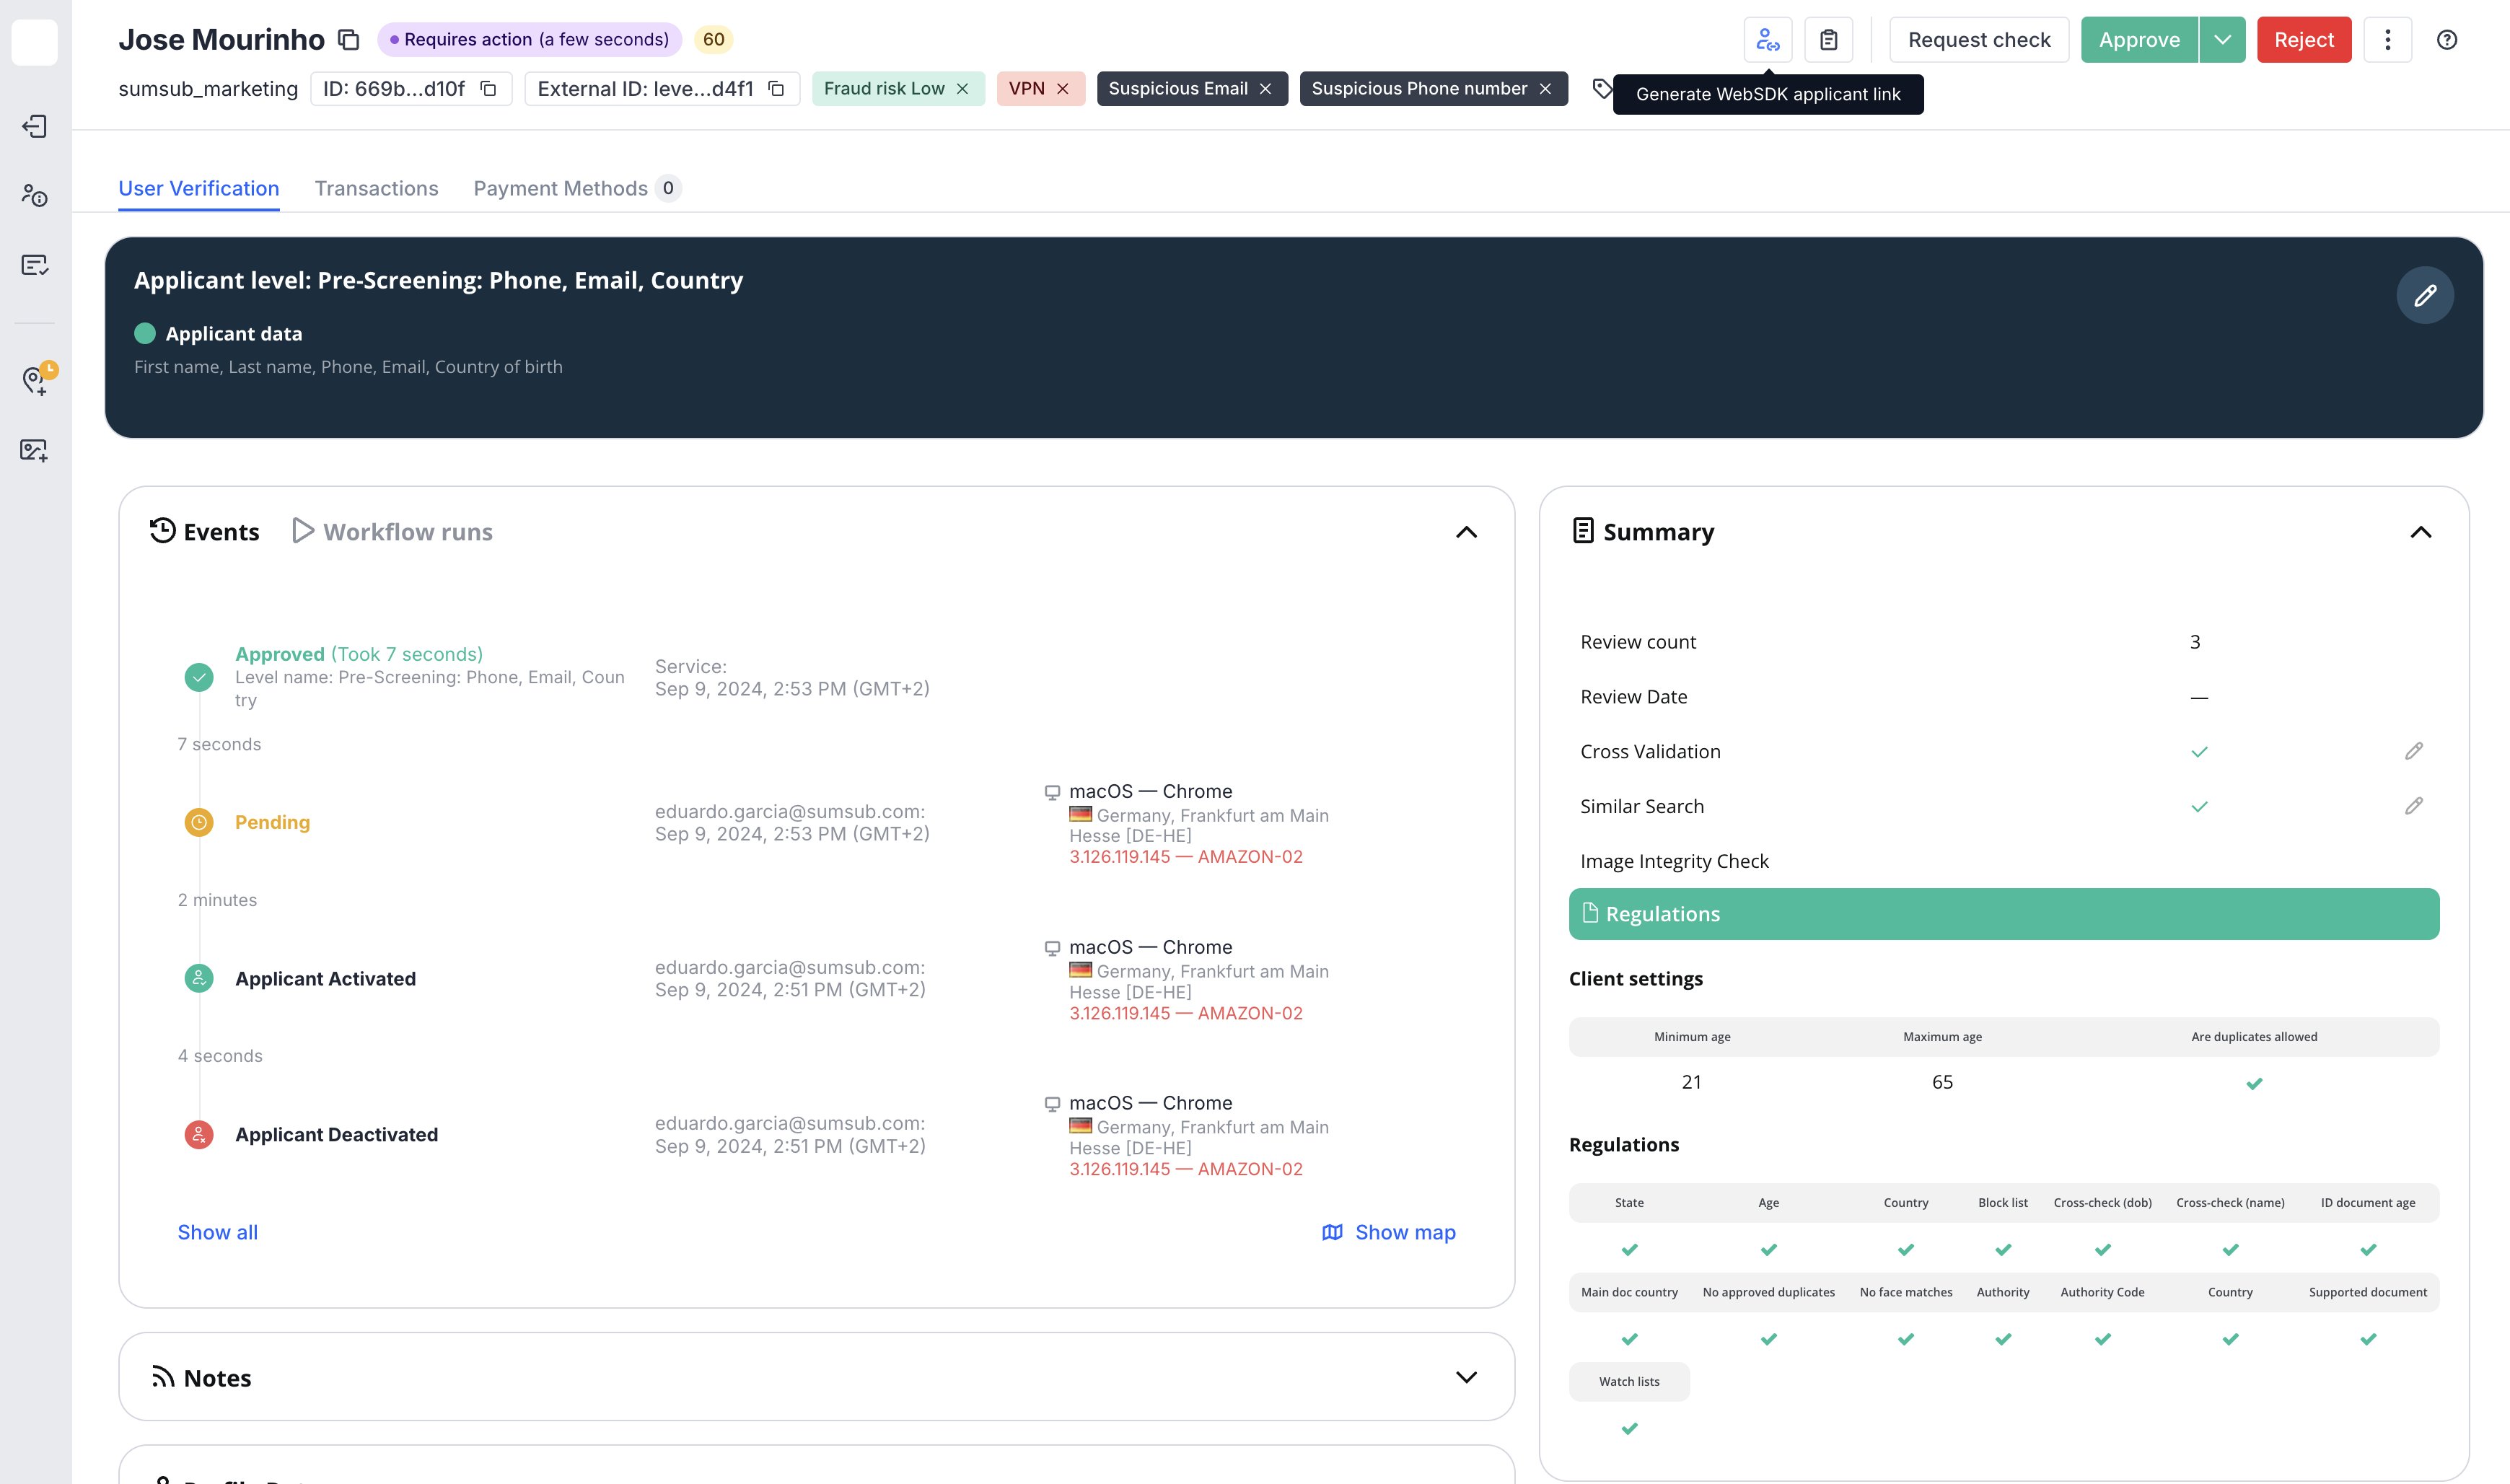
Let’s explore what's going through the manual check looks like
Begin reviewing an applicant by selecting Change applicant status.
You will now see Approve and Reject buttons.
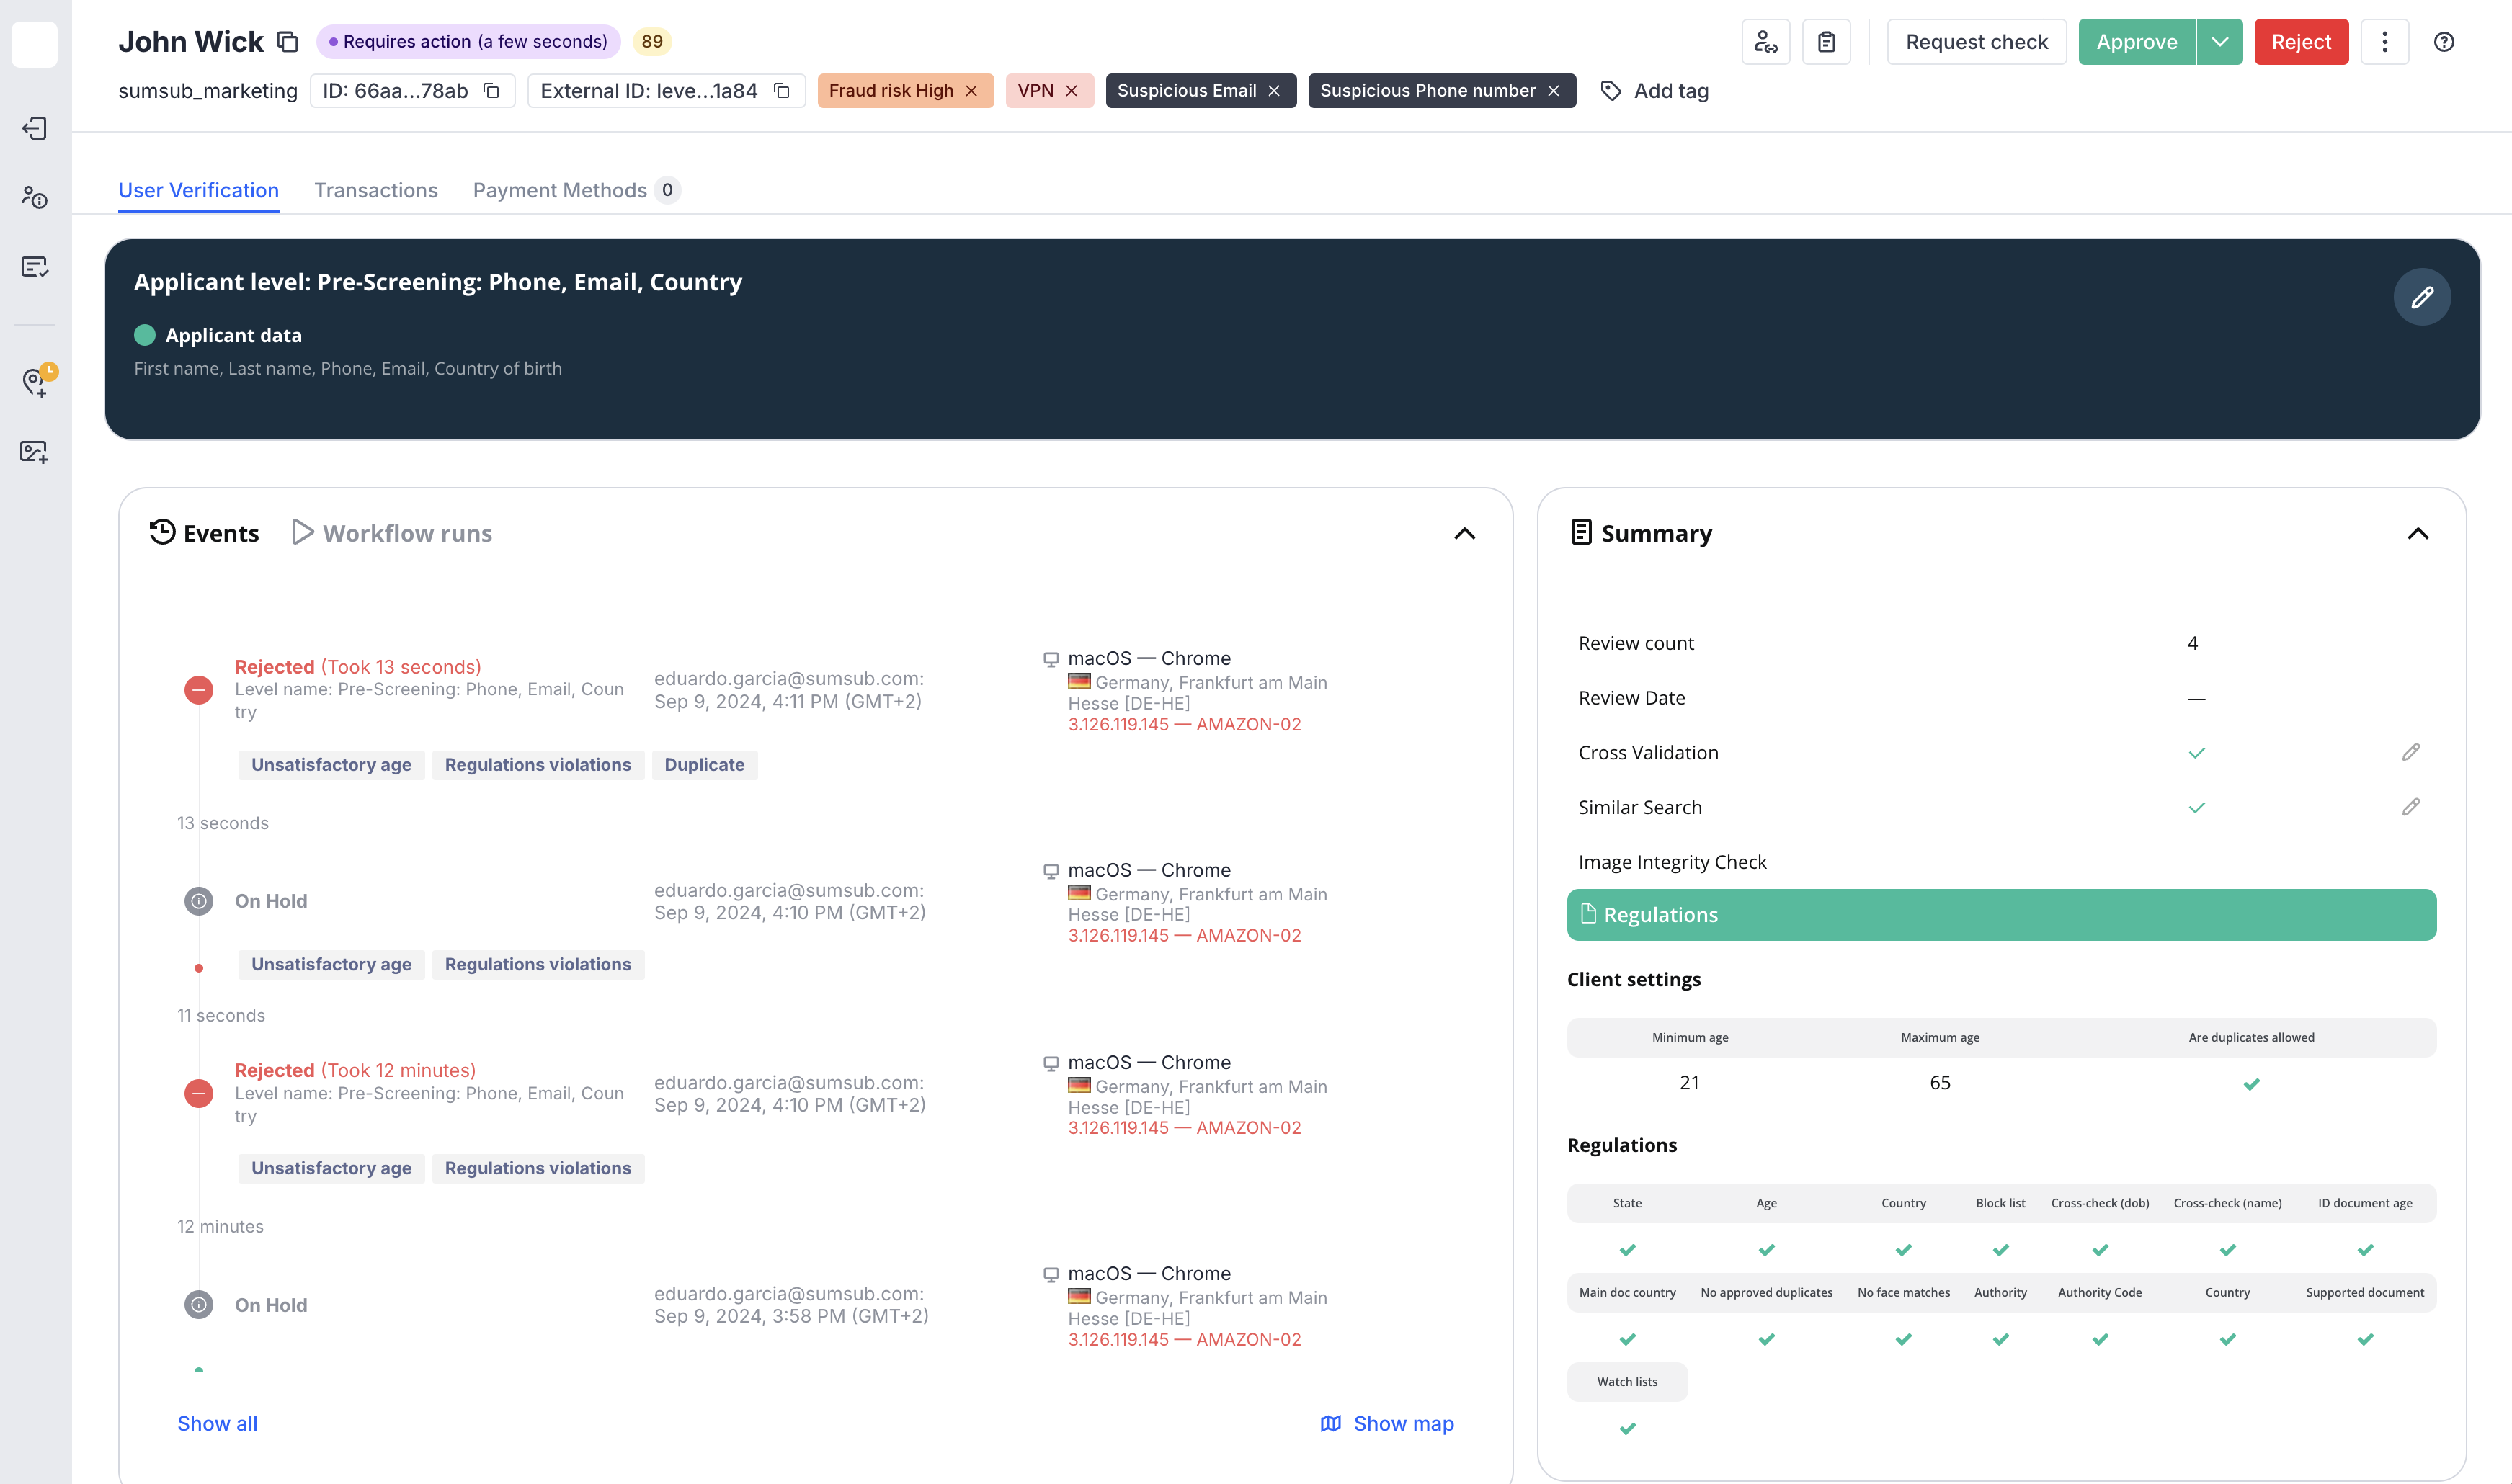
When you choose Approve, you will see the details of the verification process for the applicant.

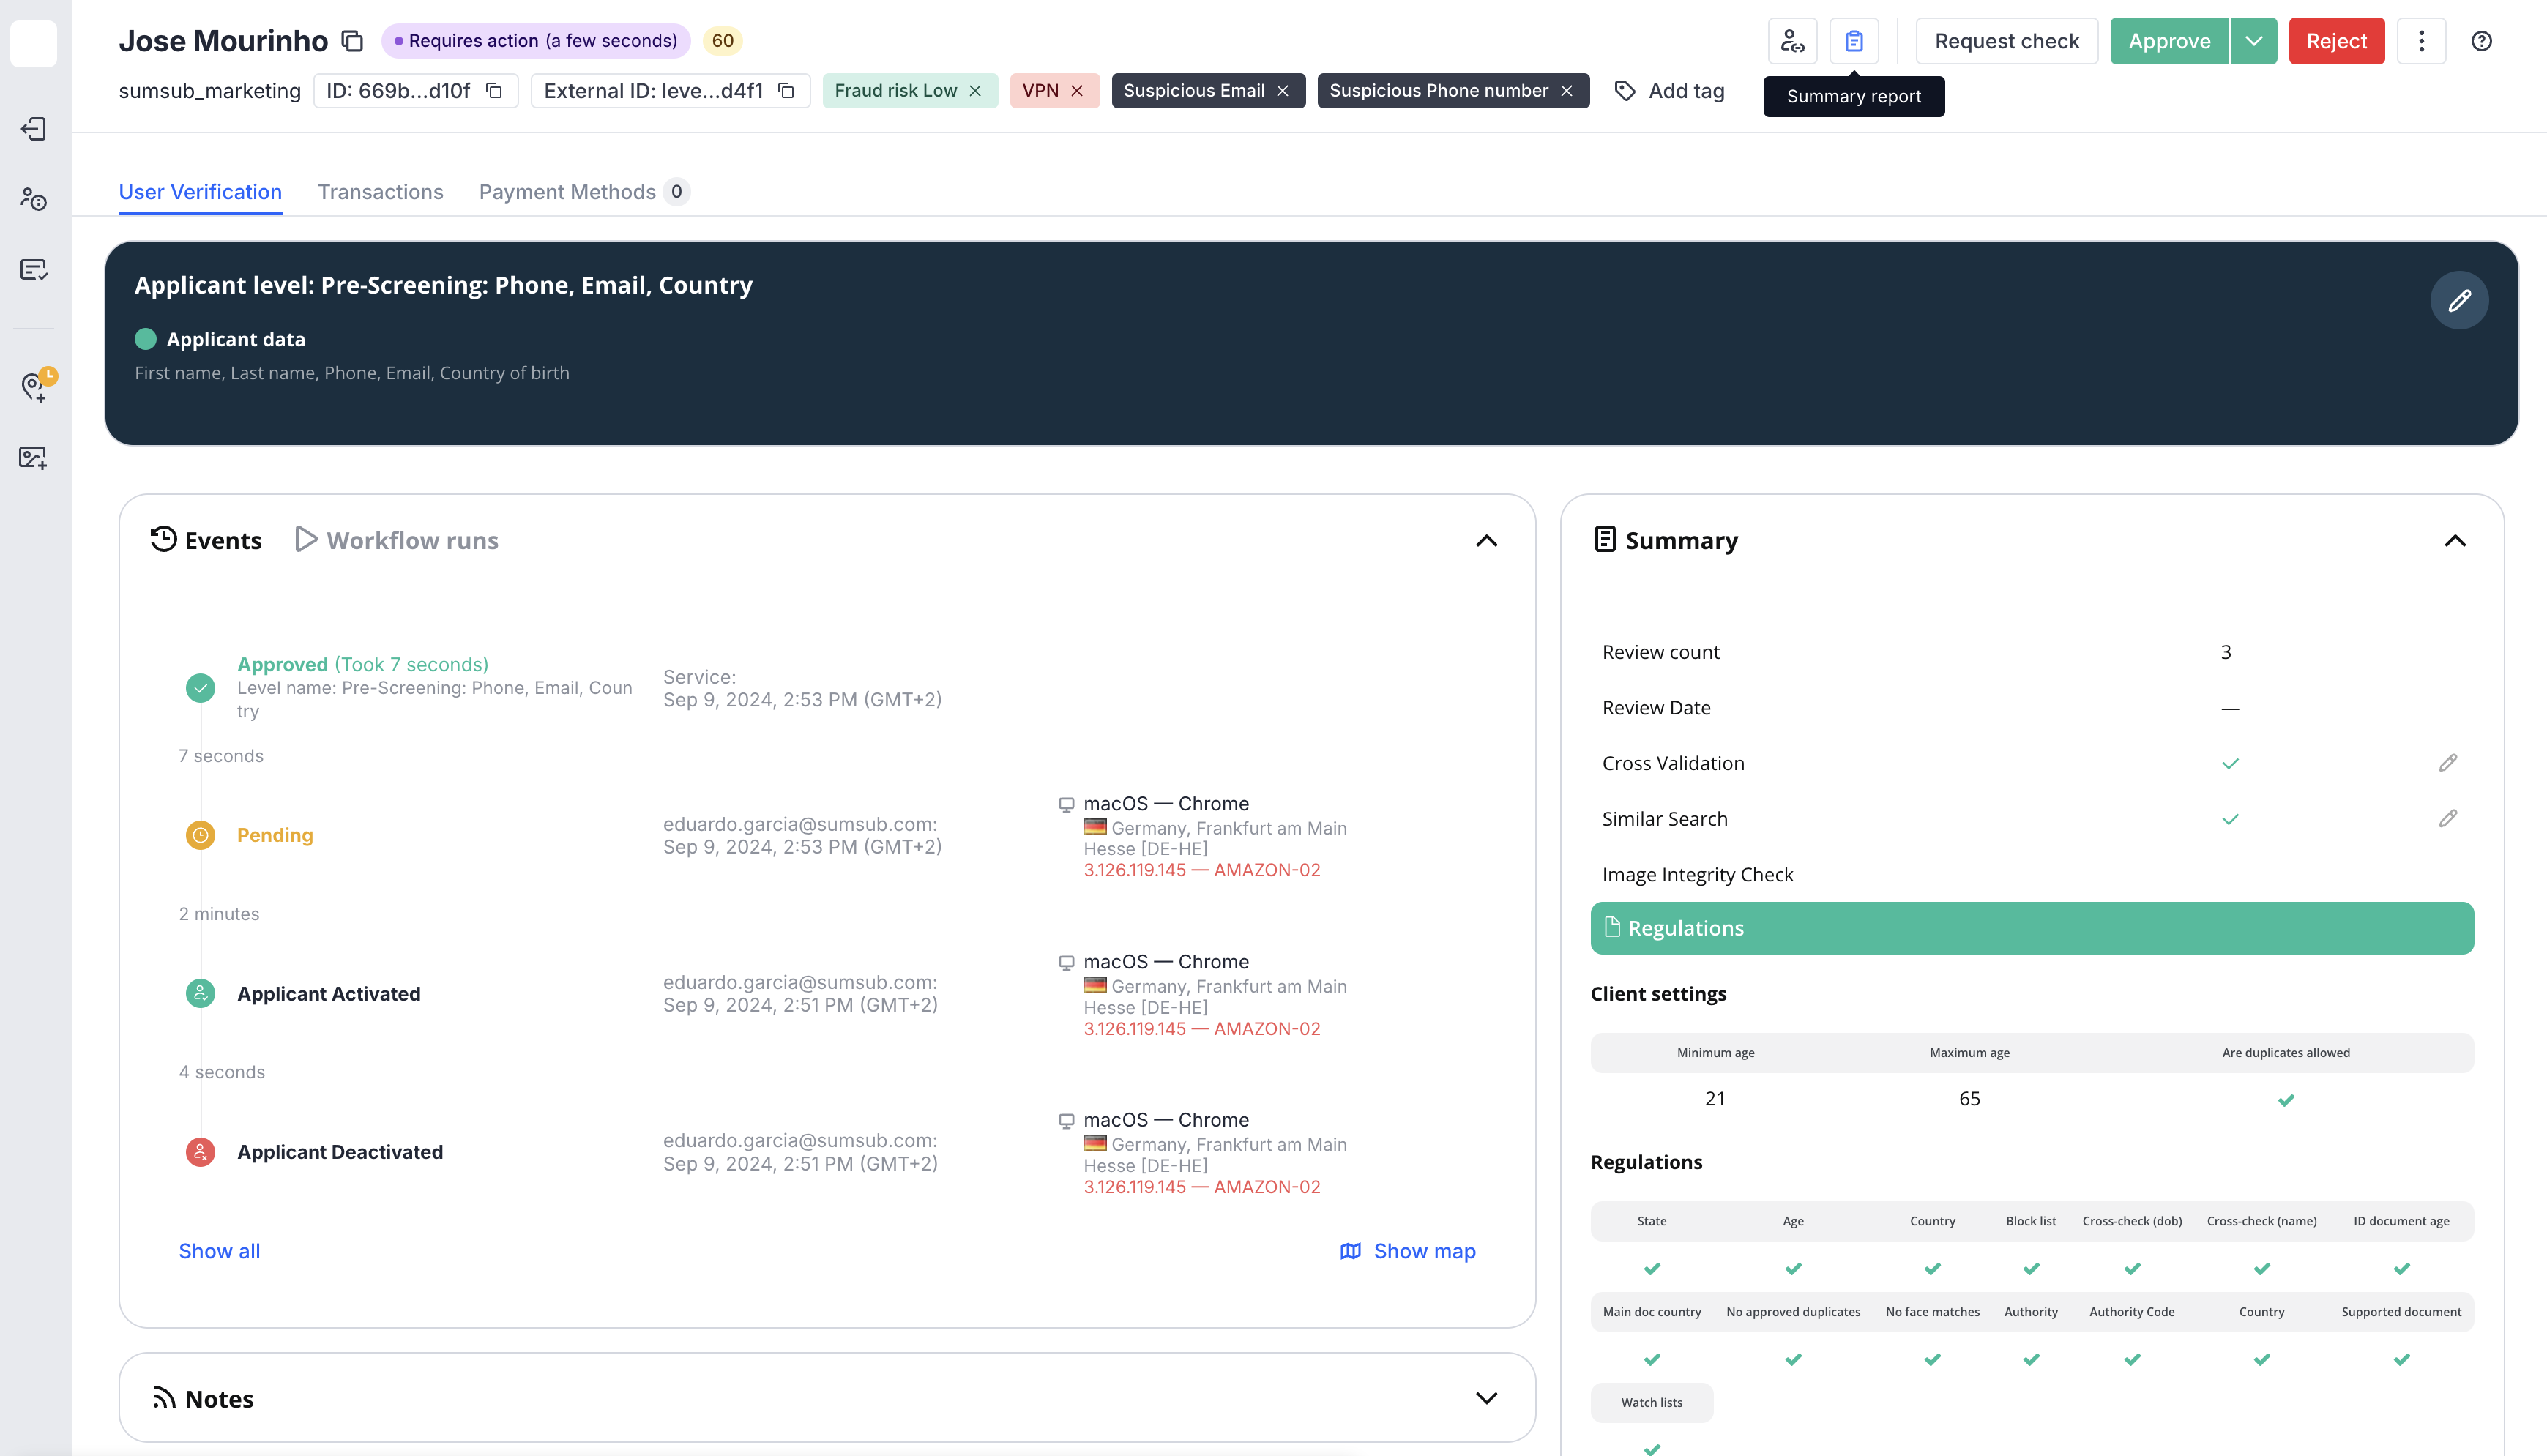
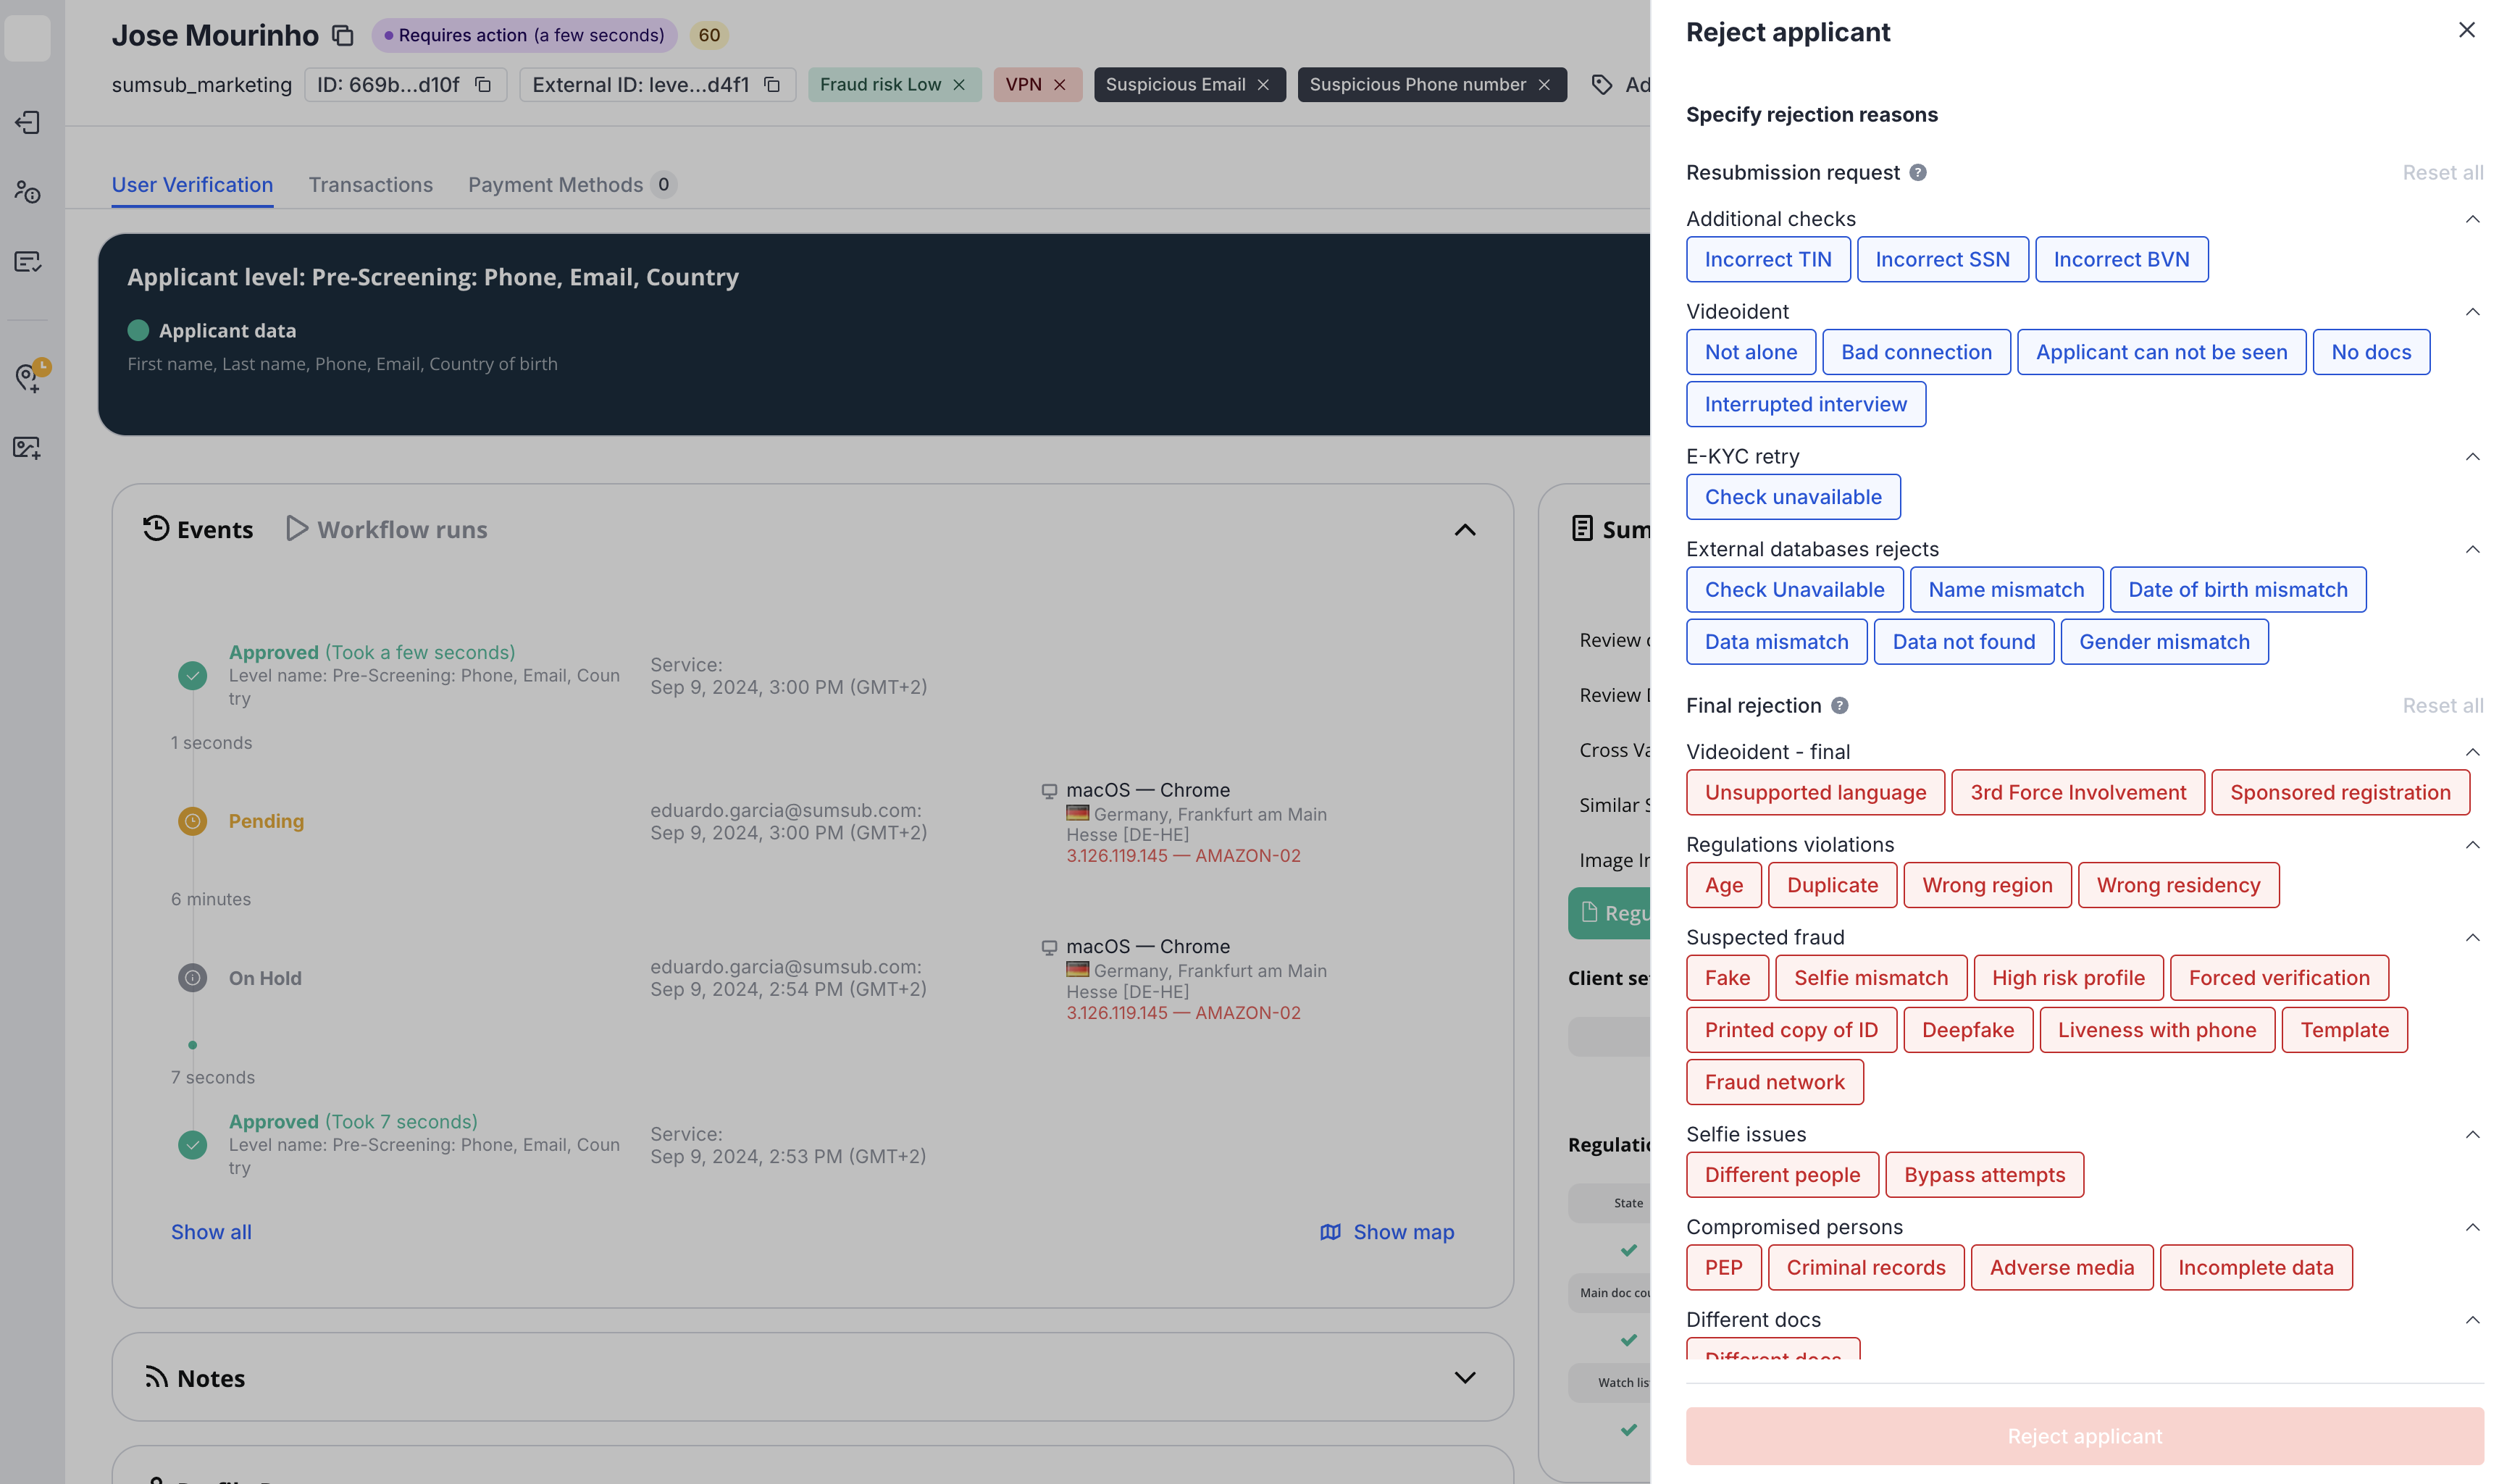
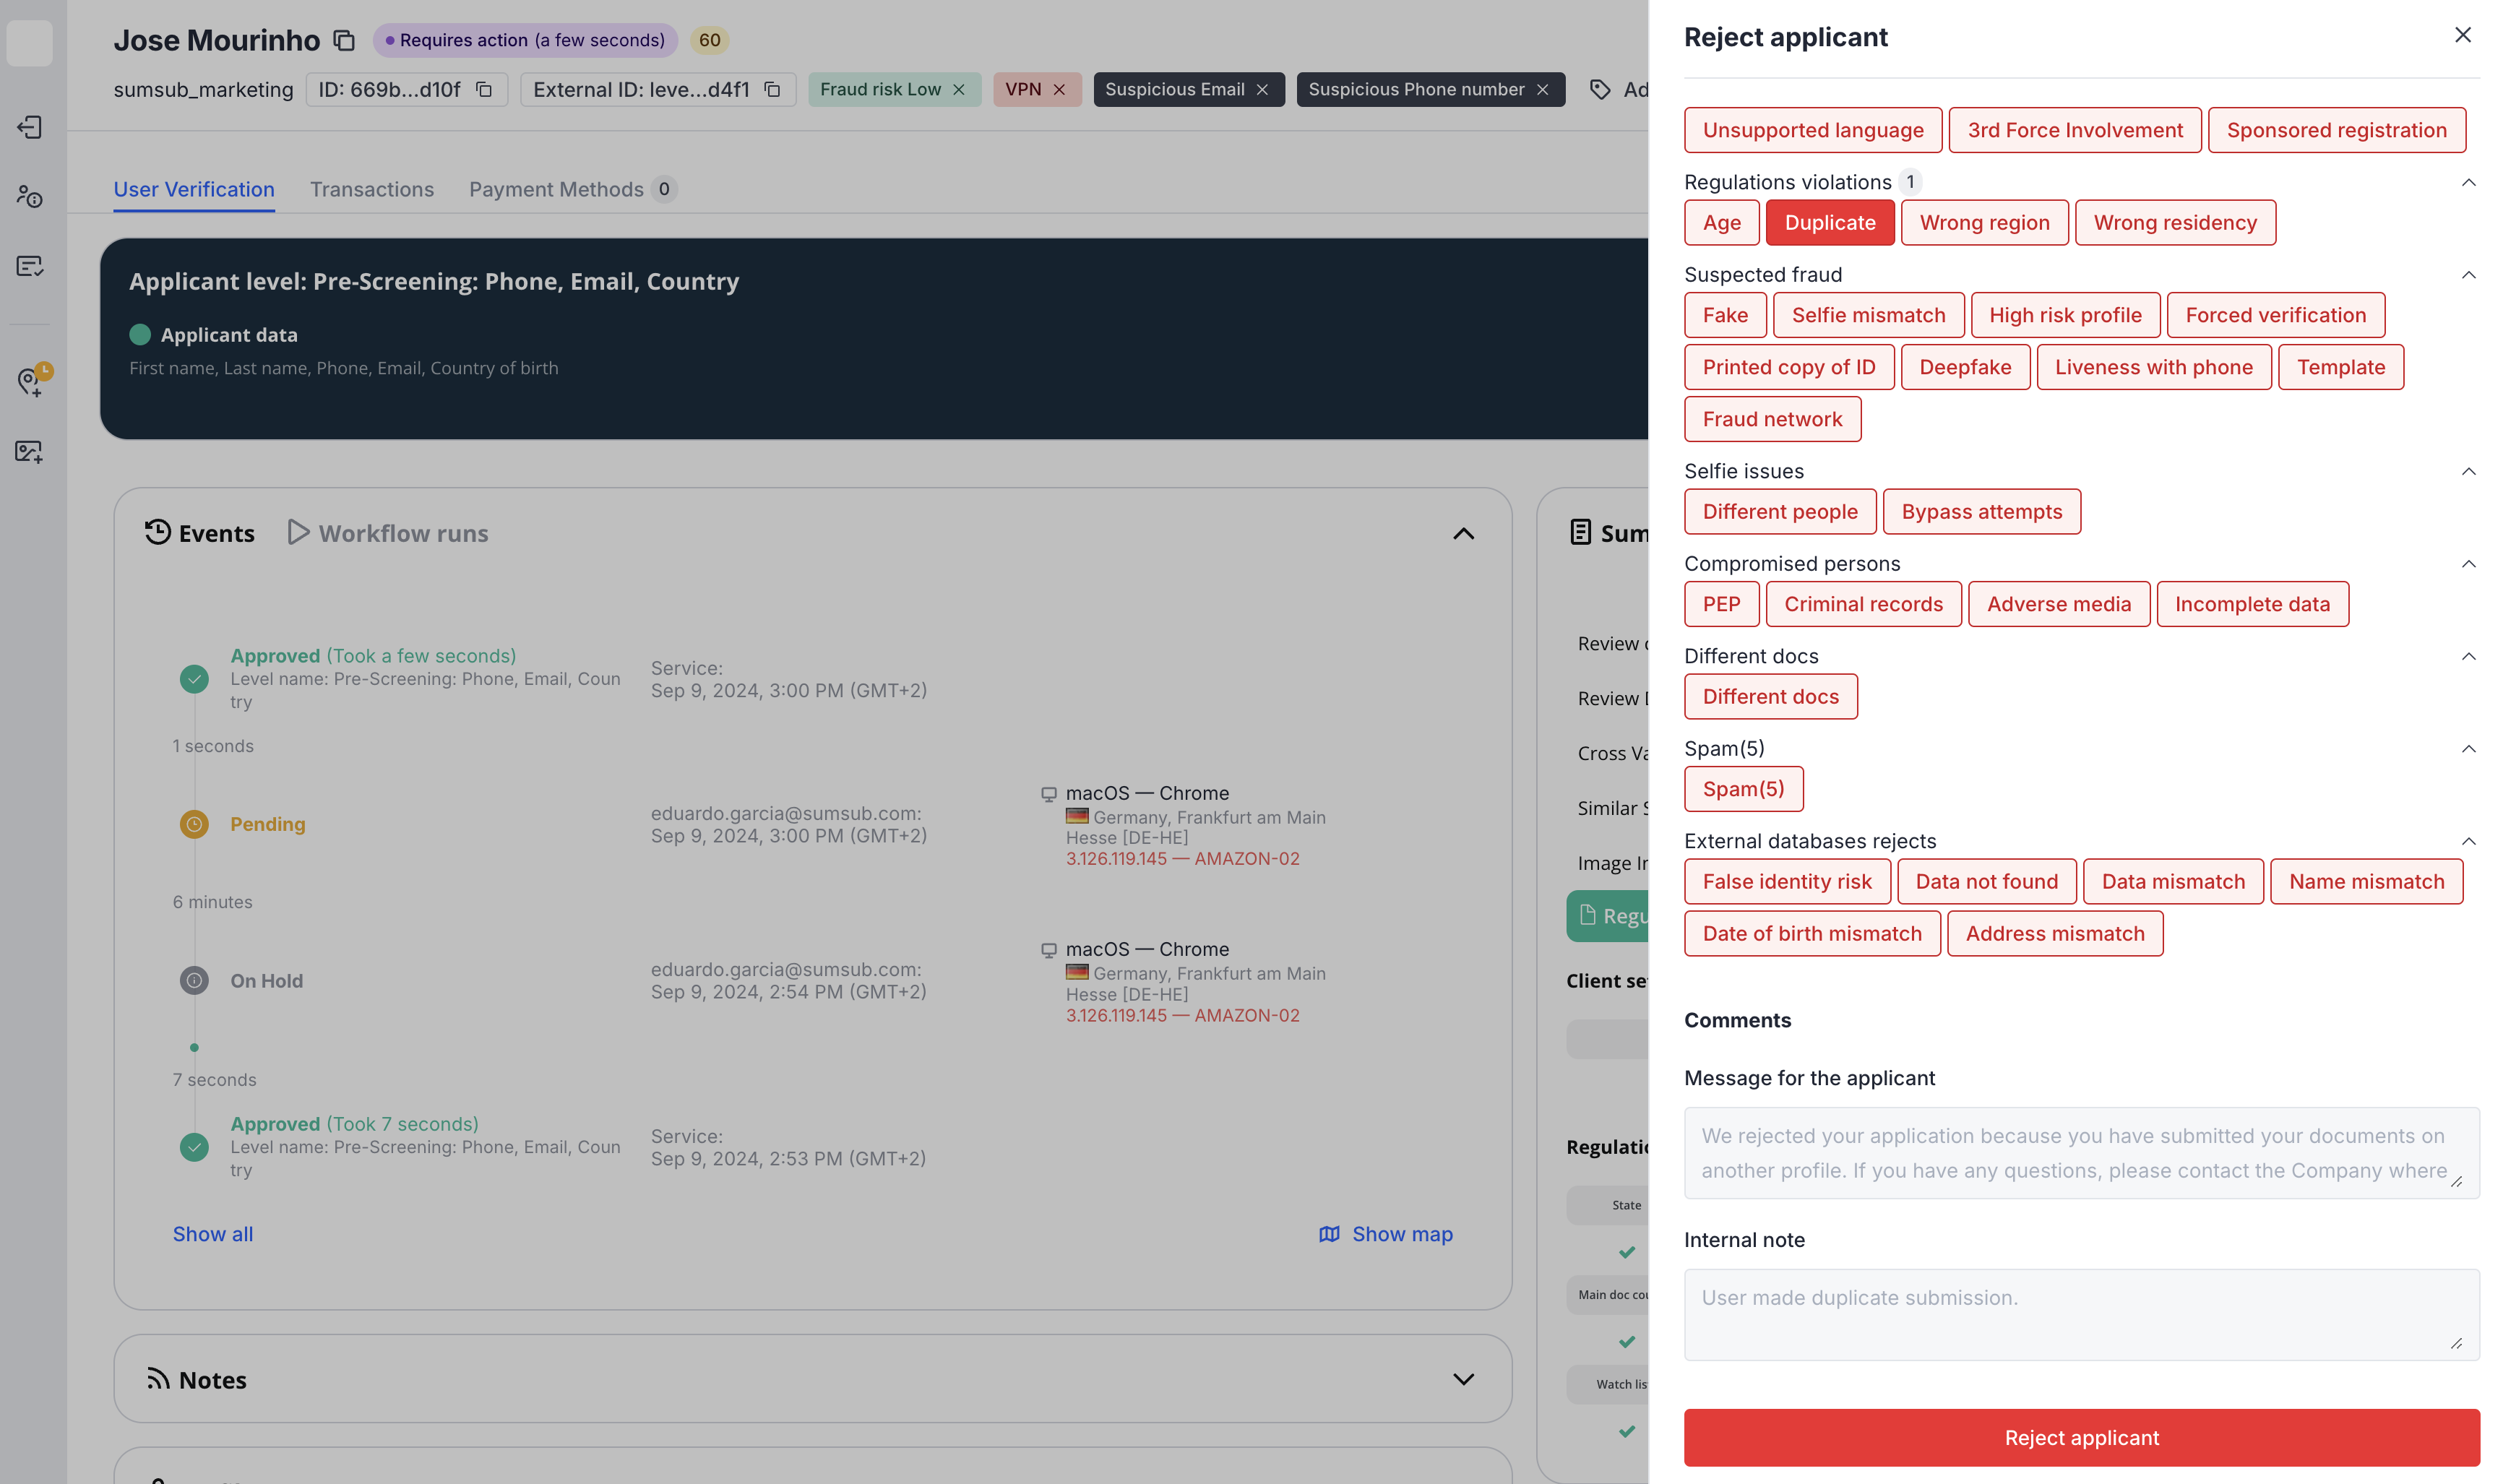
When you choose Reject, you will be prompted to select the reason(s) for rejection, and you will have the option to customise the message that will be shown to the applicant or let the field auto populate based on the chosen reason.
Confirm your selection by clicking Reject applicant.
You will now go back to the applicant page and see the final message to reason(s) chosen. Learn more here ->.